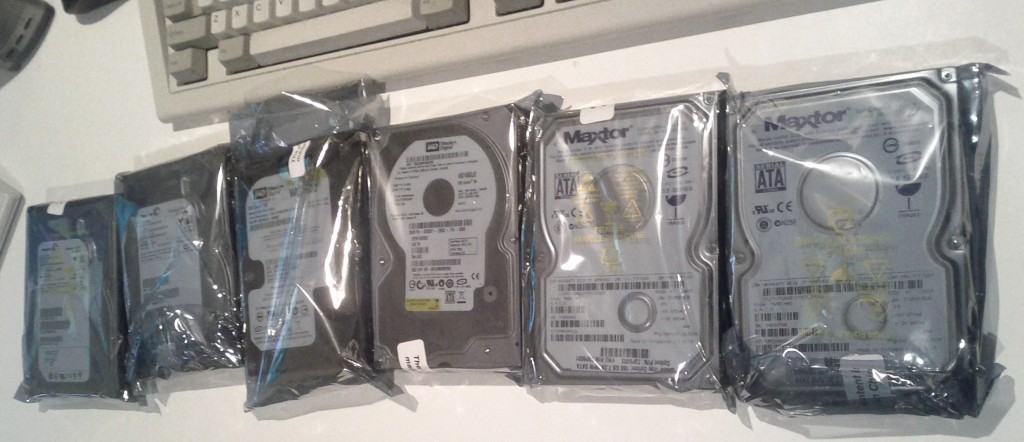
Enterprise or Consumer Spinning Rust Platters?

IMG_20120704_203427I recently wrote about bad hard disks being responsible for impacting array performance negatively after having some consumer grade disks fail in a fashion that impacted performance, but didn’t result in the disk being marked as bad.

Since then I’ve been doing more research into the differences between consumer and enterprise disks after noting that consumer SATA disks appear to be more susceptible to this sort of performance degrading failure behaviour than enterprise disks which fail cleaner/faster, but also have a much higher purchase cost.

Consumer disks are built with the exception that they’ll be running standalone in a desktop computer where spending a few seconds remapping some bad sectors or running healing procedures is better than data loss. But this messes with the performance when in RAID arrays and leads to drives with poor latency or drives that try to keep correcting and hiding failing sectors from the array controller.

Enterprise SATA disks are mostly the same from a hardware perspective, however they have a different firmware load designed with the assumption that the disk is part of a RAID array. If an enterprise disk has a failure, it should die quickly and cleanly so that the RAID array can then handle the process of repairing – after all, the array has parity information and can rebuild a new disk, it doesn’t need a failing disk to try and rescue itself.

I did some digging on the technical differences between enterprise and consumer disks – the information can be tricky to find with so many people making blind recommendations for either option based on anecdotal evidence and hearsay – but I did manage to dig up some useful articles on the subject:

When I built my file server a couple years ago, I purchased 8x standard consumer grade Seagate 7200.12 disks and 2x enterprise grade Seagate ES disks as a small test to see if the enterprise drives prove themselves more reliable than the general consumer grade disks.

Since doing this, I’ve had a few disks fail, including one enterprise grade disk. The only noticeable difference I’ve found is that the enterprise disk died much more cleanly, failing completely, whereas the consumer disks lingered on a bit longer messing things up with weird latency issues, or failed sectors that subsequently re-mapped.

Personally I’ll continue to use consumer grade disks for my systems – I keep a pretty close eye on my system so can manually toss any badly performing consumer disks out of the array and I’m also using Linux MD software RAID which is much more tolerant of sluggish consumer grade disks than a hardware RAID controller. Additionally, Linux software RAID is far easier to manage and just as fast as a budget level hardware RAID controller.

However if working with a business server with a high quality RAID controller with onboard battery-backed memory cache, I would certainly spend the extra few dollars for enterprise grade disks. Not only for the RAID advantages, but also because having the enterprise grade disks fail quick and obviously will make them more cost effective long term by reducing the amount of time that employees spend debugging poorly performing systems.

“OpsDev”

I recently did a talk at one of the regular Fairfax “Brown Bag” lunches about tools used by the operations team and how developers can use these tools to debug some of their systems and issues.

It won’t be anything mind blowing for experienced *nix users, but it will be of interest to less experienced engineers or developers who don’t venture into server land too often.

If you’re interested, my colleague and I are both featured on the YouTube video below – my block starts at 14:00, but my colleague’s talk about R at the start may also be of interest.

Additionally, Fairfax AU has also started blogging and publishing other videos and talk like this, as well as blog posts from other people around the technology business (developers, operations, managers, etc) to try and showcase a bit more about what goes on behind the scenes in our organisation.

You can follow the Fairfax Engineering blog at engineering.fairfaxmedia.com.au or on Twitter at @FairfaxEng.

Exposing name servers with Puppet Facts

Carrying on from the last post, I needed a good reliable way to point my Nginx configuration at a DNS server to use for resolving backends. The issue is that I wanted my Puppet module to be portable across various environments, some which block outbound DNS traffic to external services and others where the networks may be redefined on a frequent basis and maintaining an accurate list of all the name servers would be difficult (eg the cloud).

I could have used dnsmasq to setup a localhost resolver, but when it comes to operational servers, simplicity is key – having yet another daemon that could crash or cause problems is never desirable if there’s a simpler way to solve the issue.

Instead I used Facter (sic), Puppet’s tool for exposing values pulled from the system into variables that can be used in your Puppet manifests or templates. The following custom fact is included in my Puppet module and is run before any configuration is applied to the host running my Nginx configuration:

#!/usr/bin/env ruby
#
# Returns a string with all the IPs of all configured nameservers on
# the server. Useful for including into applications such as Nginx.
#
# I live in mymodulenamehere/lib/facter/nameserver_list.rb
# 

Facter.add("nameserver_list") do
    setcode do
      nameserver = false

      # Find all the nameserver values in /etc/resolv.conf
      File.open("/etc/resolv.conf", "r").each_line do |line|
        if line =~ /^nameserver\s*(\S*)/
          if nameserver
            nameserver = nameserver + " " + $1
          else
            nameserver = $1
          end
        end
      end

      # If we can't get any result (bad host config?) default to a
      # public DNS server that is likely to be reachable.
      unless nameserver
        nameserver = '8.8.8.8'
      end

      nameserver
    end
end

On a system with a typically configured /etc/resolv.conf file such as:

search example.com
nameserver 192.168.0.1
nameserver 10.1.1.1

The fact will expose the nameservers in a space-delineated string such as:

# facter -p | grep 'nameserver_list'
nameserver_list => 192.168.0.1 10.1.1.1

I can then use the Fact inside my Puppet templates for Nginx to configure the resolver:

server {
    ...
    resolver <%= @nameserver_list %>;
    resolver_timeout 1s;
    ...
}

This works pretty well, but there are a couple things to watch out for:

  1. If the Fact fails to execute at all, your configuration will be broken. Having said that, it’s a very simple Fact and there’s not a lot that really could fail (eg no dependencies on other apps/non-standard resources).
  2. Linux hosts resolve DNS using the nameservers specified in the order in /etc/resolv.conf. If one fails, they move on and try the next. However Nginx differs, and just uses the list of provides nameservers in round-robin fashion. This is fine if your nameservers are all equals, but if some are more latent or less reliable than others, it could cause slight delays.
  3. You want to drop the resolver_timeout to 1 second, to ensure a failing nameserver doesn’t hold up re-resolution of DNS for too long. Remember that this re-resolution should only occur when the TTL of the DNS records for the backend has expired, so even if one DNS server is bad, it should have almost no impact to performance for your requests.
  4. Nginx isn’t going to pickup stuff in /etc/hosts using these resolvers. This should be common sense, but thought I better put that out there just-in-case.
  5. This Ruby could be better, but I’m not a dev and hacked it up in 15mins. The regex should probably also be improved to handle some of the more exotic /etc/resolv.confs that I’m sure people manage to write.

Nginx, reverse proxies and DNS resolution

Nginx is a pretty awesome high performance web server and reverse proxy. It’s often used in conjunction with other HTTP servers such as Java/Tomcat and Ruby/Unicorn, as it allows static content to be served directly from disk by Nginx and for connections from slow clients to be queued and buffered by Nginx, rather than taking up time of the expensive/scarce application server worker processes.


A typical Nginx reverse proxy configuration to a single backend using proxy_pass to a local HTTP server application on port 8080 would look something like this:

server {
    ...
    proxy_pass http://localhost:8080
    ...
}

Another popular approach is having a defined upstream group (which can be used for multiple servers, or a single one if desired), for example:

upstream upstream-localhost {
    server localhost:8080;
}

server {
    ...
    proxy_pass http://upstream-localhost;
    ...
}

Generally this configuration works fine for most of our use cases – we typically have a 1-to-1 mapping between a backend application server and Nginx, so the configuration is very simple and reliable – any issues are usually with the backend application, rather than Nginx itself.


However on occasion there are times when it’s desirable to have Nginx talking to a backend on another server.

I recently implemented an OAuth2 gateway using Nginx-Lua, with the Nginx gateway doing the OAuth2 authentication in a small Lua module before passing the request through to the backend application. This configuration ran on a pair of bastion servers, which reverse proxy the request through to an Amazon ELB which load balances a number of application servers.

This works perfectly 95% of the time, but Amazon ELBs (even internal) have a tendency to change their IP addresses. Normally this doesn’t matter, since you never reference ELBs via their IP address and use their DNS name instead, but the default behaviour of the Nginx upstream and proxy modules is to resolve DNS at startup, but not to re-resolve DNS during the operation of the application.

This leads to a situation where the Amazon ELB IP address changes, Amazon update the DNS record, but Nginx never re-resolves the DNS record and stays pointing at the old IP address. Subsequently requests to the backend start failing once Amazon drops services from the old IP address.

This lack of re-resolution of backends is a known limitation/issue with Nginx. Thankfully there is a workaround to force Nginx to re-resolve addresses, as per this mailing list post by setting proxy_pass to a variable, which then forces re-resolution of the DNS names as Nginx treats variables differently to static configuration.

server {
    ...
    resolver 127.0.0.1;
    set $backend_upstream "http://dynamic.example.com:80";
    proxy_pass $backend_upstream;
    ...
}


A resolver (DNS server address) also needs to be configured. When using parametrised backends, a resolver must be configured in Nginx (it is unable to use the local OS resolver) and must point directly to a name server IP address.

If your name servers aren’t predictable, you could install something like dnsmasq to provide a local resolver on 127.0.0.1 which then forwards to the dynamically assigned name server, or take the approach of pulling the name server details from the host using something like Puppet Facts and then writing it into the configuration file when it’s generated on the host.

Nginx >= 1.1.9 will re-resolve DNS records based on their TTL, but it’s possible to override this with any value desired. To verify correct behaviour, tcpdump will quickly show whether re-resolution is working.

# tcpdump -i eth0 port 53
15:26:00.338503 IP nginx.example.com.53933 > 8.8.8.8.domain: 15459+ A? dynamic.example.com. (54)
15:26:00.342765 IP 8.8.8.8.domain > nginx.example.com.53933: 15459 1/0/0 A 10.1.1.1 (70)
...
15:26:52.958614 IP nginx.example.com.48673 > 8.8.8.8.domain: 63771+ A? dynamic.example.com. (54)
15:26:52.959142 IP 8.8.8.8.domain > nginx.example.com.48673: 63771 1/0/0 A 10.1.1.2 (70)

It’s a bit of an annoyance in an otherwise fantastic application, but as long as you are aware of the limitation, it is not too difficult to resolve the issue by a bit of configuration adjustment.

Varnish DoS vulnerability

The Varnish developers have recently announced a DoS vulnerability in Varnish (CVE-2013-4484) , if you’re using Varnish in your environment make sure you adjust your configurations to fix the vulnerability if you haven’t already.

In a test of our environment, we found many systems were protected by a default catch-all vcl_error already, but there were certainly systems that suffered. It’s a very easy issue to check for and reproduce:

# telnet failserver1 80
Trying 127.0.0.1...
Connected to failserver1.example.com.
Escape character is '^]'.
GET    
Host: foo
Connection closed by foreign host.

You will see the Varnish child dying in the system logs at the time:

Oct 31 14:11:51 failserver1 varnishd[1711]: Child (1712) died signal=6
Oct 31 14:11:51 failserver1 varnishd[1711]: child (2433) Started
Oct 31 14:11:51 failserver1 varnishd[1711]: Child (2433) said Child starts

Make sure you go and apply the fix now, upstream advise applying a particular configuration change and haven’t released a code fix yet, so distributions are unlikely to be releasing an updated package to fix this for you any time soon.

SPF with SpamAssassin

I’ve been using SpamAssassin for years, it’s a fantastic open source anti-spam tool and plugs easily into *nix operating system mail transport agents such as Sendmail and Postfix.

To stop sender address forgery, where spammers email using my domain to email either myself, or others entities, I configured SPF records for my domain some time ago. The SPF records tell other mail servers which systems are really mine, vs which ones are frauds trying to send spam pretending to be me.

SpamAssassin has a plugin that makes use of these SPF records to score incoming mail – by having strict SPF records for my domain and turning on SpamAssassin’s validation, it ensures that any spam I receive pretending to be from my domain will be blocked, as well as anyone trying to spam under the name of other domains with SPF enabled will also be blocked.

Using SpamAssassin’s scoring offers some protection against false positives – if an organisation missconfigures their mail server so that their SPF record fails, but all the other details in the email are OK, the email may still be delivered, if the content looks like ham, comes from a properly configured server, etc, even if the SPF is incorrect – generally a couple different checks need to fail in order for emails to be blacklisted.

To turn this on, you just need to ensure your SpamAssassin configuration is set to load the SPF plugin:

loadplugin Mail::SpamAssassin::Plugin::SPF

You *also* need the Perl modules Mail::SPF or Mail::SPF::Query installed – without these, SpamAssassin will silently avoid doing SPF validations and you’ll be left wondering why you’re still getting silly spam.

On CentOS/RHEL, these Perl modules are available in EPEL and you can install both with:

yum install perl-Mail-SPF perl-Mail-SPF-Query

To check if SPF validation is taking place, check the mailserver logs or the X-Spam-Status email header for SPF_PASS (or maybe SPF_FAIL!), this proves the module is loaded and running correctly.

X-Spam-Status: No, score=-1.9 required=3.5 tests=AWL,BAYES_00,SPF_PASS,
 T_RP_MATCHES_RCVD autolearn=ham version=3.3.1

Finally sit back and enjoy the quieter, spam-free(ish) inbox :-)

Puppet CRL Time Errors

Puppet is much loved for it’s clear meaningful messages when something goes wrong, made even more delightful when you combine it with the lovely error messages thrown out by OpenSSL.

Warning: SSL_connect returned=1 errno=0 state=SSLv3 read server
certificate B: certificate verify failed: [CRL is not yet valid for
/CN=host.example.com]

This error indicates that the certificate is failing to validate since the clock between the node and the puppet master differs. In my case, the clock on the node was far behind the master due to a VirtualBox clock drift issue.

In this case, it was a simple case of re-syncing the clock to resolve the issue. However if the master had been generating certs with the clock far in the future, I would have needed to re-generate my node certificates entirely as the certs would also be incorrect.

Retro mode, engage!

Most followers of this blog will be following updates via RSS readers or automated Twitter postings, however I’ve had some requests to also offer email subscriptions for people who don’t make use of RSS readers or Twitter.

I’ve chucked up a receive-only Mailman mailing list which takes the RSS feed and sends out simple HTML emails when new posts are created, allowing you to read entirely in your mail client, or follow the link to the post itself.

Just click the “Mailing List” icon in the right-side column and enter your email address to receive updates.

Pick your poison

Pick your poison

I chose Mailman for this list since it handles bounce and membership handling very nicely, certainly better than a dodgy WordPress plugin is going to be able to do.

Hard drives can be bad influences on your RAID

RAID is designed to handle the loss of hard disks due to hardware failure and can ensure continual service during such a time. But hard drives are wonderful creatures and instead of dying quickly, they can often prolong their death with bad sectors, slow performance or other nasty issues.

In a RAID array if a disk fails in a clear defined fashion, the RAID array will mark it as failed and move on with it’s life. But if the disk is still functioning at reduced performance, write operations on the array will be slowed down to the speed of the slowest disk, as the write doesn’t return as complete until all disks have completed their operation.

It can be tricky to see gradual performance decreases in I/O performance until it reaches a truly terrible level of performance that it can’t go unnoticed due to impacting services in a clear and obvious fashion.

Thankfully tools like Munin make it much easier to see degrading performance over time. I was recently having I/O performance issues thanks to a failing disk and using Munin was quickly able to see which disk was responsible, as well as seeing the level of impact it was making on my system’s performance.

Got to love that I/O wait time!

Wasting almost 2 cores of CPU due to slow I/O holding up processes.

The CPU usage graph is actually very useful for checking out storage related problems, since it records the time spent with the CPU in an idle state due to waiting for storage to catch up and provide data required for operations.

This alone isn’t indicative of a fault – you could get similar results if you are loading your system with too many I/O intensive tasks and your storage just isn’t fast enough for your needs (Are hard disks ever fast enough?), plus disk encryption always imposed some noticeable amount of I/O wait; but it’s a good first place to look.

All the disks!

All the disks!

The disk latency graph is also extremely valuable and quickly shows the disk responsible. My particular example isn’t idle, since Munin has decided to pickup all my LVM volumes and include them on the graphs which makes it very unreadable.

Looking at the stats it’s easy to see that /dev/sdd is suffering, with an average latency of 288ms and a max peak of 7.06 *seconds*. Marking this disk as failed in the array instantly restored performance and I was then able to replace the disk and rebuild the array, restoring expected performance.

Note that this RAID array is built with consumer grade SATA disks, which are particularly bad for this kind of issue – an enterprise grade SATA disk would have been more likely to fail faster and more definitively, as they are designed primarily for RAID environments where the health of the array is more important than one disk doing everything possible to keep itself going.

In my case I’m using software RAID which makes it easy to see the statistics of each disk, since the controller is acting in a JBOD mode and exposing the disks directly to the OS. Using consumer disks like these could be much more “interesting” with a hardware RAID controller that wouldn’t expose the same amount of information… if using a hardware RAID controller, I’d advise to shell up the cash and use enterprise grade disks designed for RAID arrays or you could have a much more difficult life.