Ubiquiti UniFi video lack of SSL/TLS validation

Posting this here since I’ve filed a disclosure with Ubiquiti on Feb 28th 2016 and had no acknowledgment other than to be patient. But two months of not even looking at what is quite a serious issue isn’t acceptable to me.

I do really like the Unifi Video product (hardware + software) so it’s a shame it’s let down by poor transport security and slow addressing of security issues by the vendor. I intend to write up a proper review soon, but it was more important to get this report out first.

My mitigation recommendation is that you only communicate with your Unifi Video systems via secure encrypted VPN, eg IKEv2 or OpenVPN until such time that Ubiquiti takes this seriously and patch their shit.


28th Feb 2016 – Disclosure of issue via HackerOne (#119121).

There is a SSL/TLS certificate validation flaw on the Unifi Video application for Android and iOS where it accepts any self-signed certificate served by the Unifi Video server silently allowing a malicious third party to intercept data.

Versions of software used;

  • Unifi Video 3.1.2 (server)
  • Android app 1.1.3 (Build 153)
  • iOS app 1.1.7 (Build 1.1.48)

Impact
Any man-in-the-middle attacker could intercept customers using Unifi Video from mobile devices by replacing the secure connection with their own self-signed certificate, capturing login password, all video content and being able to use this in future to view any cameras at their leisure.

Steps to reproduce:

  1. Perform clean installation of Unifi Video server.
  2. Connect to the web interface via browser. Self-signed cert, so have to accept cert.
  3. Connect to NVR via the Android app. No cert acceptance needed.
  4. Connect to NVR via the iOS app. No cert acceptance needed.
  5. Erase the previously generated keystore on server with: echo -n “” > /usr/lib/unifi-video/data/keystore
  6. Restart server with: /etc/init.d/unifi-video restart
  7. We now have the server running with a new cert. You can validate that, by refreshing the browser session and it will require re-acceptance of the new self-signed certificate and can see new generation time & fingerprint of new cert.
  8. Launch the Android app. Reconnect to the previously connected NVR. No warning/validation/acceptance of the new self-signed cert is requested.
  9. Launch the Android app. Reconnect to the previously connected NVR. No warning/validation/acceptance of the new self-signed cert is requested.
  10. Go get some gin and cry :-(

Comments
Whilst I can understand an engineer may have decided to develop the mobile apps to always accept a cert the first time it sees it to simplify setup for customers whom will predominately have a self-signed cert on Unifi Video server, it must not accept subsequent certificate changes without warning to the user. Failing to do so, allows a MITM attack on any insecure networks.

I’d recommend a revised workflow such as:

  1. User connects to a new NVR for the first time. Certificate is accepted silently (or better, shows the fingerprint, aka SSH style).
  2. Mobile app stores the cert fingerprint against the NVR it connected to.
  3. Cert gets changed – whether intentionally by user, or unintentionally by attacker.
  4. Mobile apps warn that the NVR’s cert fingerprint has changed and that this could be dangerous/malicious. User has option of selecting whether they trust this new certificate or whether they do not wish to connect. This is the approach that web browsers take with changed self-signed certificates.

This would prevent silent MITM attacks, whilst will allowing a cert to be updated/changed intentionally.


Communication with Ubiquiti:

12th March 2016 Jethro Carr

hi Ubiquiti,

Can I please get an update – do you confirm there is an issue and have a timeframe for resolution?

regards,
Jethro

15th March 2016 Ubiquiti Response

Thank you for submitting this issue to us, and we apologize for the delay. Since launching with HackerOne we have seen many issues submitted, and we are currently working on reducing our backlog. We appreciate your patience and we’ll be sure to update you as soon as we have more information.

Thanks and good luck in your future bug hunting.

24th April 2016 Jethro Carr

hi Ubiquiti,

I’ll be disclosing publicly on 29th of April due to no action on this report after two months.

regards,
Jethro

26th April 2016 Ubiquiti Response

Thank you for submitting this issue to us, and we apologize for the delay.

We’re still reviewing this issue and we appreciate your patience. We’ll be sure to update you as soon as we have more information.

Thanks and good luck in your future bug hunting.


Upcycling 32-bit Mac Minis

The first generation Intel Apple Mac Mini (Macmini1,1) has a special place as the best bang-for-buck system that I’ve ever purchased.

Purchased for around $1k NZD in 2006, it did a stint as a much more sleep-friendly server back after I started my first job and was living at my parents house. It then went on to become my primary desktop for a couple of years in conjunction with my laptop. And finally it transitioned into a media centre and spent a number of years driving the TV and handling long running downloads. It even survived getting sent over to Sydney and running non-stop in the hot blazing hell inside my apartment there.

My long term relationship on the left and a more recent stray obtained second hand.

My long term relationship on the left and a more recent stray I obtained. Clearly mine takes after it’s owner and hasn’t seen the sun much.

Having now reached it’s 10th birthday, it’s started to show it’s age. Whilst it handles 720p content without an issue, it’s now hit and miss whether 1080p H264 content will work without unacceptable jitter.

It’s previously undergone a few upgrades. I bumped it from the original 512MB RAM to 2GB (the max) years ago and it’s had it’s 60GB hard drive replaced with a more modern 500GB model. But neither of these will help much with the video decoding performance.


Given we had recently obtained something that the people at Samsung consider a “Smart” TV, I decided to replace the Mac Mini with the Plex client running natively on the TV and recycle the Mac Mini into a new role as a small server to potentially replace a much more power hungry AMD Phenom II system that performs somewhat basic storage and network tasks.

Unfortunately this isn’t as simple as it sounds. The first gen Intel Mac Minis arrived on the scene just a bit too soon for 64-bit CPUs and so are packing the original Intel Core Solo or Intel Core Duo (1 or 2 cores respectively) which aren’t clocked particularly high and are only 32bit capable.

Whilst GNU/Linux *can* run on this, supported versions of MacOS X certainly can’t. The last MacOS version supported on these devices is Mac OS X 10.6.8 “Snow Leopard” 32-bit and the majority of app developers for MacOS have decided to set their minimum supported platform at 64-bit MacOS X 10.7.5 “Lion” so they can drop the old 32-bit stuff – this includes the popular Chrome browser which now only provides 64-built builds. Basically OS X Snow Leopard is the Win XP of the MacOS world.

Even running 32-bit GNU/Linux can be an exercise in frustration. Some distributions now only ship 64-bit builds and proprietary software vendors don’t always bother releasing 32-bit builds of their apps limiting what you can run on them.


On the plus side, this earlier generation of Apple machines was before Apple decided to start soldering everything together which means not only can you replace the RAM, storage, drives, WiFi card, you can also replace the CPU itself since it’s socketed!

I found a great writeup of the process at iFixit which covers the process of replacing the CPU with a newer model.

Essentially you can replace the CPUs in the Macmini1,1 (2006) or Macmini2,1 (2007) models with any chip compatible with Intel Socket M, the highest spec model available being the Intel Core 2 Duo 2.33 Ghz T7600.

At ~$60NZD for the T7600, it was a bit more than I wanted to spend for a decade old CPU. However moving down slightly to the T7400, the second hand price drops to around ~$20NZD per CPU with international shipping included. And at 2.177Ghz it’s no slouch, especially when compared to the original 1.5Ghz single core CPU.

It took a while to get here, I used this seller after the first seller never delivered the item and refunded me when asked about it. One of my CPUs also arrived with a bent pin, so there was some rather cold sweat moments straightening the tiny pin with a screw driver. But I guess this is what you get for buying decade old CPUs from a mysterious internet trader.

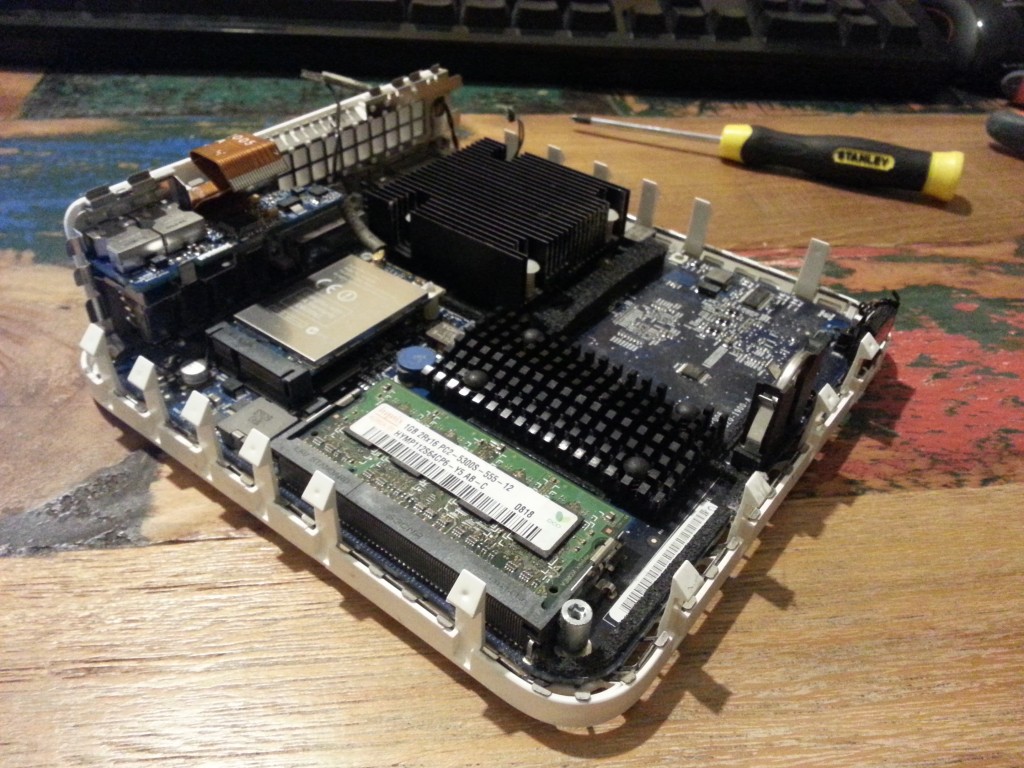
I'm naked!

I was surprised at the lack of dust inside the unit given it’s long life, even the fan duct was remarkably dust-free.

The replacement is a bit of a pain, you have to strip the Mac Mini right down and take the motherboard out, but it’s not the hardest upgrade I’ve ever had to do – dealing with cheap $100 cut-your-hand-open PC cases were much nastier than the well designed internals of the Mac. The only real tricky bit is the addition and removal of the heatsink which worked best with a second person helping remove the plastic pegs.

I did it using a regular putty knife, needle-nose pliers, phillips & flat head screw drivers and one Torx screw driver to deal with a single T10 screw that differs from the rest of the ones in the unit.

Moment of truth...

Recommend testing this things *before* putting the main case back together, they’re a pain to open back up if it doesn’t work first run.

The end result is an upgrade from a 1.5 Ghz single core 32bit CPU to 2.17 Ghz dual core 64bit CPU – whilst it won’t hold much to a modern i7, it will certainly be able to crunch video and server tasks quite happily.


The next problem was getting an OS on there.

This CPU upgrade opens up new options for MacOS fans, if you hack the installer a bit you can get MacOS X 10.7.5 “Lion” on there which gives you a 64-bit OS that can still run much of the current software that’s available. You can’t go past Lion however, since the support for the Intel GMA 950 GPU was dropped in later versions of MacOS.

Given I want them to run as servers, GNU/Linux is the only logical choice. The only issue was booting it… it seems they don’t support booting from USB flash drives.

These Mac Minis really did fall into a generational gap. Modern enough to have EFI and no legacy ports, yet old enough to be 32-bit and lack support for booting from USB. I wasn’t even sure if I would even be able to boot 64-bit Linux with a 32-bit EFI…


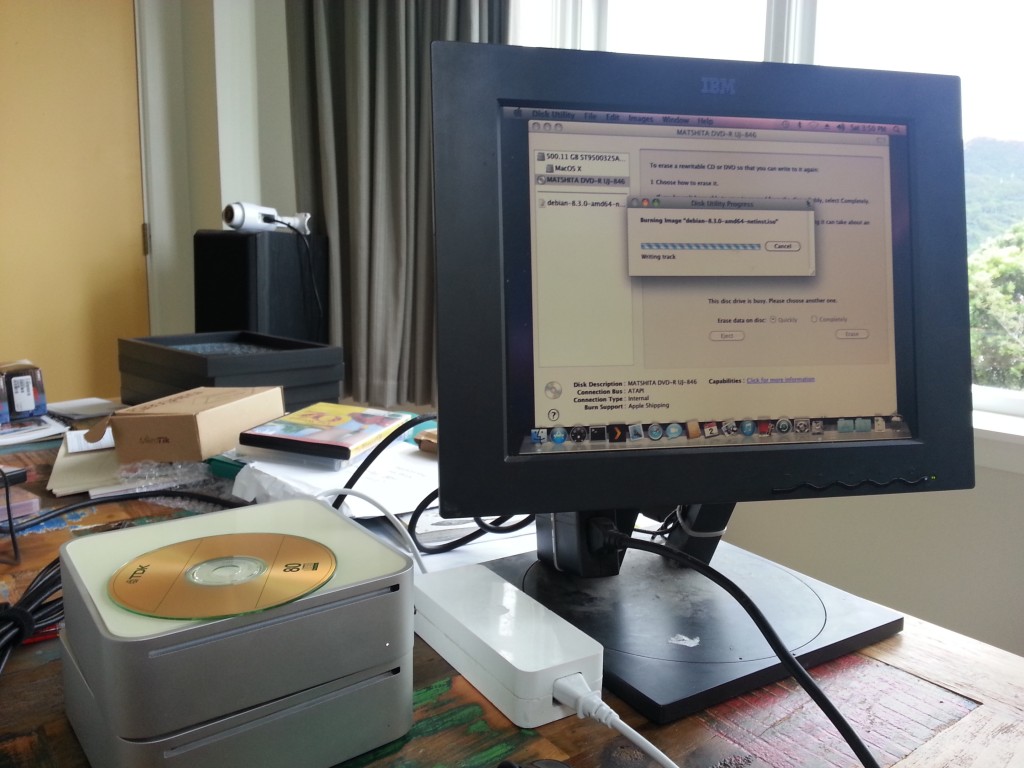
Given it doesn’t boot from USB and I didn’t have any firewire devices lying around to try booting from, I fell back to the joys of optical media. This was harder than it sounds given I don’t have any media and barely any working drives, but my colleague thankfully dug up a couple old CD-R for me.

They're basically floppy disks...

“Daddy are those shiny things floppy disks?”

I also quickly remembered why we all moved on from optical media. My first burn appeared to succeed but crashed trying to load the bootloader. And then refused to eject. Actually, it’s still refusing to eject, so there’s a Debian 8 installer that might just be stuck in there until it’s dying days… The other unit’s optical drive didn’t even work at all, so I couldn’t even do the pain of swapping around hardware to get a working combination.


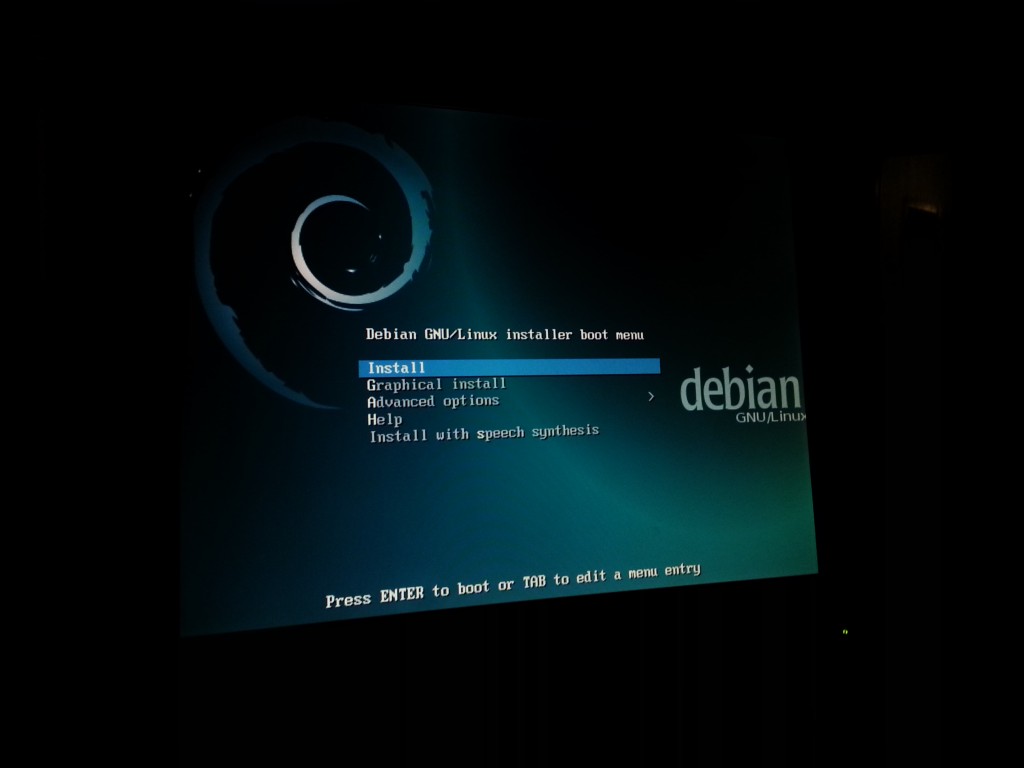
Having exhausted the optional of a old-school CD-based GNU/Linux install, I started digging into ways to boot from another partition on the machine’s hard drive and found a project called rEFInd.

This awesome software is an alternative boot manager for EFI. It differs from a boot loader slightly, in a traditional BIOS -> Boot Loader -> OS world, rEFInd is equivalent to a custom BIOS offering better boot functionality than the OEM vendor.

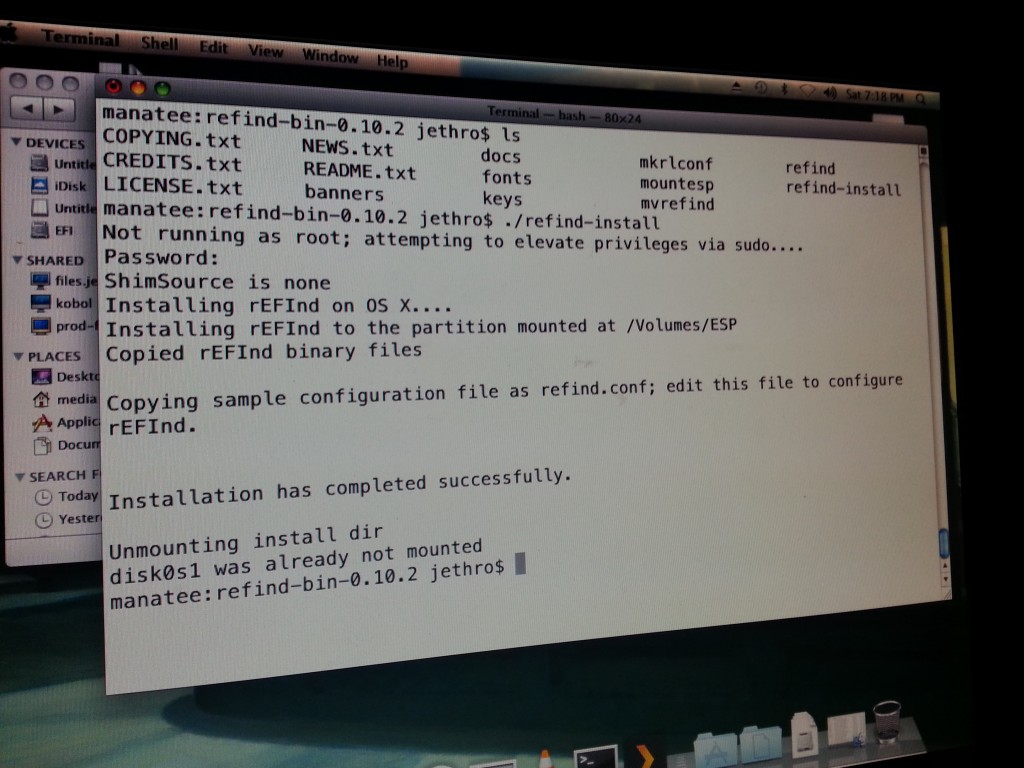
It works by installing itself into a small FAT partition that lives on the hard disk – it’s probably the easiest low-level tool I’ve ever installed – download, unzip, and run the installer from either MacOS or Linux.

./unsuckefi

Disturbingly easy from the existing OS X installation

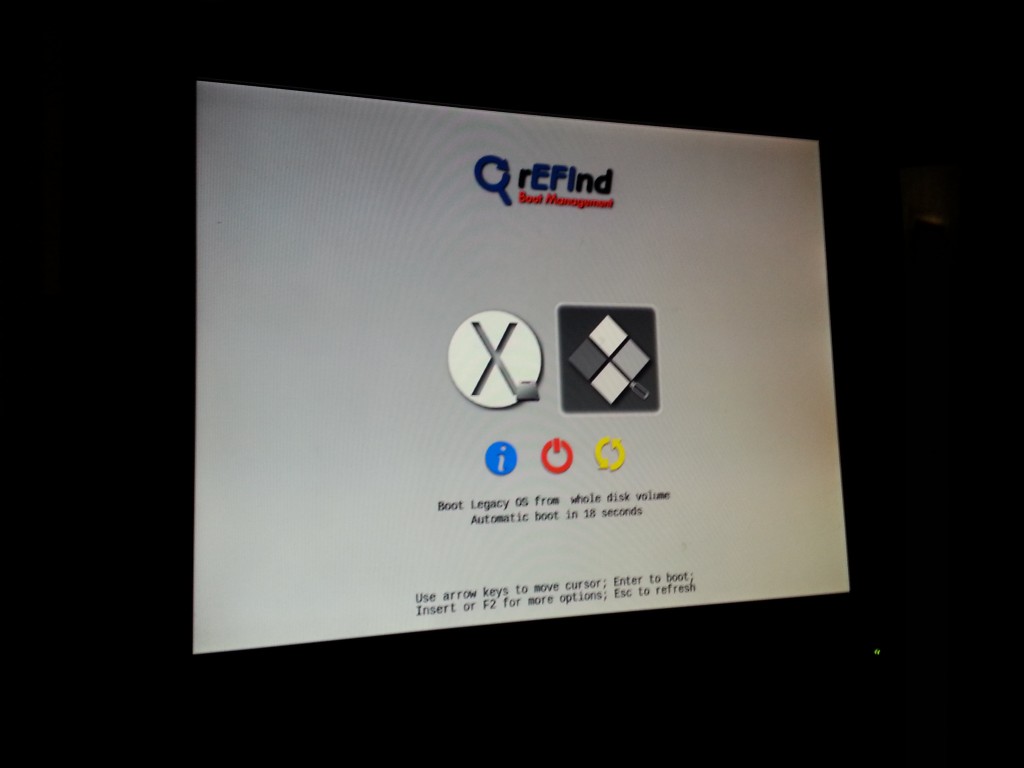
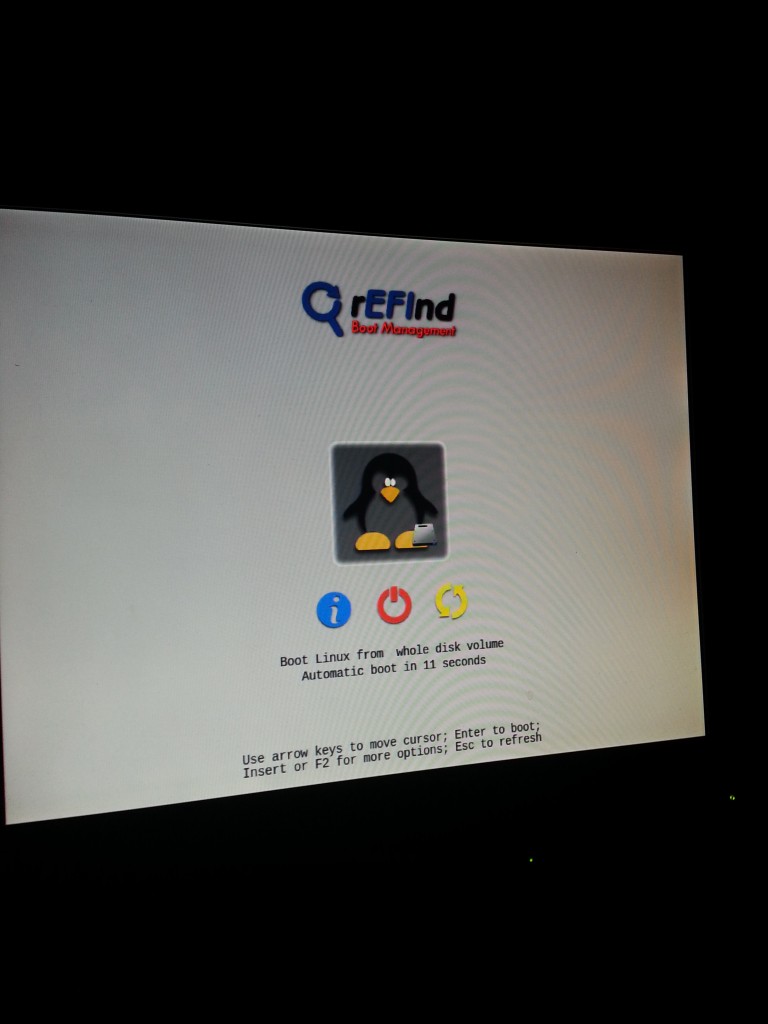
Once installed, rEFInd kicks in at boot and offers the ability to boot from USB flash drives, in addition to the hard drive itself!

Legacy

The USB flash installer has been detected as “Legacy OS from whole disk volume”.

Yusss!

Yusss, Debian installer booted from USB via rEFInd!

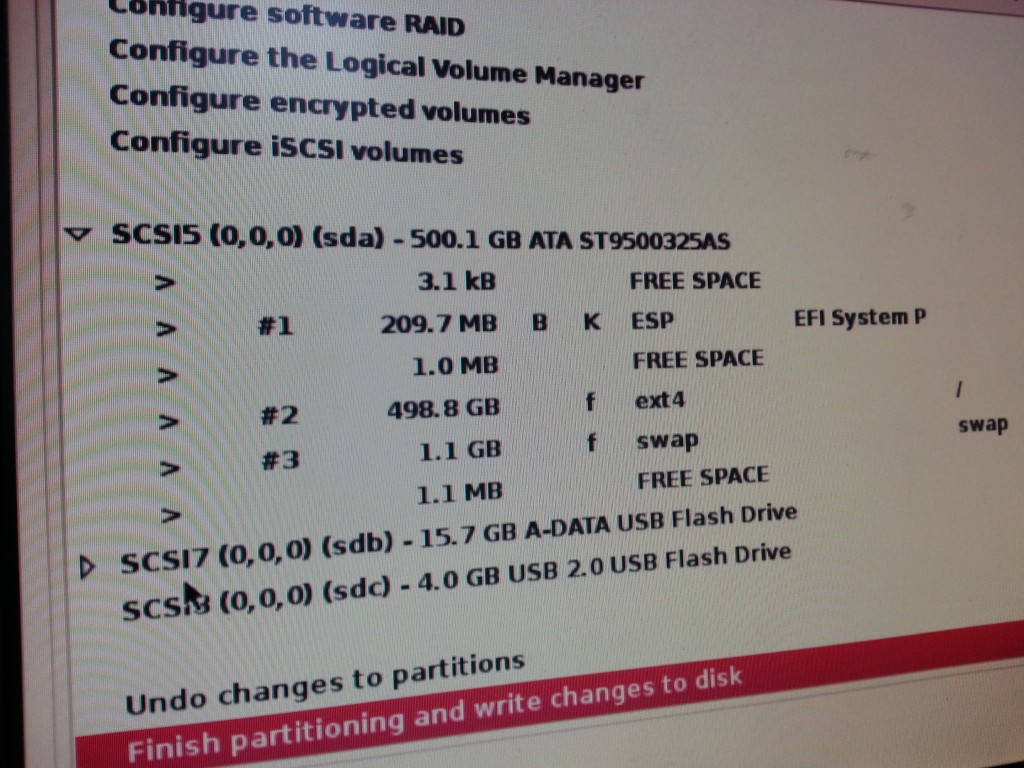
A typical Debian installation followed, only thing I was careful about was not to delete the 209.7MB FAT filesystem used by EFI – I figured I didn’t want to find out what deleting that would mean on a box that was hard enough to boot as it is…

This is an ugly partition table

The small < 1MB free space between the partitions here irks me so much, I blame MacOS for aligning the partitions weirdly.

Once installed. rEFInd detected Linux as the OS installed on the hard drive and booted into GRUB and from there the usual Linux boot process works fine.

Launch the penguins!

Launch the penguins!

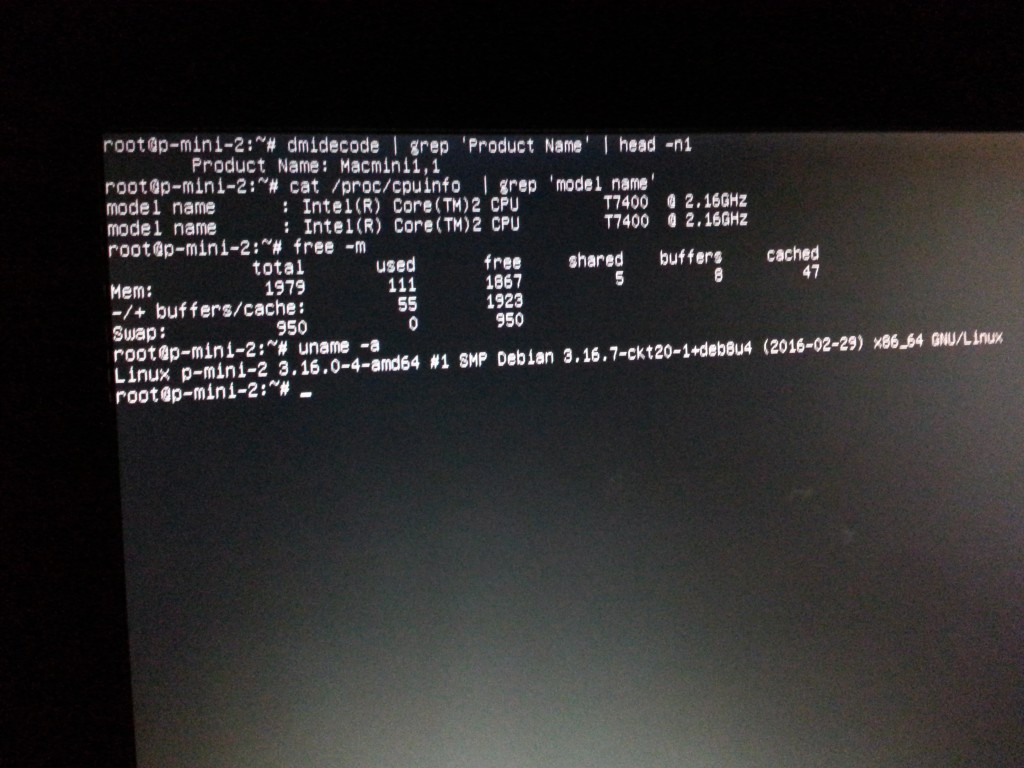
This spec sheet violates the manafacturer's warranty!

Final result -2GB RAM, 64bit CPU, delicious delicious GNU/Linux x86_64

I can confirm that both 32bit and 64bit Debian works nicely on this box (I installed 32-bit first by mistake) – so even without doing the CPU upgrade, if you want to get a bit more life out of these early unsupported Mac Minis, they’d happily run a 32-bit Debian desktop so you can enjoy wonders like a properly patched browser and operating system.

Not all other distributions will work – Ubuntu for example don’t include EFI support on their 32-bit installer which will probably cause some headaches. You should be OK with any of the major 64-bit distributions since they tend to always support EFI.


The final joy I ran into is that when I set up the Mac Mini as a headless box, it didn’t boot… it just turned on and never appeared on the network.

Seems that the Mac Minis (even the later unibody generation) have some genius firmware that disables the GPU hardware if no screen is attached, which then messes up most operating systems on it.

The easy fix, is to hack together a fake VGA load by connecting a 100Ω resister between pins 2 and 7 of a DVI-to-VGA adaptor (such as the one that ships with the Mac Mini).

I need to make a tidier/better version of this, but it works!

I need to make a tidier/better version of this, but it works!

No idea what engineer thought this was a good feature, but thankfully it’s an easy and cheap fix, especially since I have a box littered with these now-useless adaptors.


The end result is that I now have 2x 64-bit first gen Mac Minis running Debian GNU/Linux for a cost of around $20NZD and some time dismantling/reassembling them.

I’d recommend these small Mac Minis for server purposes, but the NZ second hand prices are still a bit too expensive for their age to buy specifically for this… Once they start going below $100 they’d make reasonable alternatives to something like the Intel NUC or Raspberry Pi for small serving tasks.

The older units aren’t necessarily problem free either. Whilst the build quality is excellent, after 10 years things don’t always work right. Both of my optical drives no longer function properly and one of the Mac Minis has a faulty RAM slot, limiting it to 1GB instead of the usual 2GB.

And of course at 10 years whom knows how much longer they’ll run for – but it’s been a good run so far, so here’s to another 10 years (hopefully)! The real limiting factor is going to be the 1GB/2GB RAM long term.

Node.js deployments at Fairfax with Code Deploy, Codeship and 12factor

This week I presented at the Node.js Wellington meetup around the tooling we have setup at Fairfax for running micro services for Node.js apps.

Essentially we have a workflow that uses Codeship for CI/CD and AWS Code Deploy for deployment. Our apps follow the principals of the Twelve-Factor App making each service simple and consistent to deploy.

This talk covers the reasons for this particular approach, the technologies used and offers a look at our stack including infrastructure and the deployment pipeline.

Whilst this talk is Node.js specific, we use the same technology for both Node.js and Java microservices and will shortly be standardising our Ruby applications on this approach as well.

AWS Cost Control at Fairfax

Earlier this month I was invited to speak at the AWS Wellington User Group around how we’ve been handling cost control at Fairfax including our use of spot pricing. I’ve now processed the video and got a recording up online for anyone interested in watching.

The video isn’t great since we took it in dim light using a cellphone and a webcam in a red lit bar, but the audio came through pretty good.


How much swap should I use on my VM?

Lately a couple people have asked me about how much swap space is “right” for their servers – especially in the context of running low spec machines like AWS t2.nano/t2.micro or Digital Ocean boxes with low allocations like 1GB or 512MB RAM.

The old fashioned advice was always “your swap space should be double your RAM” but this doesn’t actually make a lot of sense any more. Really swap should be considered a tool of last resort – a hack even – to squeeze a bit more performance out of systems and should be used sparingly where it makes sense.

I tend to look after two different types of systems:

  1. Small systems running a specific dedicated service (eg microservices). These systems might do nothing more than run Nginx/Apache or something like PHP-FPM or Unicorn with a few workers. They typically have 512MB-1GB of RAM.
  2. Big heavy servers running heavy weight applications, typically Java. These systems will be configured with large memory allocations (eg 16GB) and be configured to allocate a specific amount of memory to the application (eg 10GB Java Heap) and to keep the rest free for disk cache and background apps.

The latter doesn’t need swap. There’s no time I would ever want my massive apps getting pushed into swap for a couple reasons:

  • Performance of these systems is critical. We’ve paid good money to allocate them specific amounts of memory which is essentially guaranteed – we know how much the heap needs, how much disk cache we need and how much to allocate to the background apps.
  • If something does go wrong and starts consuming too much RAM, rather than having performance degrade as the server tries to swap, I want it to die – and die fast. If Puppet has decided it wants 7 GB of RAM, I want the OOM to step in and slaughter it. If I have swap, I risk everything on the server being slowed down as it moves tasks into the horribly slow (even on SSD) swap space.
  • If you’re paying for 16GB of RAM, why do you want to try and get an extra 512MB out of some swap space? It’s false economy.

For this reason, our big boxes are all swapless. But what about the former example, the small microservice type boxes, or your small personal VPS type systems?

Like many things in IT, “it depends”.

If you’re running stateless clusters, provided that the peak usage fits within the memory allocation, you don’t need swap. In this scenario, your workload is sized appropriately and if anything goes wrong due to an unexpected issue, the machine will either kill the errant process or die and get removed from the pool entirely.

I run a lot of web app workers this way – for example a 1GB t2.micro can happily run 4 Ruby Unicorn workers averaging around 128MB each, plus have space for Puppet, monitoring and delayed jobs. If something goes astray, the process gets killed and the usual automated recovery processes handle things.

However you may need some swap if you’re running stateful systems (pets) where it’s better for them to go slow than to die entirely, or if you’re running a system where the peak usage won’t fit within the memory allocation due to tight budget constraints.

For an example of tight budget constraints – I run this blog on a small machine with only 512MB RAM. With an allocation this small, there’s just not enough memory to run applications like Apache and also be able to handle the needs of background daemons and Puppet runs which can use several hundred MB just by themselves.

The approach I took was to create a small swap volume and size the worker counts in Apache so that the max workers at average size would just fit within the real memory allocation. However any background or system tasks, would have to fight over the swap space.

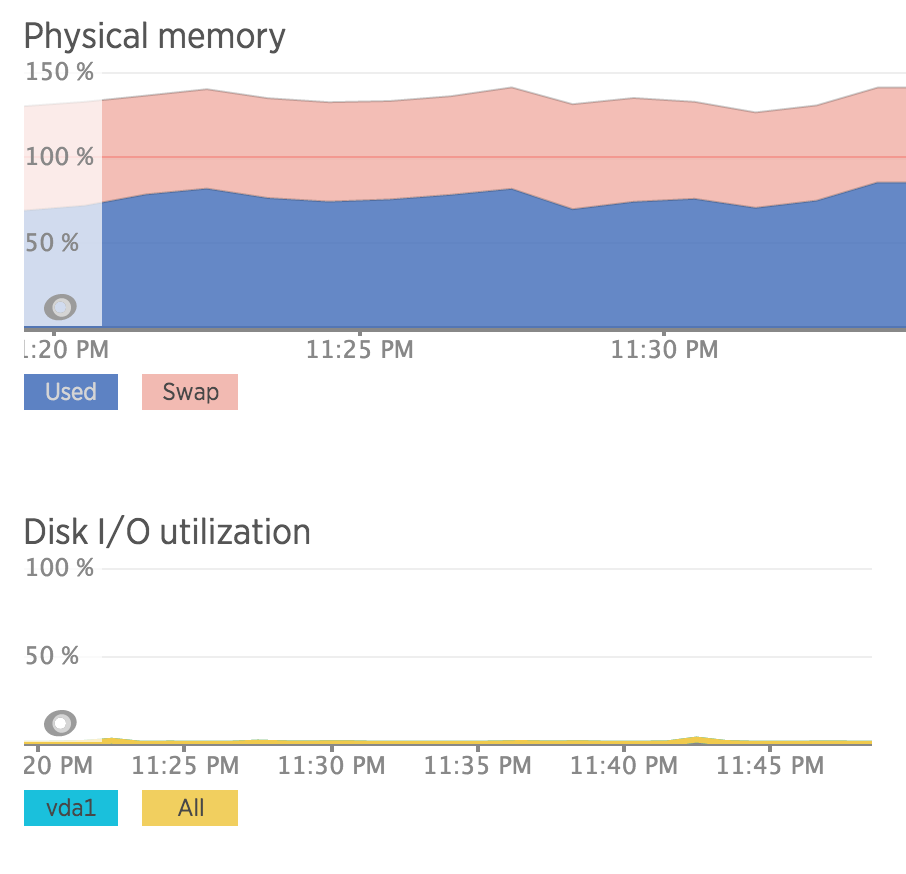
Screen Shot 2016-03-03 at 23.52.58

What you can see from the above is that I’m consuming quite a bit of swap – but my disk I/O is basically nothing. That’s because most of what’s in swap on this machine isn’t needed regularly and the active workload, i.e. the apps actually using/freeing RAM constantly, fit within the available amount of real memory.

In this case, using swap allows me to get better value for money, than using the next size up machine – I’m paying just enough to run Apache and squeezing in the management tools and background jobs onto the otherwise underutilized SSD storage. This means I can spend $5 to run this blog, vs $10. Excellent!

In respects to sizing, I’m running with a 1GB swap on a 512MB RAM server which is compliant with the traditional “twice your RAM” approach to sizing. That being said, I wouldn’t extend past this, even if the system had more RAM (eg 2GB) you should only ever use swap as a hack to squeeze a bit more out of a system. Basically don’t assume swap will scale linearly as memory scales.

Given I’m running on various cloud/VPS environments, I don’t have a traditional swap partition – instead I create an image file on the root filesystem and format it as swap space – I use a third party Puppet module (https://forge.puppetlabs.com/petems/swap_file) to do this:

swap_file::files { 'default':
  ensure            => present,
  swapfile         => '/tmp/swapfile',
  swapfilesize  => '1000 MB’
}

The performance impact of using a swap file ontop of a filesystem is almost nothing and this dramatically simplifies management and allocation of swap space. Just make sure you’re not using tmpfs for that /tmp path or you’ll find that memory benefit isn’t as good as it seems.

/tmp mounted as tmpfs on CentOS

After a recent reboot of my CentOS servers, I’ve inherited an issue where the server comes up running with /tmp mounted using tmpfs. tmpfs is a memory-based volatile filesystem and has some uses for people, but others like myself may have servers with very little free RAM and plenty of disk and prefer the traditional mounted FS volume.

Screen Shot 2016-02-17 at 23.06.28

As a service it should be possible to disable this as per the above comment… except that it already is – the following shows the service disabled on both my server and also by default by the OS vendor:

Screen Shot 2016-02-17 at 22.50.23

The fact I can’t disable it, appears to be a bug. The RPM changelog references 1298109 and implies it’s fixed, but the ticket seems to still be open, so more work may be required… it looks like any service defining “PrivateTmp=true” triggers it (such as ntp, httpd and others).

Whilst the developers figure out how to fix this properly, the only sure way I found to resolve the issue is to mask the tmp.mount unit with:

systemctl mask tmp.mount

Here’s something to chuck into your Puppet manifests that does the trick for you:

exec { 'fix_tmpfs_systemd':
 path => ['/bin', '/usr/bin'],
 command => 'systemctl mask tmp.mount',
 unless => 'ls -l /etc/systemd/system/tmp.mount 2>&1 | grep -q "/dev/null"'
}

This properly survives reboots and is supposed to survive systemd upgrades.

Secure Hiera data with Masterless Puppet

One of the biggest limitations with masterless Puppet is keeping Hiera data secure. Hiera is a great way for separating site-specific information (like credentials) from your Puppet modules without making a huge mess of your sites.pp. On a traditional Puppet master environment, this works well since the Puppet master controls access to the Hiera data and ensures that client servers only have access to credentials that apply to them.

With masterless puppet this becomes difficult since all clients have access to the full set of Hiera data, which means your webserver might have the ability to query the database server’s admin password – certainly not ideal.

Some solutions like Hiera-eyaml can still be used, but they require setting up different keys for each server (or group of servers) which is a pain with masterless, especially when you have one value you wish to encrypted for several different servers.

To solve this limitation for Pupistry users, I’ve added a feature “HieraCrypt” in Pupistry version 1.3.0 that allows the hieradata directory to be encrypted and filtered to specific hosts.

HieraCrypt works, by generating a cert on each node (server) you use with the pupistry hieracrypt --generate parameter and saving the output into your puppetcode repository at hieracrypt/nodes/HOSTNAME. This output includes a x509 cert made against the host’s SSH RSA host key and a JSON array of all the facter facts on that host that correlate to values inside the hiera.yaml file.

When you run Pupistry on your build workstation, it parses the hiera.yaml file for each environment and generates a match of files per-node. It then encrypts these files and creates an encrypted package for each node that only they can decrypt.

For example, if your hiera.yaml file looks like:

:hierarchy:
  - "environments/%{::environment}"
  - "nodes/%{::hostname}"
  - common

And your hieradata directory looks like:

hieradata/
hieradata/common.yaml
hieradata/environments
hieradata/nodes
hieradata/nodes/testhost.yaml
hieradata/nodes/foobox.yaml

When Pupistry builds the artifact, it will include the common.yaml file for all nodes, however the testhost.yaml file will only be included for node “testhost” and of course foobox.yaml will only be available on node “foobox”.

The selection of matching files is then encrypted against each host’s certificate and bundled into the artifact. The end result is that whilst all nodes have access to the same artifact, nodes can only decrypt the Hiera files relating to them. Provided you setup your Hiera structure properly, you can make sure your webserver can’t access your database server credentials and vice-versa.


HowAlarming

The previous owners of our house had left us with a reasonably comprehensive alarm system wired throughout the house, however like many alarm systems currently in homes, it required an analogue phone line to be able to call back to any kind of monitoring service.

To upgrade the alarm to an IP module via the monitoring company would be at least $500 in parts and seemed to consist of hooking the phone line to essentially a VoIP ATA adaptor which can phone home to their service.

As a home owner I want it internet connected so I can do self-monitoring, give me the ability to control remotely and to integrate it with IP-based camera systems. Most of the conventional alarm companies seem to offer none of things, or only very expensive sub-standard solutions.

To make things worse, their monitoring services are also pretty poor. Most of the companies I spoke to would receive an alarm, then call me to tell me about it/check with me and only then send someone out to investigate. The existing alarm company the previous owner was using didn’t even offer a callout security service!

Spark (NZ incumbent telco) recently brought out a consumer product called Morepork (as seen on stuff!) which looks attractive for your average non-techie consumer, but I’m not particularly keen to tie myself to Spark’s platform and it is very expensive, especially when considering I have to discard an existing functional system and start from scratch. There’s also some design weaknesses like the cameras being mains dependent, which I don’t consider acceptable given how easy it is to cut power to a house.

So I decided that I’d like to get my existing alarm IP connected, but importantly, I wanted to retain complete control over the process of generating an alert and delivering it to my phone so that it’s as fast as possible and also, as reliable as possible.

Not only did I want to avoid the human factor, but I’m also wary of the proprietary technologies used by most of the alarm companies off-the-shelf solutions. I have some strong doubts about the security of a number of offers, not to mention life span (oh sorry that alarm is EOL, no new mobile app for you) and the level of customisation/integration offered (oh you want to link your alarm with your camera motion detection? Sorry, we don’t support that).


I did some research on my alarm system and found it’s one of the DSC PowerSeries range which is a large Canadian company operating globally. The good thing about them being a large global player is that there’s a heap of reference material about their products online.

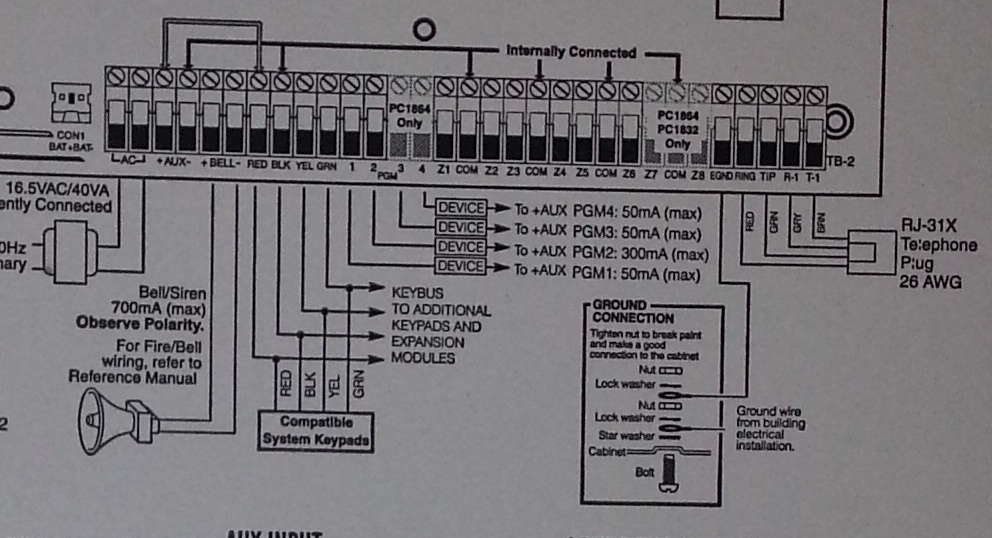
With a quick search I was able to find user guides, installer guides, programming guides and more. They also include a full wiring diagram inside the alarm control centre which is exceptionally useful, since it essentially explains how you can connect any kind of sensors yourself which can save a whole heap of money compared to paying for an alarm company to do the installation.

Spagettie

I wish all my electronic devices came with documentation this detailed.

The other great thing about this alarm is that since DSC is so massive, there’s an ecosystem of third party vendors offering components for it. Searching for third party IP modules, I ran into this article where the author purchased an IP module from a company known as Envisalink and used it’s third party API to write custom code to get alarm events and issue commands.

A third party API sounded perfect, so I purchased the EnvisaLink EVL-4 for $239 NZD delivered and did the installation myself. In theory the installation is easy, just a case of powering down the alarm (not touching any 240V hard wired mains in the process) and connecting it via the 4 wire keypad bus.

In my case it ended up being a bit more complex since the previous owner had helpfully never given me any of the master/installer alarm codes, so I ended up doing a factory reset of the unit and re-programming it from scratch (which means all the sensors, etc) which takes about a day to figure out and do the first time. The plus side is that this gave me complete control over the unit and I was able to do things like deprogram the old alarm company’s phone number to stop repeat failed callout attempts.

Once connected, the EnvisaLink unit was remarkably hassle free to setup – it grabbed a DHCP lease, connected to the internet and phoned home to the vendor’s free monitoring service.

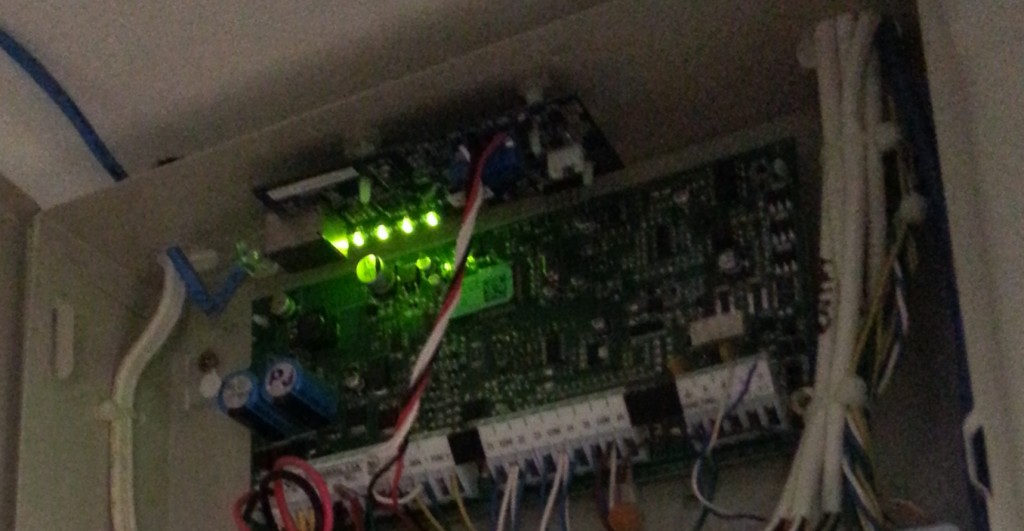
Installed with pretty LEDs!

EnvisaLink unit installed at the top above the alarm control circuit. A++ for LED ricing guys!


The EnvisaLink hardware is a great little unit and the third party programmer’s interface is reasonably well documented and works without too much grief. Unfortunately the rest of the experience of the company selling it isn’t particularly good. Specifically:

  • Their website places the order by emailing their accounts mailbox. How do I know? Because they printed the email including my credit card number in full and sent it as the packing slip on it’s journey across the world. Great PCI compliance guys!
  • They show the product as working with Android, iPhone and Blackberry. They carefully avoid saying it has native apps, they actually mean it has a “smart phone” optimized version, which is as terrible as it sounds.
  • I can’t enable alerts on their service since their signup process keeps sending my email a blank validation code. So I had an alarm that couldn’t alarm me via their service.
  • No 2FA on logging into the alarm website, so you could brute force login and then disable the alarm remotely… or set it off if you just want to annoy the occupants.

I haven’t dug into the communications between the unit and it’s vendor, I sure hope it’s SSL/TLS secured and doesn’t have the ability to remotely exploit it and upgrade it, but I’m not going to chance it. Even if they’ve properly encrypted and secured comms between the unit and their servers, the security is limited to the best practices of the company and software which already look disturbingly weak.

Thankfully my requirements for the module is purely it’s third party API so I can integrate with my own systems, so I can ignore all these issues and put it on it’s own little isolated VLAN where it can’t cause any trouble and talk to anything but my server.


So having sorted out the hardware and gotten the alarm onto the network, I now needed some software that would at least meet the basic alerting requirements I have.

There’s an existing comprehensive Java/Android-based product (plainly labeled as “DSC Security Server”) which looks very configurable, but I specifically wanted something open source to make sure the alarm integration remained maintainable long term and to use Google Push Notifications  for instant alerting on both Android (which supports long running background processes) and iOS (which does not – hence you must use push notifications via APNS).

I ended up taking advantage of some existing public code for handling the various commands and error responses from the Envisalink/DSC alarm combination but reworked it a bit so I now have a module system that consists of “alarm integrators” exchanging information/events with the alarm system and “alarm consumers” which decide what to do with the events generated. These all communicate via a simple beanstalk queue.

This design gives ultimate simplicity – each program is not much more than a small script and there’s a standard documented format for anyone whom wants to add support for other alarm integrators or alarm consumers in future. I wanted it kept simple, making it the sort of thing you could dump onto a Raspberry Pi and have anyone with basic scripting skills be able to debug and adjust it.

I’ve assembled these programs into an open source package I’m calling “HowAlarming”“, hopefully it might be useful for anyone in future with the same alarm system or wanting a foundation for building their own software for other alarms (or even their own alarms).


The simplest solution to get alerts from the system would be by sending SMS using one of the many different web-based SMS services, but I wanted something I can extend to support receiving images from the surveillance system in future and maybe also sending commands back.

Hence I’ve written a companion Android app which receives messages from HowAlarming via push notifications and maintains an event log and the current state of the alarm.

UX doens't get much better than this.

UX doens’t get much better than this.

It’s pretty basic, but it offers the MVP that I require. Took about a day to hack together not having done any Android or Java before, thankfully Android Studio makes the process pretty easy with lots of hand holding and easy integration with the simulators and native devices.

TBD if I can hack something together in a day not having done any native app development before that’s better than many of the offerings from the alarm companies currently around, they need to be asking themselves some hard questions. At the very least, they should get someone to write some apps that can pull their customer’s alarm state from their current phone-home infrastructure – there’s probably good money to be made giving existing customers on non-IP era alarms upgrades given the number of installations out there.


So far my solution is working well for me. It’s not without it’s potential problems, for example alarm communications are now at the mercy of a power/internet outage whereas previously as long as the phone line was intact, it could call out. However this is easily fixed with my UPS and 3G failover modem – the 3G actually makes it better than previously.


The other potential issue is that I don’t know what insurance would classify this nature of self-monitoring as. I have mine declared as “un-monitored” to avoid any complications, but if your insurance conditions require monitoring I’m unsure if a home-grown solution would meet those requirements (even if it is better than 90% of the alarm companies). So do your research and check your contracts & terms.

Pipegate

The joys of home ownership never stop giving and I’ve been having some fun with my old nemesis of plumbing

A few weeks back we got a rather curt letter from Wellington Water/Wellington City Council (WCC) advising us that they had detected a leak on our property at location  unknown and that they would fine us large amounts if not rectified in 14 days. The letter proceeded to give no other useful information on how this was detected or how a home owner should find said leak.


After following up via phone, it turns out they’ve been doing acoustic listening to the pipes and based on the audio taken at several different times they’re pretty certain there was a leak *somewhere*.

After doing some tests with our plumber, we were able to rule out the house being at fault, however that left a 60m water pipe up to the street, an even bigger headache to replace than the under-house plumbing given it’s probably buried under concrete and trees.

The most likely cause of any leak for us is Duxquest plumbing, a known defective product from the 70s/80s. Thankfully all the Duxquest inside the house has been removed by previous owners, but we were very concerned that our main water pipe could also be Duxquest (turns out they used it for the main feeds as well).

We decided to dig a new trench ourselves to save money by not having to have the expensive time of a plumber spent digging trenches and (strategically) started at the house end where there are the most joins in the pipe.

It's going to be a long day...

It’s going to be a long day…

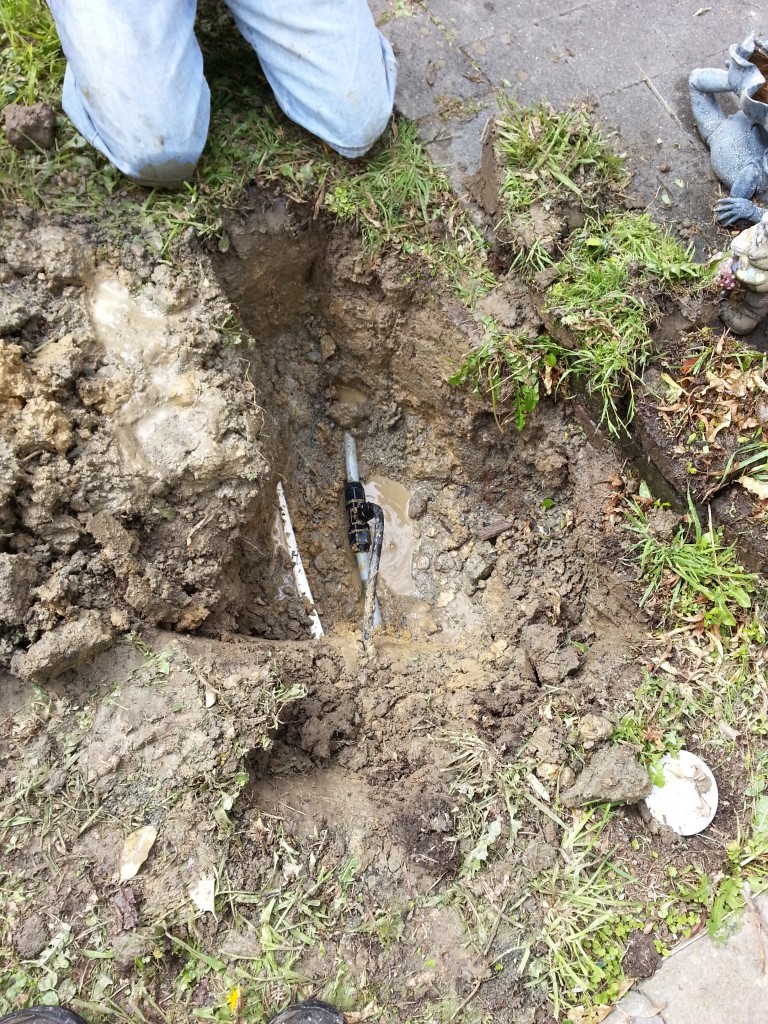
Or maybe not - is that water squirting out of the ground??!?

Or maybe not – is that water squirting out of the ground??!?

So we got lucky very early in. We started digging right by the toby at the house given it was more likely any split would be towards the house and also it’s easiest to dig up here than the other end that’s buried in concrete.

The ground on the surface wasn’t damp or wet so we had no idea the leak was right below where we would start digging. It looks like a lot of the ground around the front of the house is sand/gravel infill that has been used, which resulted in the water draining away underground rather than coming to the surface. That being said, with the size of the leak I’m pretty amazed that it wasn’t a mud-bath at the surface.

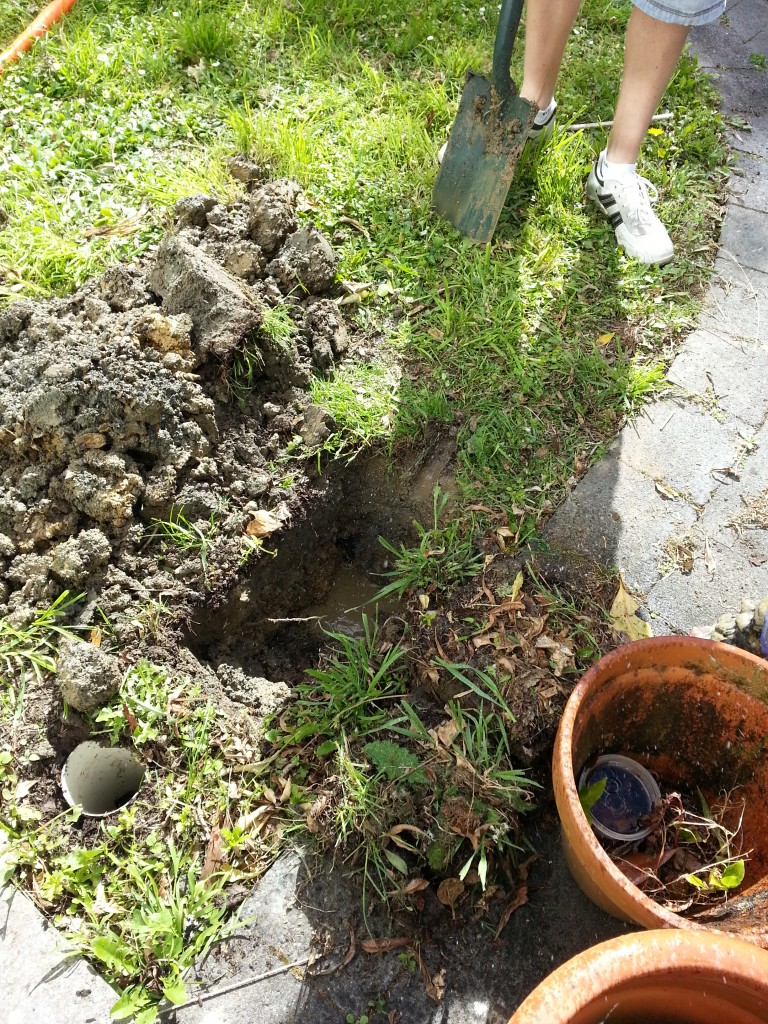
Fffffff duxquest!!

Fffffff duxquest!!

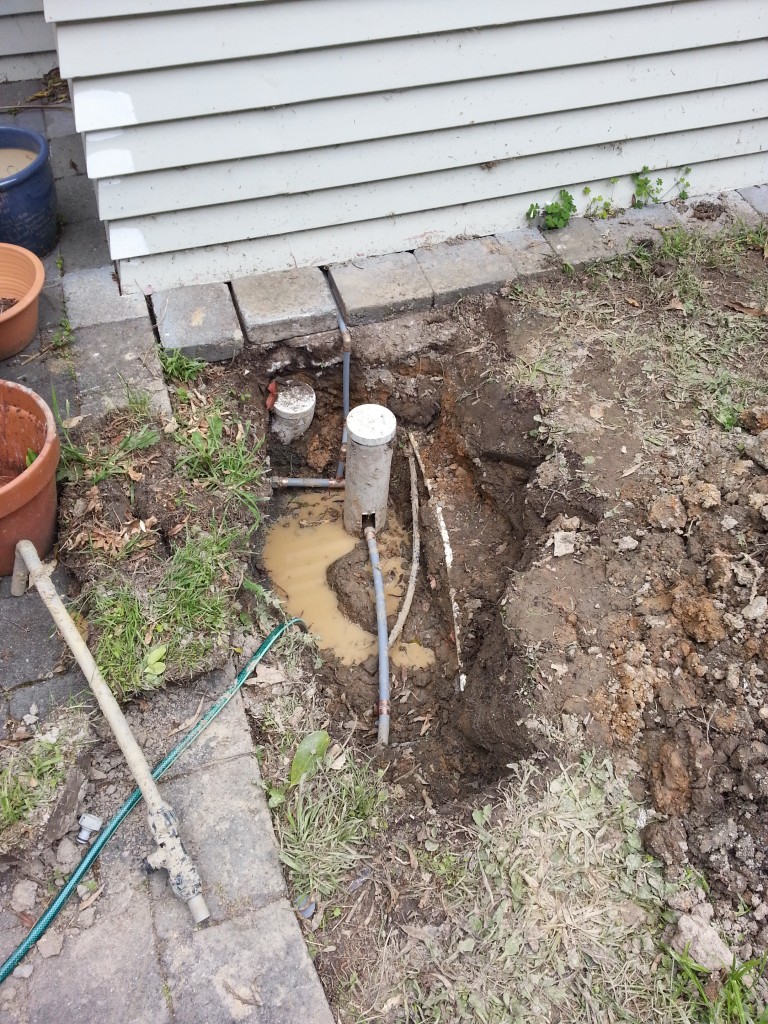
The leak itself is in the Duxquest black joiner/branch pipe which comes off the main feed before the toby. It seems someone decided that it would be a great idea to feed the garden pipes of the house from a fork *before* the main toby so that it can’t be turned off easily, which is also exactly where it split meaning we couldn’t tell if the leak was this extension or the main pipe.

The thick grey pipe is the main water feed that goes to the toby (below the white cap to the right) and thankfully this dig confirms that it’s not Duxquest but more modern PVC which shouldn’t have any structural issues long term.

Finding the leak so quickly was good, but this still left me with a hole in the ground that would rapidly fill with water whenever the mains was turned back on. And being a weekend, I didn’t particularly want to have to call out an emergency plumber to seal the leak…

The good news is that the joiner used has the same screw fitting as a garden tap, which made it very easy to “cap” it by attaching a garden hose for the weekend!

Unscrewed

Hmm that looks oddly like a garden tap screw…

When number 8 wire doesn't suit, use pipe!

Huzzah!


Subsequently I’ve had the plumber come and replace all the remaining Duxquest under the house with modern PVC piping and copper joiners to eliminate the repeat of this headache. And I also had the toby moved so that it’s now positioned before the split so that it’s possible to isolate the 60m water main to the house which will make it a lot easier if we ever have a break in future.

You too, could have this stylish muddy hole for only $800!

You too, could have this stylish muddy hole for only $800!


I’m happy we got the leak fixed, but WCC made this way harder than it should have been. To date all my interactions with WCC have been quite positive (local government being helpful, it’s crazy!), but their state-owned-entity of Wellington Water leaves a lot to be desired with their communication standards.

Despite being in communication with the company that detected the leak and giving updates on our repairs we continued to get threatening form letters detailing all the fines in-store for us and then when we finally completed the repairs had zero further communications or even acknowledgment from them.

At least it’s just fixed now and I shouldn’t have any plumbing issues to worry about for a while… in theory.

Welly

Been getting out and enjoying Wellington lately, it should be a great summer!