Tag Archives: aws

Automatically restarting GNU/Linux hosts upon hung storage

We recently experienced a weird and frustrating problem with storage reliability on our RabbitMQ cluster running on AWS c5-series EC2 instances with EBS storage and Ubuntu LTS 16.04.

  1. One of our three-node RabbitMQ cluster instances will experience an issue that results in it being unable to persist anything to disk, on any mounted volume on the instance.
  2. When this happens, the instance is *supposed* to remove itself from the cluster as an unhealthy member and have the remaining two instances take over all responsibilities with zero downtime to operational systems.
  3. Sadly for some unknown reason, the way this issue impacts RabbitMQ does not result in the instance being evicted from the cluster. Instead, it remains in the cluster exchanging healthy status messages with other members, but (and this is the critical bit) it manages to then jam up queues across the entire cluster, bringing down the two healthy instances along with the one unhealthy.
  4. Operations (me) gets paged to solve a critical outage on the platform that’s going to impact customers.

The problem is super weird in that it occurs somewhat randomly – no obvious correlation to load, time of day – but it does tend to happen after the instance has been running for at least a few weeks. It also occurs on any of the three RabbitMQ instances, so it’s not something specifically weird about any one instance in the fleet.

The one thing we do know, is that the issue is storage related. Firstly nothing is persisted in the logs (RabbitMQ or system/kernel) from the time the issue occurs and secondly we can see a large spike in disk I/O wait time in our Datadog monitoring for the instance, showing that the instance is stuck with processes waiting for the disk to respond.

Why RabbitMQ is impacted in this manner is unclear. It makes sense that the cluster quorum and status negotiation wouldn’t require working disk to keep running, but in every test we made where we deliberately broke the storage, the RabbitMQ process would correctly detect something was wrong on the host and go into an unhealthy state, removing it from the cluster. Tested ripping out EBS storage whilst still mounted, corrupting with dd, force unmounting, etc… nothing could trigger the exact same behaviour.

Reviewing what differs about production was difficult since it didn’t persist any of the kernel or RabbitMQ logs, however we did manage to extract some information from the AWS instance console for one of the impacted systems before we restarted it:

Ubuntu 16.04.4 LTS localhost ttyS0
[349442.682614] Not tainted 4.4.0-1062-aws #71-Ubuntu
[349442.684363] "echo 0 > /proc/sys/kernel/hung_task_timeout_secs" disables this message.
[349442.686890] INFO: myprocess:1956 blocked for more than 120 seconds.

Essentially the Linux kernel is proceeding to log a number of different processes (basically everything on the box that does anything) as being blocked for over 120 seconds, thanks to the storage failing and being unable to do anything about it to unblock the processes

Given we have been unable to identify the exact fault or reproduce the behaviour (could be something in the Linux Kernel, could be something in AWS c5 or EBS…), we needed a solution that would at least help us by terminating any instance that experienced this storage issue.

The solution is helpfully identified by the kernel log lines above. We can use the hung task panic feature in the Linux kernel to force a host to immediately reboot itself if processes are hung for too long.

We do this using two different sysctl configuration changes (note – you need to set these up in /etc/sysctl.conf to survive reboots):

# Panic if a hung task was found
sysctl kernel.hung_task_panic=1

# Reboot 5 seconds after panic
sysctl kernel.panic=5

The first instructs the kernel to panic if a hung task (any task blocked for more than 120 seconds) occurs. The second, instructs it to reboot shortly after this occurs. We set it to 5 seconds, to give time for any logging to persist or be delivered about the hung task before it’s reboot, although in this particular situation, with all storage being busted its of very limited benefit.

This has been in place for several months now and is working beautifully. Every so often an instance experiences this fault and instead of causing any disruption, it is quickly self-terminated and replaced. Because it terminates completely, the RabbitMQ cluster negotiation is successfully able to re-assign responsibilities to the other instances in the cluster.

In theory there is a 2-minute period where the unhealthy instance is still running, however reviewing the production metrics, it appears that when the fault occurs, RabbitMQ doesn’t immediately break – sometimes it continues to run for 15mins or more before jamming up the cluster. So having it run for 2 minutes has turned out to be just fine.

Ideally going forwards we need to setup a network logging endpoint for these hosts to see if we can capture anything like a stack trace from a kernel driver. It seems likely that it’s a Linux kernel bug rather than an AWS EBS bug, since the issue is resolved with a soft reboot, rather than a force stop-start of the instance via the AWS API, meaning it’s still running on the same hypervisor host, etc. But until then, this kernel configuration parameter means we are not going to disrupt operational services when the fault does occur.

Scaling backend infrastructure to handle millions of phones (Mobile Refresh 2018)

I recently had the pleasure to speak at the 2018 Mobile Refresh conference held here in Wellington and did a talk introducing how we run some parts of the Sailthru Mobile platform, along with recommendations and advice to anyone else also building backends to support their mobile applications.

It’s more entry-level than some of my other infrastructure talks as it’s focused on people that are primarily mobile developers with maybe a limited set of infrastructure awareness.

Deep Dive into ECS

I spent a fair bit of time in 2017 re-architecting the carnival.io platform onto Amazon ECS, including working to handle some tricky autoscaling challenges brought on by the nature of the sudden high-load spikes experienced when we deliver push messages to customers.

I’ve now summed up these learnings into a deep dive talk on the Amazon ECS architecture that I presented at the Wellington AWS Users Group on February 12th 2018.

This talk explains what container orchestration is, some key fundamentals about ECS, how we’ve tackled CI/CD with ECS and going into details around some of the unique autoscaling challenges caused by millions of cellphones sending home telemetry all at once.

This talk is technical, but includes content appropriate for both beginners wanting to know how ECS functions and experts wanting to see just what can be accomplished with the platform.


Puppet Autosigning & Cloud Recommendations

I was over in Sydney this week attending linux.conf.au 2018 and made a short presentation at the Sysadmin miniconf regarding deploying Puppet in cloud environments.

The majority of this talk covers the Puppet autosigning process which is a big potential security headache if misconfigured. If you’re deploying Puppet (or even some other config management system) into the cloud, I recommend checking this one out (~15mins) and making sure your own setup doesn’t have any issues.


Access Route53 private zones cross account

Using Route53 private zones can be a great way to maintain a private internal zone for your server infrastructure. However sometimes you may need to share this zone with another VPC in the same or in another AWS account.

The first situation is easy – a Route53 zone can be associated with any number of VPCs within a single AWS account using the AWS console.

The second is more tricky but is doable by creating a VPC association authorization request in the account with the zone, then accepting it from the other account.

# Run against the account with the zone to be shared.
aws route53 \
create-vpc-association-authorization \
--hosted-zone-id abc123 \
--vpc VPCRegion=us-east-1,VPCId=vpc-xyz123 

# Run against the account that needs access to the private zone.
aws route53 \
associate-vpc-with-hosted-zone \
--hosted-zone-id abc123 \
--vpc VPCRegion=us-east-1,VPCId=vpc-xyz123 \
--comment "Example Internal DNS Zone"

# List authori(z|s)ations once done
aws route53 \
list-vpc-association-authorizations \
--hosted-zone-id abc123

This doesn’t even require VPC peering since it works behind the scenes, with the associated zone now being resolvable using the default VPC DNS server on each zone that has been associated.

Note that the one catch is that this does not help you if you’re linking to a non-AWS VPC environment, such as an on-prem data centre via IPSec VPN or Direct Connect. Even though you can route to the VPC and systems inside it, the AWS DNS resolver for the VPC will refuse requests from IP space outside of the VPC itself.

So the only option is have an EC2 instance acting as a DNS forwarder inside the VPC, which is reachable from the linked data centre and yet since it’s in the VPC, can use the resolver.

FailberryPi – Diverse carrier links for your home data center

Given the amount of internet connected things I now rely on at home, I’ve been considering redundant internet links for a while. And thanks to the affordability of 3G/4G connectivity, it’s easier than ever to have a completely diverse carrier at extremely low cost.

I’m using 2degrees which has a data SIM sharing service that allows me to have up to 5 other devices sharing the one data plan, so it literally costs me nothing to have the additional connection available 24×7.

My requirements were to:

  1. Handle the loss of the wired internet connection.
  2. Ensure that I can always VPN into the house network.
  3. Ensure that the security cameras can always upload footage to AWS S3.
  4. Ensure that the IoT house alarm can always dispatch events and alerts.

I ended up building three distinct components to build a failover solution that supports flipping between my wired (VDSL) and wireless (3G) connection:

  1. A small embedded GNU/Linux system that can bridge a USB 3G modem and an ethernet connection, with smarts to recover from various faults (like crashed 3G stick).
  2. A dynamic DNS solution, since my mobile telco certainly isn’t going to give me a static IP address, but I need inbound traffic.
  3. A DNS failover solution so I can redirect inbound requests (eg home VPN) to the currently active endpoint automatically when a failure has occurred.


The Hardware

I considered using a Mikrotik with USB for the 3G link – it is a supported feature, but I decided to avoid this route since I would need to replace my perfectly fine router for one with a USB port, plus I know from experience that USB 3G modems are fickle beasts that would be likely to need some scripting to workaround various issues.

For the same reason I excluded some 3G/4G router products available that take a USB modem and then provide ethernet or WiFi. I’m very dubious about how fault tolerant these products are (or how secure if consumer routers are anything to go by).

I started off the project using a very old embedded GNU/Linux board and 3G USB modem I had in the spare parts box, but unfortunately whilst I did eventually recycle this hardware into a working setup, the old embedded hardware had a very poor USB controller and was throttling my 3G connection to around 512kbps. :-(
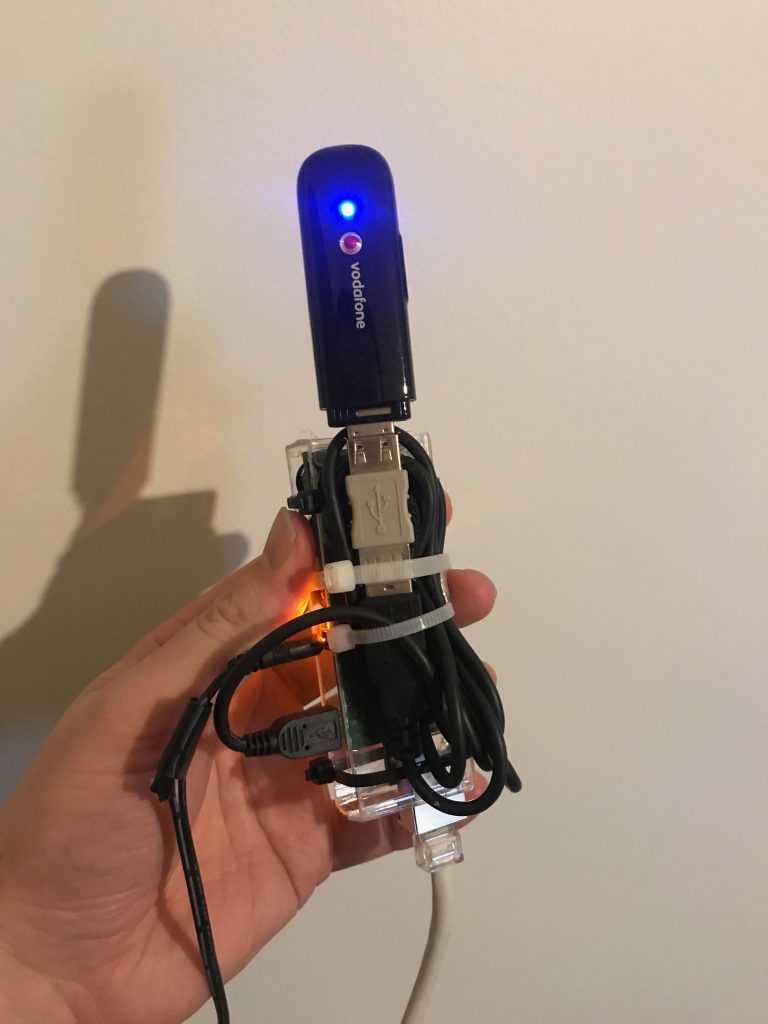
Initial approach – Not a bomb, actually an ancient Gumstix Verdex with 3G modem.

So I started again, this time using the very popular Raspberry Pi 2B hardware as the base for my setup. This is actually the first time I’ve played with a Raspberry Pi and I actually really enjoyed the experience.

The requirements for the router are extremely low – move packets between two interfaces, dial a modem and run some scripts. It actually feels wasteful using a whole Raspberry Pi with it’s whole 1GB of RAM and Quad Core ARM CPU, but they’re so accessible and cost affordable, it’s not worth the time messing around with any more obscure embedded boards.
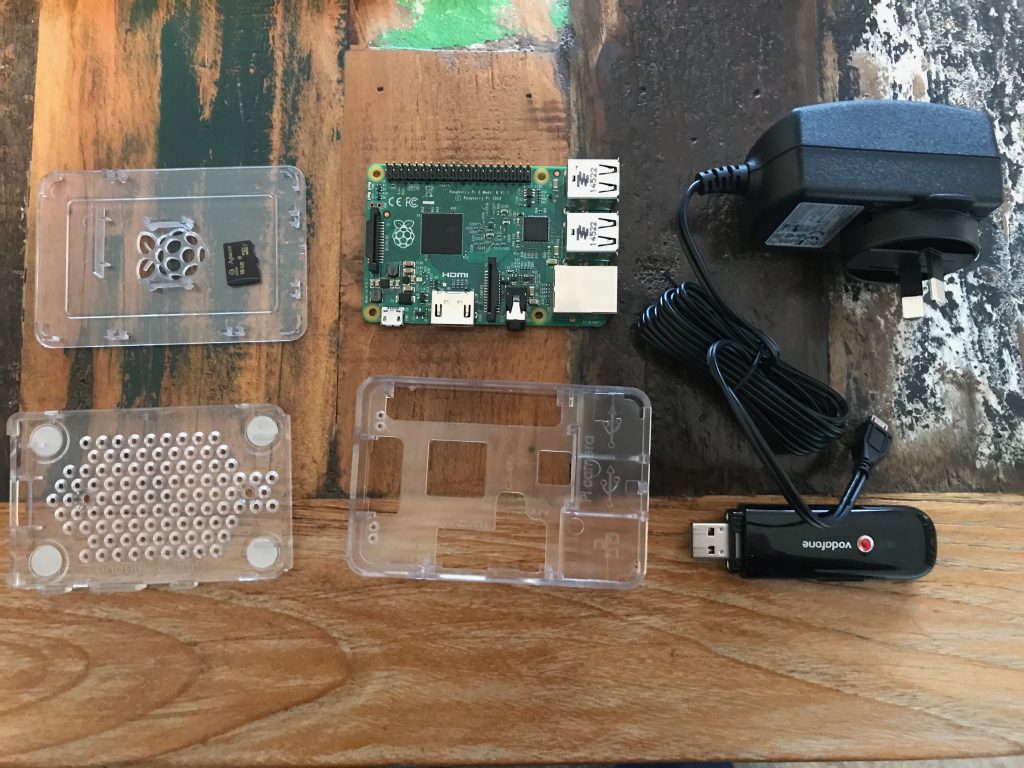
Pie ingredients

It took me all of 5 mins to assemble and boot an OS on this thing and have a full Debian install ready for work. For this speed and convenience I’ll happily pay a small price premium for the Raspberry Pi than some other random embedded vendors with much more painful install and upgrade processes.
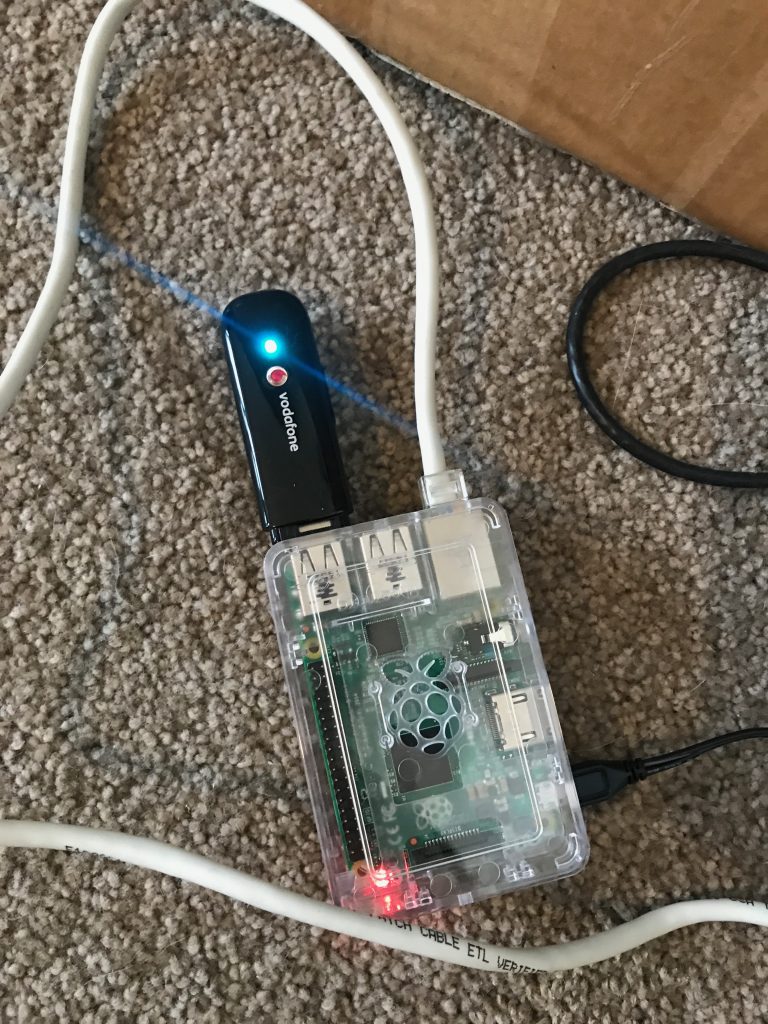
Baked!

It’s important to get a good power supply – 3G/4G modems tend to consume the full 500mW available to them. I kept getting under voltage warnings (the red light on the Pi turns off) with a 2.1 Amp phone charger I was using. Ended up buying the official 2.5 Amp Raspberry Pi charger, which powers the Raspberry Pi 2 + the 3G modem perfectly.

I brought the smallest (& cheapest) class 10 Micro SDHC card possible – 16GB. Of course this is way more than you actually need for a router, 4GB would have been plenty.

The ZTE MF180 USB 3G modem I used is a tricky beast on Linux, thanks to the kernel seeing it as a SCSI CDROM drive initially which masks the USB modem features. Whilst Linux has usb_modeswitch shipping as standard these days, I decided to completely disable the SCSI CDROM feature as per this blog post to avoid the issue entirely.


The Software

The Raspberry Pi I was given (thanks Calcinite! ?) had a faulty GPU so the HDMI didn’t work. Fortunately Raspberry Pi doesn’t let such a small issue like no display hold it back – it’s trivial to flash an image to the SD card from another machine and boot a headless installation.

  1. Download Raspbian minimal/lite (Debian + Raspberry Pi goodness).
  2. Installed image to the SD card using the very awesome Etcher.io (think “safe dd” for noobs) as per the install instructions using my iMac.
  3. Enable SSH as per instructions: “SSH can be enabled by placing a file named ssh, without any extension, onto the boot partition of the SD card. When the Pi boots, it looks for the ssh file. If it is found, SSH is enabled, and the file is deleted. The content of the file does not matter: it could contain text, or nothing at all.”
  4. Login with username “pi” and password “raspberry”.
  5. Change the password immediately before you put it online!
  6. Upgrade the Pi and enable automated updates in future with:
    apt-get update && apt-get -y upgrade
    apt-get install -y unattended-upgrades

The rest is somewhat specific to your setup, but my process was roughly:

  1. Install apps needed – wvdial for establishing the 3G connection via AT commands + PPP, iptables-persistent for firewalling, libusb-dev for building hub-ctrl and jq for parsing JSON responses.
    apt-get install -y wvdial iptables-persistent libusb-dev jq
  2. Configure a firewall. This is very specific to your network, but you’ll want both ipv4 and ipv6 rules in /etc/iptables/rules.* Generally you’d want something like:
    1. Masquerade (NAT) traffic going out of the ppp+ and eth0 interfaces.
    2. Permit forwarding traffic between the interfaces.
    3. Permit traffic in on port 9000 for the health check server.
  3. Enable IP forwarding (net.ipv4.ip_forward=1) in /etc/sysctl.conf.
  4. Build hub-ctrl. This utility allows the power cycling of the USB controller + attached devices in the Raspberry Pi, which is extremely useful if your 3G modem has terrible firmware (like mine) and sometimes crashes hard.
    wget https://raw.githubusercontent.com/codazoda/hub-ctrl.c/master/hub-ctrl.c
    gcc -o hub-ctrl hub-ctrl.c -lusb
  5. Build pinghttpserver. This is a tiny C-based webserver which we can use to check if the Raspberry Pi is up (Can’t use ICMP as detailed further on).
    wget -O pinghttpserver.c https://gist.githubusercontent.com/jethrocarr/c56cecbf111af8c29791f89a2c30b978/raw/9c53f66fbed609d09652b8c4ceff0194876c05a3/gistfile1.txt
    make pinghttpserver
  6. Configure /etc/wvdial.conf. This will vary by the type of 3G/4G modem and also the ISP in use. One key value is the APN that you use. In my case, I had to set it to “direct” to ensure I got a real public IP address with no firewalling, instead of getting a CGNAT IP, or a public IP with inbound firewalling enabled. This will vary by carrier!
    [Dialer Defaults]
    Init1 = ATZ
    Init2 = ATQ0 V1 E1 S0=0 &C1 &D2 +FCLASS=0
    Init3 = AT+CGDCONT=1,"IP","direct"
    Stupid Mode = 1
    Modem Type = Analog Modem
    Phone = *99#
    Modem = /dev/ttyUSB2
    Username = { }
    Password = { }
    New PPPD = yes
  7. Edit /etc/ppp/peers/wvdial to enable “defaultroute” and “replacedefaultroute” – we want the wireless connection to always be the default gateway when connected!
  8. Create a launcher script and (once tested) call it from /etc/rc.local at boot. This will start up the 3G connection at boot and launch various processes we need. (this could be nicer and be a collection of systemd services, but damnit I was lazy ok?). It also handles reboots and powercycling USB if problems are encountered for (an attempt) at automated recovery.
    wget -O 3g_failover_launcher.sh https://gist.githubusercontent.com/jethrocarr/a5dae9fe8523cf74d30a065d77d74876/raw/57b5860a9b3f6a048b02b245f3628ee60ea766dc/3g_failover_launcher.sh

At this point, you should be left with a Raspberry Pi that gets a DHCP lease on it’s eth0, dials up a connection with your wireless telco and routes all traffic it receives on eth0 to the ppp interface.

In my case, I setup my Mikrotik router to have a default GW route to the Raspberry Pi and the ability to failover based on distance weightings. If the wired connection drops, the Mikrotik will shovel packets at the Raspberry Pi, which will happily NAT them to the internet.


The DNS Failover

The work above got me an outbound failover solution, but it’s no good for inbound traffic without a failover DNS record that flips between the wired and wireless connections for the VPN to target.

Because the wireless link would be getting a dynamic IP addresses, the first requirement was a dynamic DNS service. There are various companies around offering free or commercial products for this, but I chose to use a solution built around AWS Lambda that can be granted access directly to my DNS hosted inside Route53.

AWS have a nice reference dynamic DNS solution available here that I ended up using (Sadly not using the Serverless framework so there’s a bit more point+click setup than I’d like, but hey).

Once configured and a small client script installed on the Raspberry Pi, I had reliable dynamic DNS running.

The last bit we need is DNS failover. The solution I used was the native AWS Route53 Health Check feature, where AWS adjust a DNS record based on the health of monitored endpoints.

I setup a CNAME with the wired connection as the “primary” and the wireless connection as the “secondary”. The DNS CNAME will always point to the primary/wired connection, unless it’s health check fails, in which case the CNAME will point to the secondary/wireless connection. If both fail, it fails-safe to the primary.

A small webserver (pinghttpserver) that we built earlier is used to measure connectivity – the Route53 Health Check feature unfortunately lacks support for ICMP connectivity tests hence the need to write a tiny server for checking accessibility.

This webserver runs on the Raspberry Pi, but I do a dst port NAT to it on both the wired and wireless connections. If the Pi should crash, the connection will always fail safe to the primary/wired connection since both health checks will fail at once.

There is a degree of flexibility to the Route53 health checks. You can use a CloudWatch alarm instead of the HTTP check if desired. In my case, I’m using a Lambda I wrote called “lambda-ping” (creative I know) which is a Lambda that does HTTP “pings” to remote endpoints and recording the response code, plus latency. (Annoyingly it’s not possible to do ICMP pings with Lambda either, since the container that Lambda execute inside of lack the CAP_NET_RAW kernel capability, hence the “ping-like” behaviour).

lambda-ping in action

I use this, since it gives me information for more than just my failover internet links (eg my blog, sites, etc) and acts like my Pingdom / Newrelic Synthetics alternative.


Final Result

After setting it all up and testing, I’ve installed the Raspberry Pi into the comms cabinet. I was a bit worried that all the metal casing would create a faraday cage, but it seems to be working OK (I also placed it so that the 3G modem sticks out of the cabinet surrounds).

So far so good, but if I get spotty performance or other issues I might need to consider locating the FailberryPi elsewhere where it can get clear access to the cell towers without disruption (maybe sealed ABS box on the roof?). For my use case, it doesn’t need to be ultra fast (otherwise I’d spend some $ and upgrade to 4G), but it does need to be somewhat consistent and reliable.
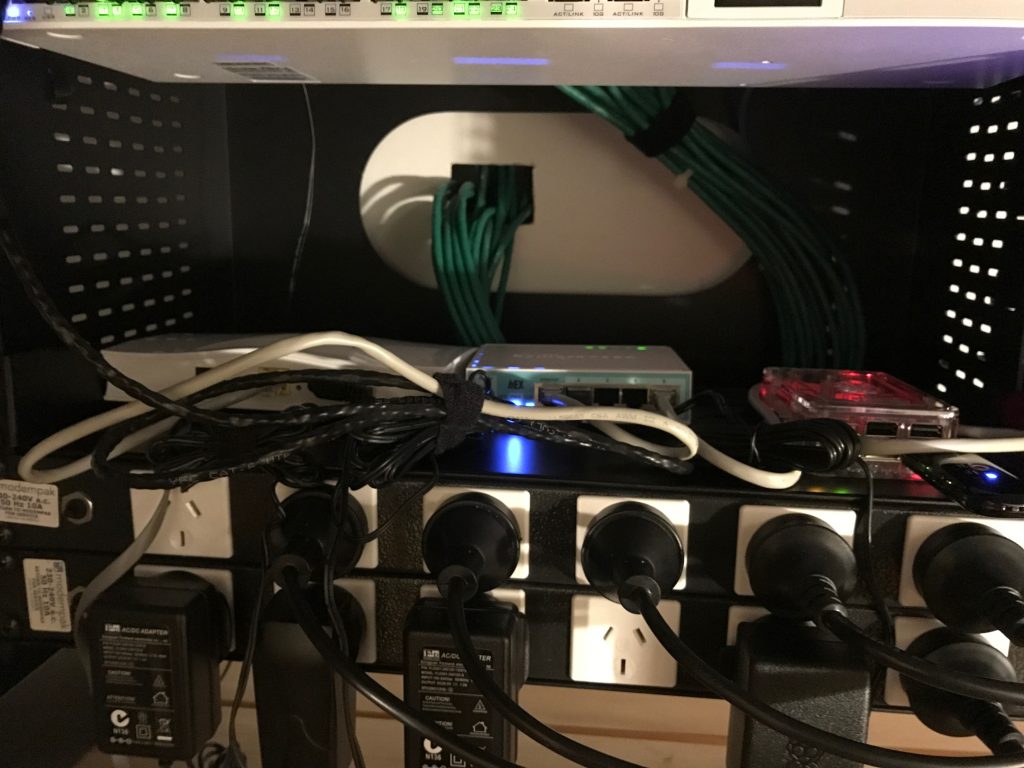
Installed on a shelf in the comms cabinet, along side the main Mikrotik router and the VDSL modem

So far it’s working well – the outbound failover could do with some tweaking to better handle partial failures (eg VDSL link up, but no international transit), but the failover for the inbound works extremely well.

Few remaining considerations/recommendations for anyone considering a setup like this:

  1. If using the one telco for both the wireless and the wired connection, you’re still at risk of a common fault taking out both services since most ISPs will share infrastructure at some level – eg the international gateway. Use a completely different provider for each service.
  2. Using two wired ISPs (eg Fibre with VDSL failover)  is probably a bit pointless, they’re probably both going back to the same exchange or along the some conduit waiting for a  single backhoe to take them both out at once.
  3. It’s kind of pointless if you don’t put this behind a UPS, otherwise you’ll still be offline when the power goes out. Strongly recommend having your entire comms cabinet on UPS so your wifi, routing and failover all continue to work during outages.
  4. If you failover, be careful about data usage. Your computers won’t know they’re on an expensive mobile connection with limited data and they’ll happily download updates, steam games, backups, etc…. One approach is using a firewall to whitelist select systems only for failover (eg IoT devices, alarm, cameras) and leaving other devices like laptops blocked to prevent too much billshock.
  5. Partial ISP outages are still a PITA. Eg, if routing is broken to some NZ ISPs, but international is fine, the failover checks from ap-southeast-2 won’t trigger. Additional ping scripts could help here (eg check various ISP gateways from the Pi), but that’s getting rather complex and tries to solve a problem that’s never completely fixable.
  6. Just buy a Raspberry Pi. Don’t waste time/effort trying to hack some ancient crap together it wastes far too much time and often falls flat. And don’t use an old laptop/desktop, there’s too much to fail on them like fans, HDDs, etc. The Pi is solid embedded electronics.
  7. Remember that your Pi is essentially a server attached to the public internet. Make sure you configure firewalls and automatic patching and any other hardening you deem appropriate for such a system. Lock down SSH to keys only, IP restrict, etc.

Detectatron

I recently installed security cameras around my house which are doing an awesome job of recording all the events that take place around my house and grounds (generally of the feline variety).

Unfortunately the motion capture tends to be overly trigger happy and I end up with heaps of recordings of trees waving, clouds moving or insects flying past. It’s not a problem from a security perspective as I’m not missing any events, but it makes it harder to check the feed for noteworthy events during the day.

I decided I’d like to write some logic for processing the videos being generated and decided to write a proof of concept that sucks video out of the Ubiquiti Unifi Video server and then analyses it with Amazon Web Services new AI product “Rekognition” to identify interesting videos worthy of note.

What this means, is that I can now filter out all the noise from my motion recordings by doing image recognition and flagging the specific videos that feature events I consider interesting, such as footage featuring people or cats doing crazy things.

I’ve got a 20 minute talk about this system which you can watch below, introducing it’s capabilities and how I’m using the AWS Rekognition service to solve this problem. The talk was for the Wellington AWS Users Group, so it focuses a bit more on the AWS aspects of Rekognition and AWS architecture rather than the Unifi video integration side of things.

The software I wrote has two parts – “Detectatron” which is the backend Java service for processing each video and storing it in S3 after processing and the connector I wrote for integration with the Unifi Video service. These can be found at:

https://github.com/jethrocarr/detectatron
https://github.com/jethrocarr/detectatron-connector-unifi

The code quality is rather poor right now – insufficient unit tests, bad structure and in need of a good refactor, but I wanted to get it up sooner rather than later… since perfection is always the enemy of just shipping something.

Note that whilst I’ve only added support for the product I use (Ubiquiti’s Unifi Video), I’ve designed it so that it’s pretty trivial to build other connectors for other platforms. I’d love to see contributions like connectors for Zone Minder and other popular open source or commercial platforms.

If you’re using Unifi Video, my connector will automatically mark any videos it deems as interesting as locked videos, for easy filtering using the native Unifi Video apps and web interface.

It also includes an S3 upload feature – given that I integrated with the Unifi Video software, it was a trivial step to extend it to also upload every video the system records into S3 within a few seconds for off-site retention. This performs really well, my on-prem NVR really struggled to keep up with uploads when using inotify + awscli to upload footage, but using my connector and Detectatron it has no issues keeping up with even high video rates.

Fairfax’s Cloud Journey at Auckland AWS Summit 2016

I recently presented at the 2016 AWS Summit Auckland about Fairfax’s cloud journey as part of the business stream “Key Steps for Setting up your AWS Journey for Success” alongside two excellent Amazon engineers. It’s a bit different from my usual talks, in that this one was specifically focused on a business audience, rather than a technical one.

My segment was just part of a talk full of excellent content from Amazon themselves, so you can checkout the full presentation here and all the other recorded presentations at the AWS Summit Auckland on-demand site.

Node.js deployments at Fairfax with Code Deploy, Codeship and 12factor

This week I presented at the Node.js Wellington meetup around the tooling we have setup at Fairfax for running micro services for Node.js apps.

Essentially we have a workflow that uses Codeship for CI/CD and AWS Code Deploy for deployment. Our apps follow the principals of the Twelve-Factor App making each service simple and consistent to deploy.

This talk covers the reasons for this particular approach, the technologies used and offers a look at our stack including infrastructure and the deployment pipeline.

Whilst this talk is Node.js specific, we use the same technology for both Node.js and Java microservices and will shortly be standardising our Ruby applications on this approach as well.

AWS Cost Control at Fairfax

Earlier this month I was invited to speak at the AWS Wellington User Group around how we’ve been handling cost control at Fairfax including our use of spot pricing. I’ve now processed the video and got a recording up online for anyone interested in watching.

The video isn’t great since we took it in dim light using a cellphone and a webcam in a red lit bar, but the audio came through pretty good.