Tag Archives: linux

Installing EL7 onto EL5 Xen hosts

With RedHat recently releasing RHEL 7 (and CentOS promptly getting their rebuild out the door shortly after), I decided to take the opportunity to start upgrading some of my ageing RHEL/CentOS (EL) systems.

My personal co-location server is a trusty P4 3.0Ghz box running EL 5 for both host and Xen guests. Xen has lost some popularity in favour of HVM solutions like KVM, however it’s still a great hypervisor and can run Linux guests really nicely on even hardware as old as mine that lacks HVM CPU extensions.

Considering that EL 5, 6 and 7 are all still supported by RedHat, I would expect that installing EL 7 as a guest on EL 5 should be easy – and to be fair to RedHat it mostly is, the installation was pretty standard.

Like EL 5 guests, EL 7 guests can be installed entirely from the command line using the standard virt-install command – for example:

$ virt-install --paravirt \
 --name MyCentOS7Guest \
 --ram 1024 \
 --vcpus 1 \
 --location http://mirror.centos.org/centos/7/os/x86_64/ \
 --file /dev/lv_group/MyCentOS7Guest \
 --network bridge=xenbr0

One issue I had is that the installer no longer prompts for network information to use to download the rest of the installer and instead assumes you have a DHCP server, an assumption that isn’t always correct. If you want to force it to use a static address, append the following parameters to the virt-install command.

 -x 'ip=192.168.1.20 netmask=255.255.255.0 dns=8.8.8.8 gateway=192.168.1.1'

The installer will proceed and give you an option to either use VNC to get a graphical installer, or to accept the more basic/limited text mode installer. In my case I went with the text mode installer, generally this is fine for average installations, except that it doesn’t give you a lot of control over partitioning.

Installation completed successfully, but I was not able to subsequently boot the new guest, with an error being thrown about pygrub being unable to find the boot partition.

# xm create -c vmguest
Using config file "./vmguest".
Traceback (most recent call last):
  File "/usr/bin/pygrub", line 774, in ?
    raise RuntimeError, "Unable to find partition containing kernel"
RuntimeError: Unable to find partition containing kernel
No handlers could be found for logger "xend"
Error: Boot loader didn't return any data!
Usage: xm create <ConfigFile> [options] [vars]


Xen works a little differently than VMWare/KVM/VirtualBox in that it doesn’t try to emulate hardware unnecessarily in paravirtualised mode, so there’s no BIOS. Instead Xen ships with a tool called pygrub, that is essentially an application that implements grub and goes through the process of reading the guest’s /boot filesystem, displaying a grub interface using the config in /boot, then when a kernel is selected grabs the kernel and associated information and launches the guest with it.

Generally this works well, certainly you can boot any of your EL 5 guests with it as well as other Linux distributions with Xen paravirtulised compatible kernels (it’s merged into upstream these days).

However RHEL has moved on a bit since 2007 adding a few new tricks, such as replacing Grub with Grub2 and moving from the typical ext3 boot partition to an xfs boot partition. These changes confuse the much older utilities written for Xen, leaving it unable to read the boot loader data and launch the guest.

The two main problems come down to:

  1. EL 5 can’t read the xfs boot partition created by default by EL 7 hosts. Even if you install optional xfs packages provided by centosplus/centosextras, you still can’t read the filesystem due to the version of xfs being too new for it to comprehend.
  2. The version of pygrub shipped with EL 5 doesn’t have support for Grub2. Well, technically it’s supposed to according to RedHat, but I suspect they forgot to merge in fixes needed to make EL 7 boot.

I hope that RedHat fix this deficiency soon, presumably there will be RedHat customers wanting to do exactly what I’m doing who will apply some pressure for a fix, however until then if you want to get your shiny new EL 7 guests installed, I have a bunch of workarounds for those whom are not faint of heart.


For these instructions, I’m assuming that your guest is installed to /dev/lv_group/vmguest, however these instructions should work equally for image files or block devices.

Firstly, we need to check what the state of the /boot partition is – we need to make sure it is an ext3 volume, or convert it if not. If you installed via the limited text mode installer, it will be an xfs partition, however if you installed via VNC, you might be able to change the type to ext3 and avoid the next few steps entirely.

We use kpartx -a and -d respectively to expose the partitions inside the block device so we can manipulate the contents. We then use the good ol’ file command to check what type of filesystem is on the first partition (which is presumably boot).

# kpartx -a /dev/lv_group/vmguest
# file -sL /dev/mapper/vmguestp1
/dev/mapper/vmguestp1: SGI XFS filesystem data (blksz 4096, inosz 256, v2 dirs)
# kpartx -d /dev/lv_group/vmguest

Being xfs, we’re probably unable to do much – if we install xfsprogs (from centos extras), we can verify it’s unreadable by the host OS:

# yum install xfsprogs
# xfs_check /dev/mapper/vmguestp1
bad sb version # 0xb4b4 in ag 0
bad sb version # 0xb4a4 in ag 1
bad sb version # 0xb4a4 in ag 2
bad sb version # 0xb4a4 in ag 3
WARNING: this may be a newer XFS filesystem.
#

Technically you could fix this by upgrading the kernel, but EL 5’s kernel is a weird monster that includes all manor of patches for Xen that were never included into upstream, so it’s not a simple (or even feasible) operation.

We can convert the filesystem from xfs to ext3 by using another newer Linux system. First we need to export the boot volume into an image file:

# dd if=/dev/mapper/vmguestp1  | bzip2 > /tmp/boot.img.bz2

Then copy the file to another host, where we will unpack it and recreate the image file with ext3 and the same contents.

$ bunzip2 boot.img.bz2
$ mkdir tmp1 tmp2
$ sudo mount -t xfs -o loop boot.img tmp1/
$ sudo cp -avr tmp1/* tmp2/
$ sudo umount tmp1/
$ mkfs.ext3 boot.img
$ sudo mount -t ext3 -o loop boot.img tmp1/
$ sudo cp -avr tmp2/* tmp1/
$ sudo umount tmp1
$ rm -rf tmp1 tmp2
$ mv boot.img boot-new.img
$ bzip2 boot-new.img

Copy the new file (boot-new.img) back to the Xen host server and replace the guest’s/boot volume with it.

# kpartx -a /dev/lv_group/vmguest
# bzcat boot-new.img.bz2 > /dev/mapper/vmguestp1
# kpartx -d /dev/lv_group/vmguest


Having fixed the filesystem, Xen’s pygrub will be able to read it, however your guest still won’t boot. :-( On the plus side, it throws a more useful error showing that it could access the filesystem, but couldn’t parse some data inside it.

# xm create -c vmguest
Using config file "./vmguest".
Using <class 'grub.GrubConf.Grub2ConfigFile'> to parse /grub2/grub.cfg
Traceback (most recent call last):
  File "/usr/bin/pygrub", line 758, in ?
    chosencfg = run_grub(file, entry, fs)
  File "/usr/bin/pygrub", line 581, in run_grub
    g = Grub(file, fs)
  File "/usr/bin/pygrub", line 223, in __init__
    self.read_config(file, fs)
  File "/usr/bin/pygrub", line 443, in read_config
    self.cf.parse(buf)
  File "/usr/lib64/python2.4/site-packages/grub/GrubConf.py", line 430, in parse
    setattr(self, self.commands[com], arg.strip())
  File "/usr/lib64/python2.4/site-packages/grub/GrubConf.py", line 233, in _set_default
    self._default = int(val)
ValueError: invalid literal for int(): ${next_entry}
No handlers could be found for logger "xend"
Error: Boot loader didn't return any data!

At a glance, it looks like pygrub can’t handle the special variables/functions used in the EL 7 grub configuration file, however even if you remove them and simplify the configuration down to the core basics, it will still blow up.

# xm create -c vmguest
Using config file "./vmguest".
Using <class 'grub.GrubConf.Grub2ConfigFile'> to parse /grub2/grub.cfg
WARNING:root:Unknown image directive load_video
WARNING:root:Unknown image directive if
WARNING:root:Unknown image directive else
WARNING:root:Unknown image directive fi
WARNING:root:Unknown image directive linux16
WARNING:root:Unknown image directive initrd16
WARNING:root:Unknown image directive load_video
WARNING:root:Unknown image directive if
WARNING:root:Unknown image directive else
WARNING:root:Unknown image directive fi
WARNING:root:Unknown image directive linux16
WARNING:root:Unknown image directive initrd16
WARNING:root:Unknown directive source
WARNING:root:Unknown directive elif
WARNING:root:Unknown directive source
Traceback (most recent call last):
  File "/usr/bin/pygrub", line 758, in ?
    chosencfg = run_grub(file, entry, fs)
  File "/usr/bin/pygrub", line 604, in run_grub
    grubcfg["kernel"] = img.kernel[1]
TypeError: unsubscriptable object
No handlers could be found for logger "xend"
Error: Boot loader didn't return any data!
Usage: xm create <ConfigFile> [options] [vars]

Create a domain based on <ConfigFile>

At this point it’s pretty clear that pygrub won’t be able to parse the configuration file, so you’re left with two options:

  1. Copy the kernel and initrd file from the guest to somewhere on the host and set Xen to boot directly using those host-located files. However then kernel updating the guest is a pain.
  2. Backport a working pygrub to the old Xen host and use that to boot the guest. This requires no changes to the Grub2 configuration and means your guest will seamlessly handle kernel updates.

Because option 2 is harder and more painful, I naturally chose to go down that path, backporting the latest upstream Xen pygrub source code to EL 5. It’s not quite vanilla, I had to make some tweaks to rip out a couple newer features that were breaking it on EL 5, so I’ve packaged up my version of pygrub and made it available in both source and binary formats.

Download Jethro’s pygrub backport here

Installing this *will* replace the version installed by the Xen package – this means an update to the package on the host will undo these changes – I thought about installing it to another path or making an RPM, but my hope is that Red Hat get their Xen package fixed and make this whole blog post redundant in the first place so I haven’t invested that level of effort.

Copy to your server and unpack with:

# tar -xkzvf xen-pygrub-6f96a67-JCbackport.tar.gz
# cd xen-pygrub-6f96a67-JCbackport

Then you can build the source into a python module and install with:

# yum install xen-devel gcc python-devel
# python setup.py build
running build
running build_py
creating build
creating build/lib.linux-x86_64-2.4
creating build/lib.linux-x86_64-2.4/grub
copying src/GrubConf.py -> build/lib.linux-x86_64-2.4/grub
copying src/LiloConf.py -> build/lib.linux-x86_64-2.4/grub
copying src/ExtLinuxConf.py -> build/lib.linux-x86_64-2.4/grub
copying src/__init__.py -> build/lib.linux-x86_64-2.4/grub
running build_ext
building 'fsimage' extension
creating build/temp.linux-x86_64-2.4
creating build/temp.linux-x86_64-2.4/src
creating build/temp.linux-x86_64-2.4/src/fsimage
gcc -pthread -fno-strict-aliasing -DNDEBUG -O2 -g -pipe -Wall -Wp,-D_FORTIFY_SOURCE=2 -fexceptions -fstack-protector --param=ssp-buffer-size=4 -m64 -mtune=generic -D_GNU_SOURCE -fPIC -fPIC -I../../tools/libfsimage/common/ -I/usr/include/python2.4 -c src/fsimage/fsimage.c -o build/temp.linux-x86_64-2.4/src/fsimage/fsimage.o -fno-strict-aliasing -Werror
gcc -pthread -shared build/temp.linux-x86_64-2.4/src/fsimage/fsimage.o -L../../tools/libfsimage/common/ -lfsimage -o build/lib.linux-x86_64-2.4/fsimage.so
running build_scripts
creating build/scripts-2.4
copying and adjusting src/pygrub -> build/scripts-2.4
changing mode of build/scripts-2.4/pygrub from 644 to 755

# python setup.py install

Naturally I recommend reviewing the source code and making sure it’s legit (you do trust random blogs right?) but if you can’t get it to build/lack build tools/like gambling, I’ve included pre-built binaries in the archive and you can just do

# python setup.py install

Then do a quick check to make sure pygrub throws it’s help message, rather than any nasty errors indicating something went wrong.

# /usr/bin/pygrub


We’re almost ready to try booting again! First create a directory that the new pygrub expects:

# mkdir /var/run/xend/boot/

Then launch the machine creation – this time, it should actually boot and run through the usual systemd startup process. If you installed with /boot set to ext3 via the installer, everything should just work and you’ll be up and running!

If you had to do the xfs to ext3 conversion trick, the bootup process will explode with scary errors like the following:

.......
[ TIME ] Timed out waiting for device dev-disk-by\x2duuid-245...95b2c23.device.
[DEPEND] Dependency failed for /boot.
[DEPEND] Dependency failed for Local File Systems.
[DEPEND] Dependency failed for Relabel all filesystems, if necessary.
[DEPEND] Dependency failed for Mark the need to relabel after reboot.
[  101.134423] systemd-journald[414]: Received request to flush runtime journal from PID 1
[  101.658465] type=1305 audit(1405735466.679:4): audit_pid=476 old=0 auid=4294967295 ses=4294967295 subj=system_u:system_r:auditd_t:s0 res=1
Welcome to emergency mode! After logging in, type "journalctl -xb" to view
system logs, "systemctl reboot" to reboot, "systemctl default" to try again
to boot into default mode.
Give root password for maintenance
(or type Control-D to continue):

The issue is that the conversion of the filesystem changed it’s UUID, plus the filesystem type in /etc/fstab no longer matches.

We can fix this easily by dropping to the recovery shell by entering the root password above and executing the following commands:

guest# sed -i -e '/boot/ s/UUID=[0-9\-]*/\/dev\/xvda1/' /etc/fstab
guest# sed -i -e '/boot/ s/xfs/ext3/' /etc/fstab
guest# cat /etc/fstab | grep '/boot'

Make sure the cat returns a valid /boot line, it should be using /dev/xvda1 as the device and ext3 as the filesystem now.

Finally, stop and start the instance (reboots seem to hang for me):

guest# shutdown -h now
xm create -c vmguest1

It should now boot correctly! Go forth and enjoy your new VM!

CentOS Linux 7 (Core)
Kernel 3.10.0-123.el7.x86_64 on an x86_64

This is certainly a hack – doing this backport of pygrub solved my personal issue, but it’s entirely possible it may break other things, so do your own testing and determine whether it’s suitable for you and your environment or not.

Funny tasting Squid Resolver

squid_logoSquid is a very popular (and time tested) proxy server, it’s generally the go-to solution for a  proxy server in a *nix environment and is capable of providing general caching proxy services (including transparent) as well as more sophisticated reverse proxy solutions.

I recently ran into an issue where Squid was refusing to resolve some DNS addresses on our network – not an uncommon problem if using a public DNS server instead of an internal-only DNS server by mistake.

The first step was to check the nameservers listed in /etc/resolv.conf and make sure they were correct and returning valid results. In this case they were, all the name servers correctly resolved the address without any issue.

Next step was to check for specific configuration in Squid – some applications like Squid and Nginx allow you to specifically set their nameservers to something other than the contents of /etc/resolv.conf. In this case, there was no such configuration, in fact there was no configuration relating to DNS at all, meaning it would have to fall back to the operating system resolver.

Or does it? Generally Linux applications use the OS resolver which follows a set order to discover hosts defined explicitly in /etc/hosts, or tries the nameservers in /etc/resolv.conf. When either file is changed, the changes are reflected immediately on the next query for those addresses.

However Squid has it’s own approach. Unless it’s using DNS name servers specifically defined in it’s configuration file, instead of using the OS resolver it reads the configuration in /etc/resolv.conf as a once-off startup action, then continues to use the name servers that were defined for the lifetime of the process.

You can see this in the logs – at startup time Squid logs the servers it’s using in cache.log:

# grep nameserver /var/log/squid/cache.log
2014/07/02 11:57:37| Adding nameserver 192.168.1.10 from /etc/resolv.conf

From this, the sequence of events is simple to figure out:

  1. A server was brought online, using a public DNS server that lacked some of our internal records.
  2. Squid was started up, reading in that DNS server from /etc/resolv.conf.
  3. The DNS server addresses were corrected and immediately resolved all other applications – but Squid stuck with the old address still, so continued to refuse the queries.

Resolving the immediate issue is as simple as restarting the Squid process to force it to pickup the new resolver settings. But what if your DNS server values could change at any future stage without warning?

If you’re using Puppet, you could use a custom fact (like this one) that exposes the current name servers on the system, then writes them into the Squid configuration file using the dns_nameservers configuration parameter and notifies the Squid service to reload on any change of the configuration file.

Or if your squid server is always going to be using a particular DNS server, regardless of what the host is using, you can simply set the dns_nameservers parameter in Squid to point to the desired servers.

Thunderbolt and other Macbook hardware issues with Linux

Having semi-recently switched to a Macbook Pro Retina 15″ at work, I decided to give MacOS a go. It’s been interesting, it’s not too bad an operating system and whilst it is something I could use on an ongoing basis, I quickly longed for the happy embrace of GNU/Linux where I have a bit more power and control over the system.

Generally the Linux kernel supports most of the Macbook hardware out-of-the-box (As of 3.15 anyway), but with a couple exceptions:

  • I believe support for the dual GPU mode switching is now fixed, however the model I’m using now is Intel only, so I can’t test this unfortunately.
  • The Apple Webcam does not yet have a driver. The older iSight driver doesn’t work, since the new gen of hardware is a PCIe connected device, not USB.
  • The WiFi requires a third party driver to be built for your kernel. You’ll want the latest Broadcom 802.11 STA driver in order for it to built with new kernel versions. Ubuntu users, get this version, or more recent.
  • If you’re having weird hangs where the Macbook just halts frequently waiting on on I/O, add “libata.force=noncq” kernel parameter. It seems that there is some bug with this SSD and some kernel versions that leads to weird I/O halts, which is fixed by this option.
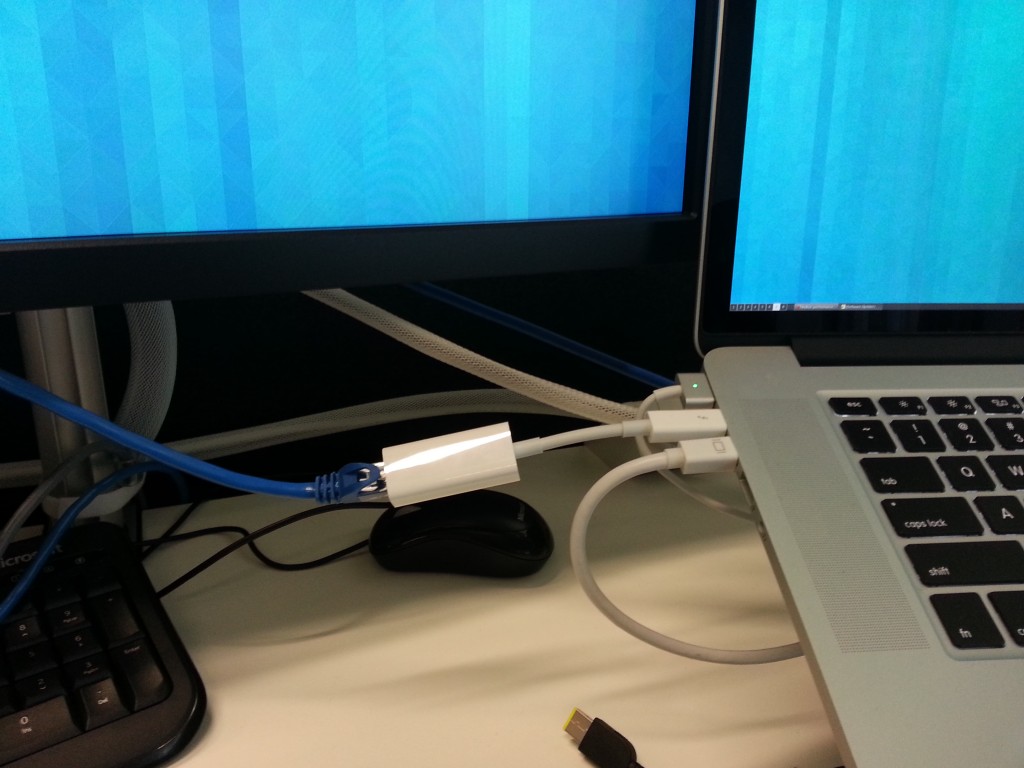
  • Thunderbolt support is limited to only working on devices connected at boot up, no hotplug. Additionally, when using Thunderbolt, Suspend/Resume is disabled (although it works otherwise if there’s no Thunderbolt involved).

Of all these issues, the lack of Thunderbolt support was the one that was really frustrating me, since I need to use a Thunderbolt based Ethernet adaptor currently on a daily basis and I always rely on Suspend and Resume heavily.

Thankfully two kernel developers, Andreas Noever and Matthew J Garrett have been working on a series of kernel patches that introduce support for Thunderbolt hotplug and thus allow it to work on suspend and resume.

Sadly whilst this patch is awesome, it doesn't yet do wireless Thunderbolt for when the ethernet cable you want is too bloody short.

You too can now enjoy the shackles of a wired LAN connection like it’s 1990 all over again!

It doesn’t sound like it has been easy based on the posts on MJG’s blog which are well worth a read – essentially the Apple firmware does weird things with the Thunderbolt hardware when the OS doesn’t identify itself as Darwin (MacOS’s kernel) and likes to power stuff down after suspend/resume, so it’s taken some effort to debug and put in hardware-specific workarounds.
It will surely only be a matter of time before these awesome patches are merged, but if you need them right now and are happy to run rather beta kernel patches (who isn’t??) then the easiest way is to checkout their Git repo of 3.15 with all the patches applied. This repository should build cleanly via the usual means, and provide you with a new kernel module called “thunderbolt”.I’ve been testing it for a few days and it looks really good. I’ve had no kernel panics, freezes, devices failing to work or any issues with suspend/resume with these patches – the features that they claim to work, just work.  The only catches are:

  • If you boot the Macbook with the Thunderbolt device attached, it will be treated like a PCIe hotplug device… except that when you remove it, that Thunderbolt port won’t work again until the next restart. I recommend booting the Macbook with no devices attached, then hotplug once started to avoid this issue. I always remove before suspend and re-connect after resume as well (mostly because it’s a laptop and it’s easy to do so and avoid any issues).
  • The developers advise that Thunderbolt Displays don’t work at this time (however Mini DisplayPort connected screens work fine, even though they share the same socket).
  • The developers advise that chaining Thunderbolt devices is not yet supported. So stick to one device per port for now.

If you’re using Linux on a Macbook, I recommend grabbing the patched source and doing a build. Hopefully all these patches make their way into 3.16 or 3.17 and make this post irrelevant soon.

If you’re extra lazy and trust a random blogger’s binary packages, I’ve built deb packages for Ubuntu 13.10 (and should work just fine on 14.04 as well) for both the Thunderbolt enabled kernel as well as the Broadcom WiFi. You can download these packages here.

There are no seasons in the datacenter

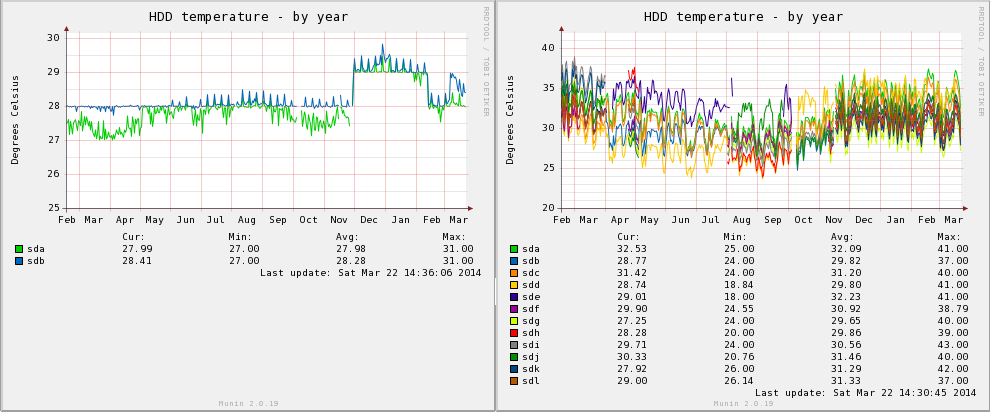
I always like reviewing the Munin temperature graphs between my co-located server and my home server, the temperature range fluctuations in non-air conditioned rooms is always quite interesting – as much as 25 degrees Celsius over the course of the year, inline with the seasons.

Tmp

Co-location machine (left), home machine (right).

t,p

Co-location machine (left), home machine (right).

The awesome tablet money can’t buy

Most people working in technology and have heard of and formulated some opinion about the Microsoft Surface tablet, now in it’s second generation of hardware. For some it’s a poor attempt to compete with the iPad, for others it’s the greatest laptop replacement they’ve ever seen, destined to bring the brilliance of Windows 8.1 to the masses.

Surface

Whilst I think it’s good for Apple and Android to have some competition in the tablet market, the Windows platform itself is of no interest to a GNU/Linux using, free-software loving individual like myself. What I do find interesting about the Microsoft Surface, is not the software, but rather the excellent high-specification hardware they’ve managed to cram into 980g of handheld excellence.

I’ve been using my Lenovo X201i Thinkpad for about 4 years now and it’s due for an upgrade – whilst still very functional, the lack of AES-NI and a low resolution display and poor GPU is starting to get quite frustrating, not to mention the weight!

The fully speced Microsoft Surface 2 Pro features a Core i5 CPU, 8GB of RAM and 512GB SSD, plus the ability to drive up to two external displays – qualities that would make it suitable as my primary workstation, whether on the go, or docked into larger displays at home – essentially a full laptop replacement.

Since the Microsoft Surface Pro 2 is x86-based and supports disabling secure-boot, it is possible to run GNU/Linux natively on the device, suddenly making it very attractive for my requirements.

It’s not a perfect device of course – the unit is heavy by tablet standards, and the lack of a 3G or LTE modem is a frustrating limitation. Battery life of the x86 Pro series is not where near as good as a low power ARM chip (although the Haswell Core i5 certainly has improved things over the generation 1 device)..

There’s also the question of cost, the fully speced unit is around $2,600 NZD which puts it in the same bracket as high end expensive laptops.

Remember ads? Before adblocker?

Personally I feel these ads need more design effort other than the product name and the convincing slogan of “Get it”!

Microsoft has certainly spared no expense advertising the Surface. With billboards, placement marketing in TV series and internet advertising, it’s hard not to notice them. Which is why it’s even more surprising that Microsoft made the monumental mistake of not stocking enough units to buy.

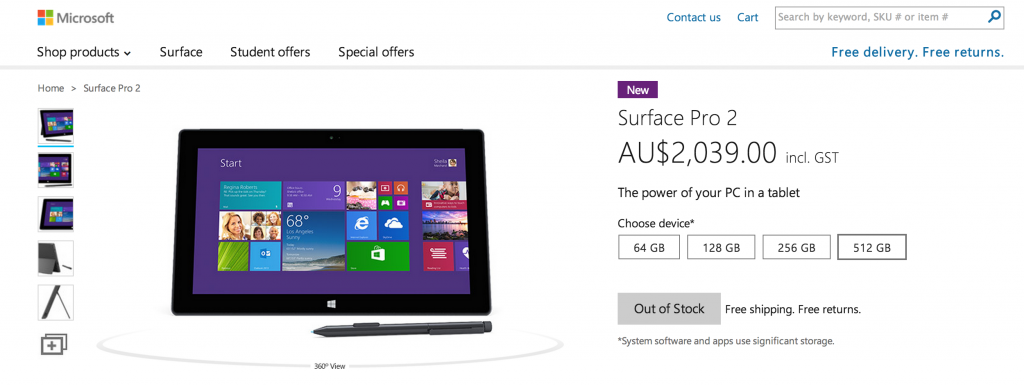
I’m not sales or marketing expert, but generally my understanding is that if you want people to buy something, you should have stock to sell to them. If I walk into the Apple store down the road, I can buy an iPad in about 5mins. But if I try to buy the competing Microsoft Surface, I get the depressing statement that the unit is “Out of Stock”:

All models of Surface Pro 2, out of stock on AU online store.

All models of Surface Pro 2, out of stock on AU online store.

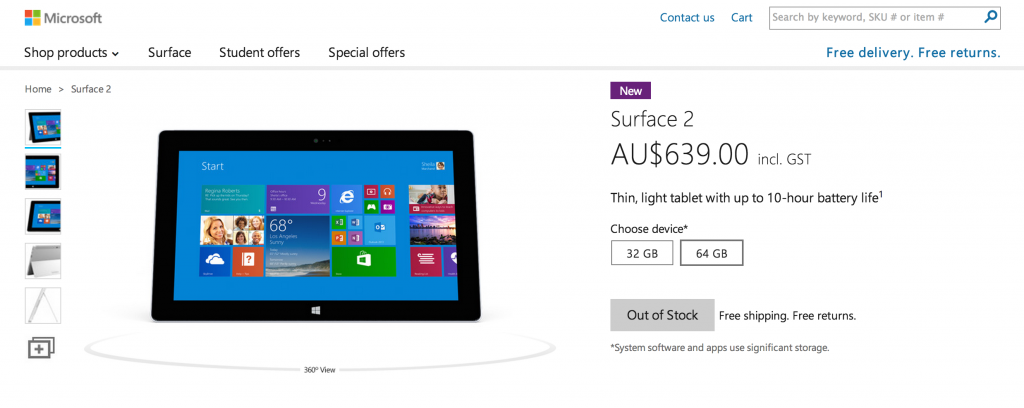
In fact, even it’s less loved brother, the ARM-based Windows RT version which can’t run anything other than Microsoft Store applications is out of stock as well.

Even the fundamentally flawed RT-family of devices is sold out.

Even the feature limited RT-family of devices is sold out.

The tablets seem to have been out of stock since around December 2013, which suggests that the Christmas sales exhausted all the stock and Microsoft has been unable to resupply it’s distributors.

Possibly Microsoft limited the volume of units manufactured in fear of ending up with unsold units (like the difficult to shift Surface RT Gen-1 series that got written down) and didn’t manufacture as many units as they otherwise would have – a gamble that has shown itself to be a mistake. I wonder how many missed sales have resulted, where people gave up waiting and either went for a third party Windows tablet, or just purchased an iPad?

Microsoft hasn’t even provided an ETA for more stock or provided an email option to be advised and get first dibs on new stock when it arrives eventually.

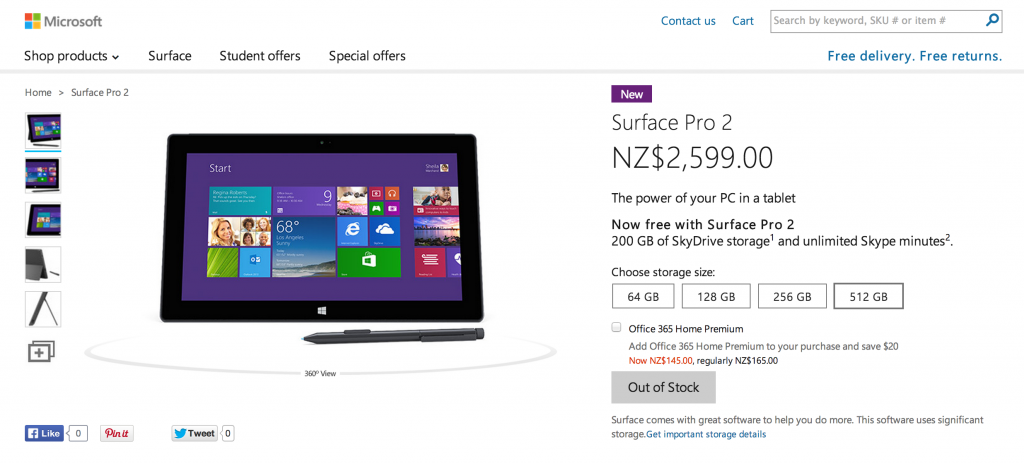
Of interest, when comparing NZ and AU stock availability and pricing, the price disparity isn’t too bad. The top model Surface Pro 2 costs AUD $1854 excluding GST, whereas the New Zealand model sells for NZD $2260 excluding GST, which is currently around AUD $2137.

This is a smallish difference of around $283, but this is probably due to Microsoft pricing the tablet when the exchange rate was around $0.80 AUD to $1 NZD.

What I would expect, is that when they (eventually!) import additional stock to replenish supplies, the pricing should be re-adjusted to suit the current exchange rate – which is more around $0.95 AUD to $1 NZD.

Kiwi pricing

Kiwi pricing is a bit more eh bru? 15% GST vs 10% GST in Australia is the biggest reason for the disparity.

Whether they do this or not, remains to be seen – but considering how expensive it is, if they can drop the price without impacting the profit margin it could only help make it more attractive.

For now, I’m just keeping an eye on the stock – in many ways not being able to buy one certainly helps the house fund, but the fact is that I need to upgrade my Lenovo laptop at some point in the next year at the latest. If Microsoft can sort out their stock issues, the Surface could well be that replacement.

Jethro does Mac: Retina Display

With a change in job, I recently shifted from my primary work computer being a Lenovo X1 Carbon running GNU/Linux to using an Apple Macbook Pro Retina 15″ running MacOS.

It’s not the first time that I’ve used MacOS as my primary workstation, but I’ve spent the vast majority of my IT life working in a purely GNU/Linux environment so it was interesting having to try and setup my usual working habits and flow with this new platform.

I’m going to do a few blog posts addressing my thoughts and issues with this platform and how I’ve found it compared to my GNU/Linux laptops. I’m going to look at both hardware and software and note down a few fixes and tricks that I’ve learnt along the way.


Part 1: The Retina Display

Apple is known for their hardware quality – the Macbook Pro Retina 15″ I am using is a top-of-the-line machine with a whopping Core i7, 16GB of RAM and 512GB SDD, Nvidia GPU and the massive 2880×1800 pixel Retina LCD display. Whilst the hardware is nice, it’s something that can be found with other vendors – what really makes it interesting, is the massive high resolution display.

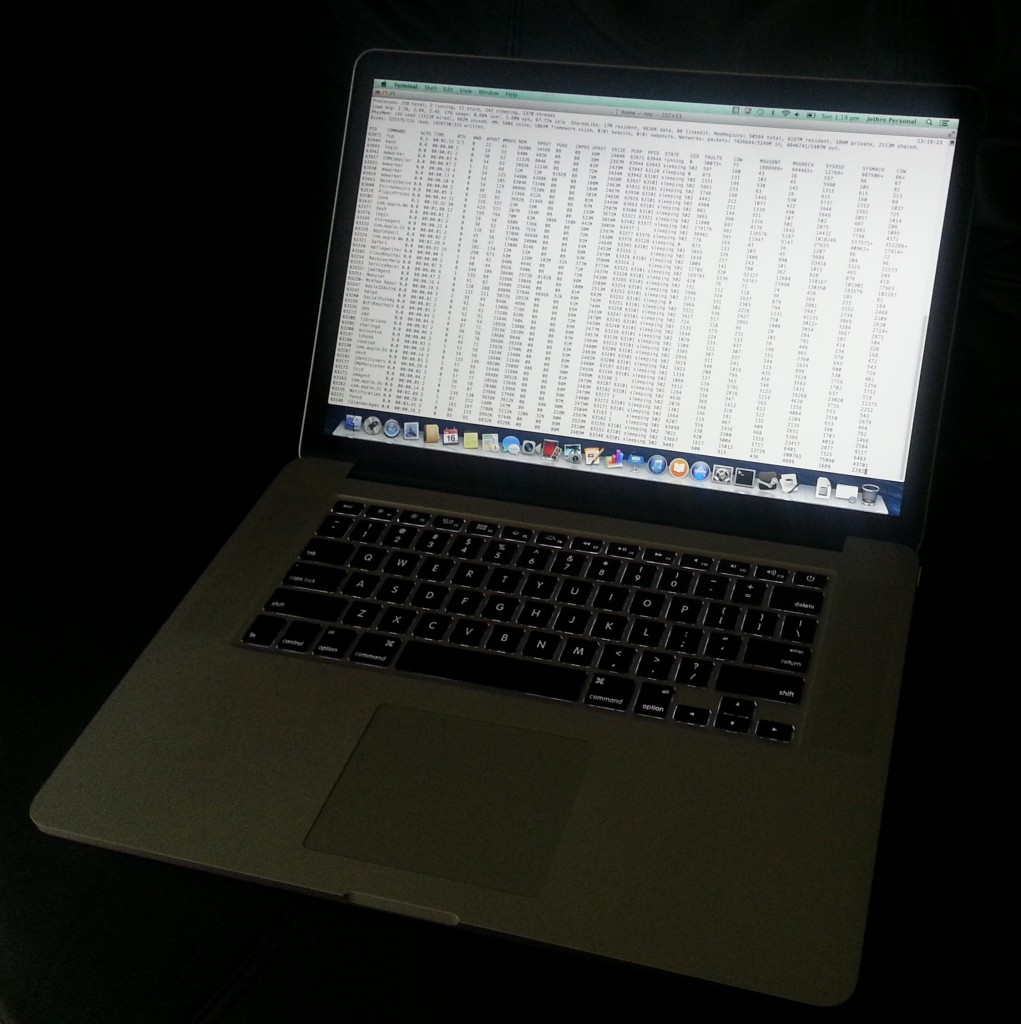
Shiny shiny

Shiner than a Thinkpad. But is it just a showoff?

Unfortunately for all the wonderfulness that Retina advertises, it’s given me more grief than happiness so far. My main issue, is how Apple handles this massive high resolution display.

Out of the box you get a scaled resolution that looks like any standard MacOS laptop, rather than the full native resolution of the display. Apple then does some weird black magic with their UI layer, where the actual display is rendered on a massive virtual 3360 x 2100 resolution virtual display and is then scaled down to the actual display size of 2880 x 1800 pixels.

The actual resolutions available to the end user aren’t real resolutions, but rather different modes that essentially look/feel like 1920×1200, 1680×1050, 1440×900 (the default for Retina), 1280×800 and 1024×640, but in the background MacOS is just scaling application windows to these sizes.

There’s some more details about the way the Retina display and MacOS work on the AnandTech review here.

If you come from a Windows or GNU/Linux world where the screen resolution is what it says on the box, it’s a really weird mindshift. You’ll quickly find this approach is common to the Apple ecosystem – so much stuff that I understand about computers is difficult to figure out with MacOS due to the way Apple hides everything and instead of using the technical terminology, hides it behind their own terminology designed to make it “easier” for normal users. And maybe it does… but for me, it’s more of a hindrance, rather than a help.

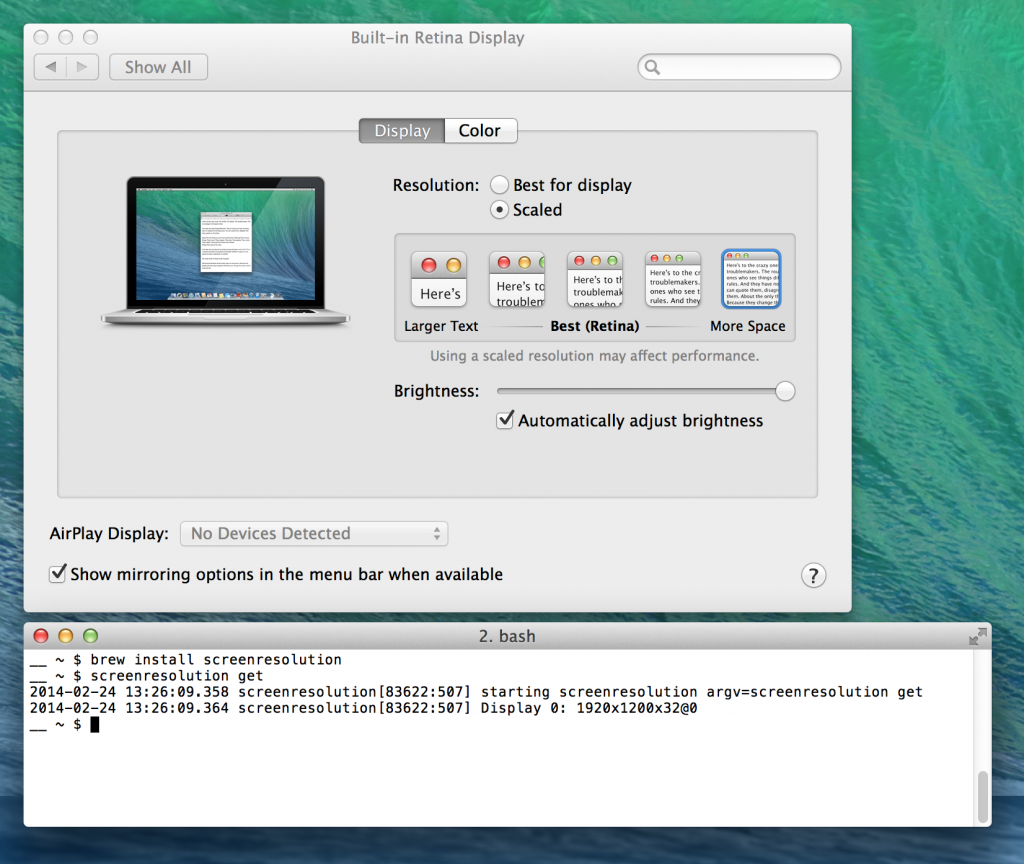
Apple's Settings window isn't that helpful at explaining the real resolutions underneath. Use

Apple’s Settings window isn’t that helpful at explaining the real resolutions underneath, in my case I had to get “screenresolution” from Brew in order to figure out what resolution this machine was actually displaying.

So which size and mode do I use? The stock screen resolution is OK for a laptop and maybe you’ll like it perfectly if you’re using Retina optimised applications (eg Aperture) where having a lower effective resolution, but high DPI for the content is useful.

Default scaled mode - effectively 1440x900

Default scaled mode – effectively 1440×900

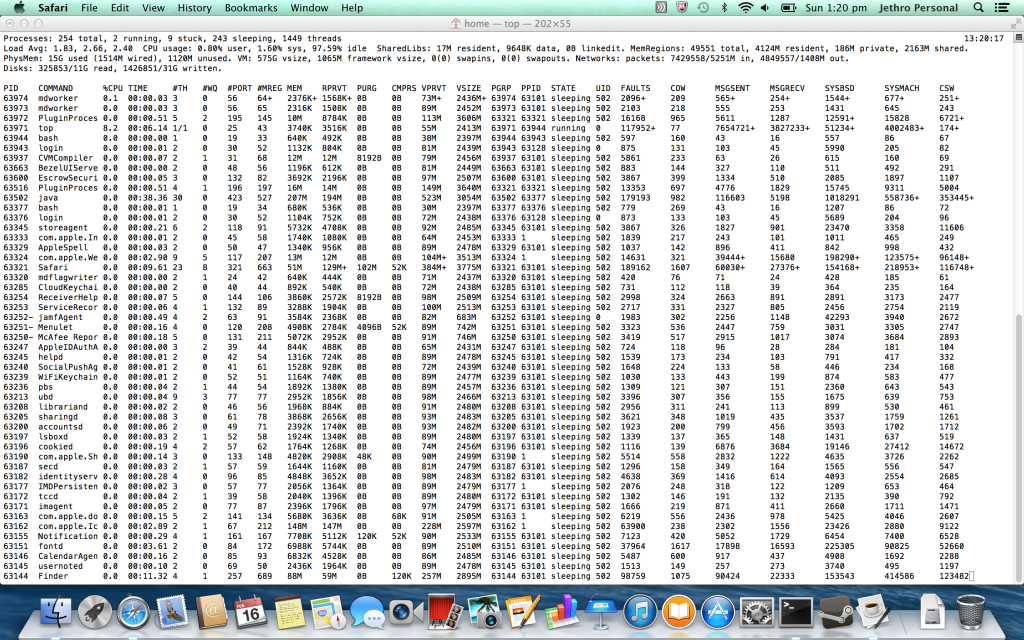
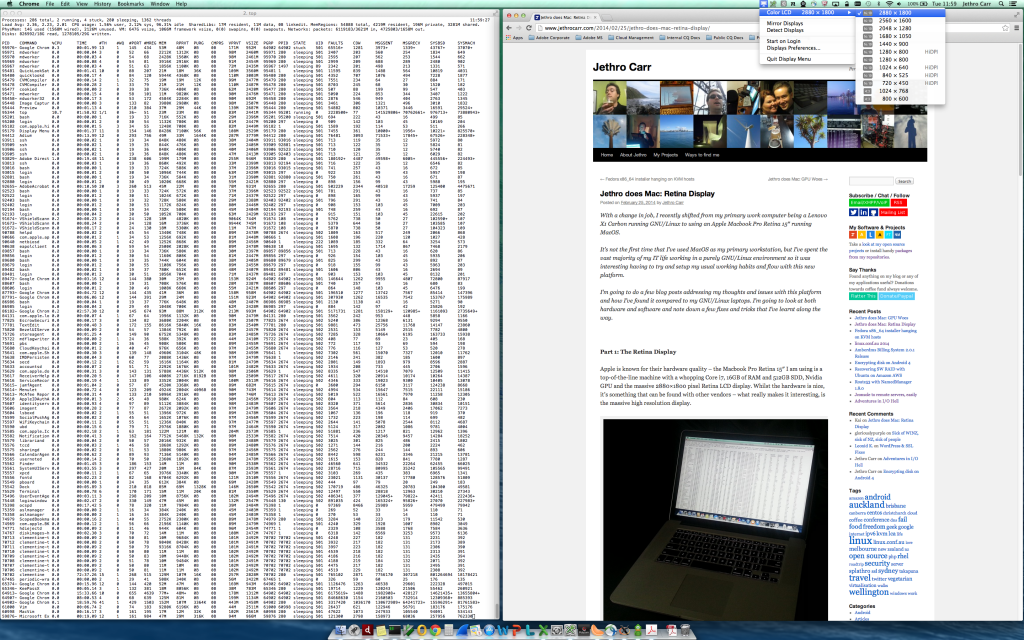
However for me, where most of my use case is email, terminal and a browser, I wanted the ability to fit the most possible information onto the screen, so I ended up using the “More Space” resolution, which drives the display at a 1920×1200-like scaled resolution.

The "More Space" mode is handy for fitting decent amounts of console output.

The “More Space” mode is handy for fitting decent amounts of console output.

Whilst the Retina display is an excellent equal to a 24″ monitor (which have a resolution around 1920×1080, almost the same as the “More Space” mode), it doesn’t quite meet my dream hope which was that it would equal a 27″ monitor.

27″ monitors are the holy grail for me, since they have a resolution of 2560 x 1080, which is big enough to fit two large A4 sized windows on the screen at the same exact time.

Good, but not as good as a nice 27" panel.

It’s functional, but not as natural-feeling as doing the same on a 27″ monitor – still feels like trying to squeeze everything in.

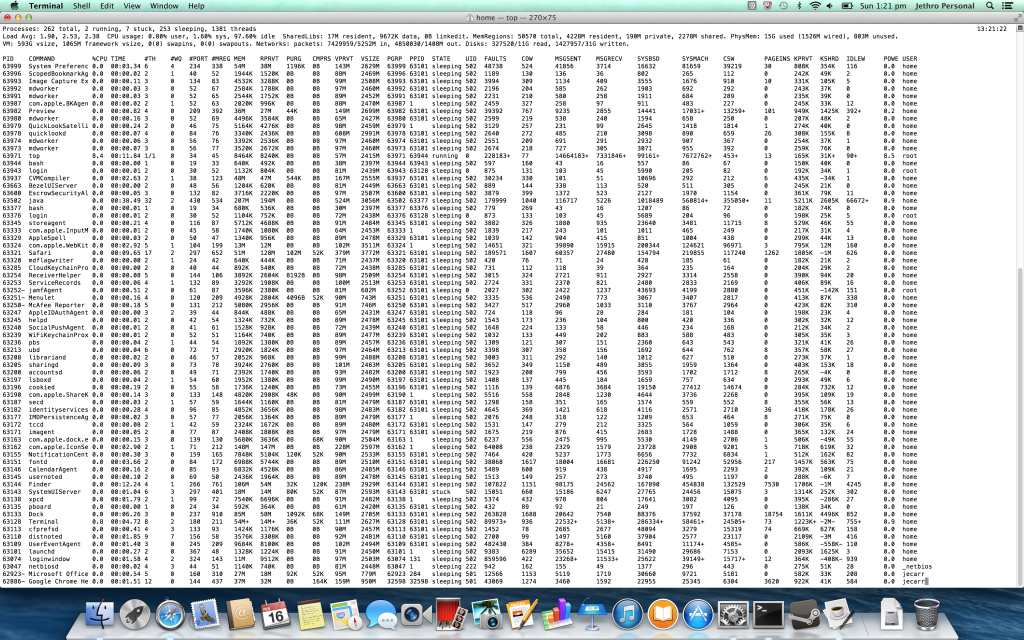
It is possible to bypass Apple’s limitations on resolution get a higher resolution using third party tools, but I can only just read the 1920×1200 comfortably. I tried DisplayMenu (as suggested by Kai in the comments), but whilst the resulting resolution is amazing, I find reading text on it just a bit too small for prolonged periods.

The full 2880x1800 is lovely, but I might need glasses to read it...

The full 2880×1800 is lovely, but I might need glasses to read it…

The other issue with the Retina displays, is that due to the way Apple does the scaling, some applications just end up looking bad and fuzzy due to bitmap stretching and other nastiness – this impacted me with KeepassX, as well as some company-internal web applications.

But when you do get a properly Retina compatible application, things do look beautiful – Google Maps both in vector map and also satellite view look incredibly sharp and clear.

Vectorised graphics were made for Retina

Vectorised graphics were made for Retina

If I was choosing between a laptop with a high resolution display like this and one without, I’d be choosing the former all other factors being considered equal. But I’m not convinced that it’s worth splashing lots of cash on for my particular requirements of terminals and browsing – the Retina screen probably wouldn’t add much for me over a laptop that features a resolution like 1920×1200 native instead of downscaling.


See other posts in this series via the jethro does mac tag as I explore using MacOS after years of GNU/Linux only.

Fedora x86_64 installer hanging on KVM hosts

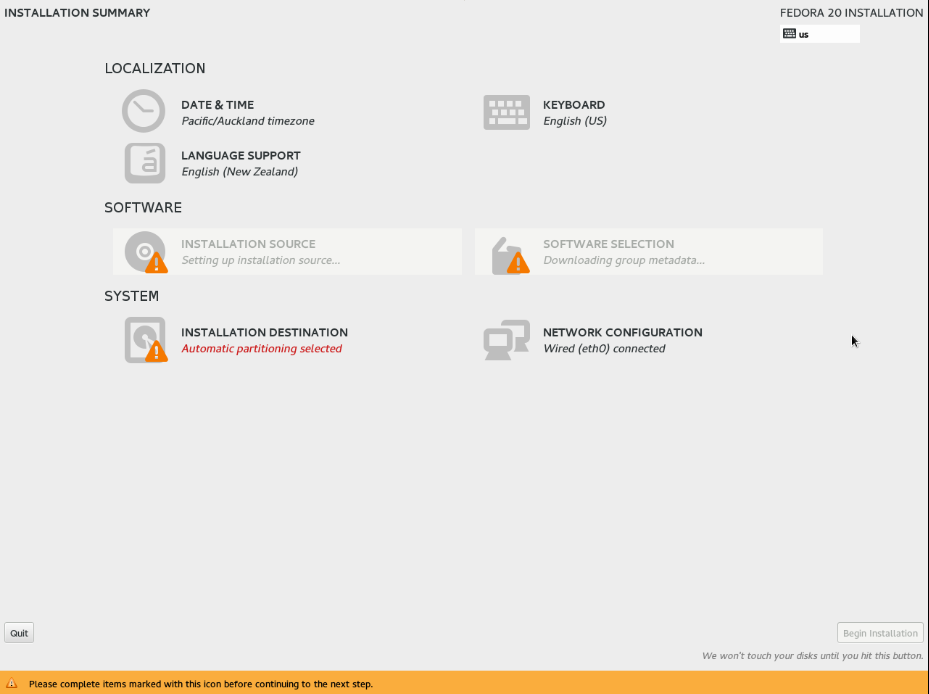
Had an annoying problem today where a Fedora x86_64 guest wouldn’t install on my CentOS KVM server. Weirdly the i386 version had installed perfectly, but the x86_64 version would repeatedly crash and chew up heaps of CPU at the software package selection screen.

I hate being stuck here...

Stuck here, unresponsive console, no mouse, etc?

Turns out that 512MB of RAM isn’t enough to install Fedora x86_64, but is enough to get away with installing Fedora i386 on. Simply boost the RAM allocation of the VM up to 1GB, and the installation will proceed OK. You can drop the RAM allocation down again afterwards.

Unsure why the installer dies in such a strange fashion, I would have expected Linux’s OOM to terminate the installer and leave me with a clear message, but maybe Anaconda is doing something weird like OOM protection and just ends up with the system running out of memory and hanging.

linux.conf.au 2014

I’ve just returned from my annual pilgrimage to linux.conf.au, which was held in Perth this year. It’s the first time I’ve been over to West Australia, it’s a whole 5 hour flight from Sydney –  longer than it takes to fly to New Zealand.

Perth’s climate is a very dry heat compared to Sydney, so although it was actually hotter than Sydney for most of the week, it didn’t feel quite as unpleasant – other than the final day which hit 45 degrees and was baking hot…

It’s also a very clean/tidy city, the well maintained nature was very noticeable with the city and gardens being immaculately trimmed – not sure if it’s always been like this, or if it’s a side effect of the mining wealth in the economy allowing the local government to afford it more effectively.

The towering metropolis of mining wealth.

The towering metropolis of mining wealth.

As usual, the conference ran for 5 full days and featured 4-5 concurrent streams of talks during the week. The quality was generally high as always, although I feel that content selection has shifted away from a lot of deep dive technical talks to more high level talks, and that OpenStack (whilst awesome) is taking up far too much of the conference and really deserves it’s own dedicated conference now.

I’ve prepared my personal shortlist of the talks I enjoyed most of all for anyone who wants to spend a bit of time watching some of the recorded sessions.


Interesting New(ish) Software

  1. RatticDB – A web-based password storage system written in Python written by friends in Melbourne. I’ve been trialling it and since then it’s growing in popularity and awareness, as well as getting security audits (and fixes) [video] [project homepage].
  2. MARS Light – This is an insanely awesome replacement for DRBD designed to address the issues of DRBD when replicating over slower long WAN links. Like DRBD, MARS Light is a block-level replication, so ideal for entire datacenter and VM replication. [video] [project homepage].
  3. Pettycoin – Proposal/design for an adjacent network to Bitcoin designed for microtransactions. It’s currently under development, but is an interesting idea. [video] [project homepage].
  4. Lua code in Mediawiki – the Mediawiki developers have added the ability for Wikipedia editors to write Lua code that is executed server side which is pretty insanely awesome when you think about how normally nobody wants to allow untrusted public the ability to remote execute code on systems. The developers have taken Lua and created a “safe” version that runs inside PHP with restrictions to make this possible. [video] [project homepage].
  5. OpenShift – RedHat did a demonstration on their hosted (and open source) PAAS platform, OpenShift. It’s a solution I’ve been looking at before, if you’re a developer whom doesn’t care about infrastructure management, it looks very attractive. [video] [project homepage].


Evolution of Linux

  1. D-Bus in the Kernel – Lennart Pottering (of Pulseaudio and SystemD fame) presented the efforts he’s been involved in to fix D-Bus’s shortcomings and move it into the kernel itself and have D-Bus as a proper high speed IPC solution for the Linux kernel. [video]
  2. The Six Stages of SystemD – Presentation by an engineer who has been moving systems to SystemD and the process he went through and his thoughts/experience with SystemD. Really showcases the value that moving to SystemD will bring to GNU/Linux distributions. [video]
  3. Development Tools & The UNIX Philosophy – Excellent talk by a Python developer on how we should stop accepting command-line only tools as being the “right” or “proper” UNIX-style tools. Some tools (eg debuggers) are just better suited for graphical interfaces, and that it still meets the UNIX philosophy of having one tool doing one thing well. I really like the argument he makes and have to agree, in some cases GUIs are just more suitable for some tasks. [video]


Walkthroughs and Warstories

  1. TCP Tuning for the Web – presented by one of the co-founders of Fastly showing the various techniques they use to improve the performance of TCP connections and handle issues such as DDOS attacks. Excellent talk by a very smart networking engineer. [video]
  2. Massive Scaling of Graphite – very interesting talk on the massive scaling issues involved to collect statistics with Graphite and some impressive and scary stats on the lifespans and abuse that SSDs will tolerate (which is nowhere near as much as they should!). [video]
  3. Maintaining Internal Forks – One of the FreeBSD developers spoke on how his company maintains an internal fork of FreeBSD (with various modifications for their storage product) and the challenges of keeping it synced with the current releases. Lots of common problems, such as pain of handling new upstream releases and re-merging changes. [video]
  4. Reverse engineering firmware – Mathew Garrett dug deep into vendor firmware configuration tools and explained how to reverse engineer their calls with various tools such as strace, IO and memory mapping tools. Well worth a watch purely for the fact that Matthew Garrett is an amazing speaker. [video]
  5. Android, The positronic brain – Interesting session on how to build native applications for Android devices, such as cross compiling daemons and how the internal structure of Android is laid out. [video]
  6. Rapid OpenStack Deployment – Double-length Tutorial/presentation on how to build OpenStack clusters. Very useful if you’re looking at building one. [video]
  7. Debian on AWS – Interesting talk on how the Debian project is using Amazon AWS for various serving projects and how they’re handling AMI builds. [video]
  8. A Web Page in Seven Syscalls – Excellent walk through on Varnish by one of the developers. Nothing too new for anyone who’s been using it, but a good explanation of how it works and what it’s used for. [video]


Other Cool Stuff

  1. Deploying software updates to ArduSat in orbit by Jonathan Oxer – Launching Arduino powered satelittes into orbit and updating them remotely to allow them to be used for educational and research purposes. What could possibly be more awesome than this? [video].
  2. HTTP/2.0 and you – Discussion of the emerging HTTP/2.0 standard. Interesting and important stuff for anyone working in the online space. [video]
  3. OpenStreetMap – Very interesting talk from the director of OpenStreetMap Team about how OpenStreetMap is used around disaster prone areas and getting the local community to assist with generating maps, which are being used by humanitarian teams to help with the disaster relief efforts. [video]
  4. Linux File Systems, Where did they come from? – A great look at the history and development cycles of the different filesytems in the Linux kernel – comparing ext1/2/3/4, XFS, ReiserFS, Btrfs and others. [video]
  5. A pseudo-random talk on entropy – Good explanation of the importance of entropy on Linux systems, but much more low level and about what tools there are for helping with it. Some cross-over with my own previous writings on this topic. [video]

Naturally there have been many other excellent talks – the above is just a selection of the ones that I got the most out from during the conference. Take a look at the full schedule to find other talks that might interest, almost all sessions got recorded during the conference.

Encrypting disk on Android 4

Traditional computer operating systems have been around for a while, long enough that concerns around physical security have been well addressed. We understand the value and power that the information on our computers can provide to an attacker, so we have locked them down with features such as disk encryption, passphrase protected lock screens and techniques to prevent unwanted DMA attacks via high speed buses.

Yet despite the massive development of mobile devices technology in the past several years, a number of these features didn’t manage to make their way into the mobile operating systems as defaults. Whilst we take the time to setup disk encryption on our laptops and maybe desktops, we tend not to bother securing our mobile devices, possibly due to the perception of them being less risky to have exposed, or that they are less attractive targets.

Even a relatively paranoid IT geek like myself with an encrypted laptop, secure passphrases, and VPNs, still had a mobile phone that was protected with nothing more than it’s physical proximity to myself. Anyone gaining physical access to my phone could unlock it, whether it be by guessing a trivial unlock pattern, or by attaching it to another computer and reading the unencrypted filesystem.

And as these mobile devices have increased in functionality, so has the risk of an attacker getting hold of the device. When a mobile phone did nothing but phone calls and txts, having someone gain access would be more of a annoyance when they rack up a bill or prank call your contacts, than a serious risk.

But rather than leave it there, we started adding other productivity features – email, so we could keep in touch on the go. Instant messaging. Fully featured web browers that sync account details, bookmarks and history with your desktop. Banking applications. Access to shared storage solutions like Dropbox. Suddenly a mobile device is a much more attractive target.

And even if we decide that the mobile apps are too limited in scope, there’s  the risk of an attacker using the information such as credentials stored on the device to gain full access to the desktop version of these services. Having an email application that limits the phone to the inbox can reduce risk by protecting your archives, but not if the attacker can obtain your full username/passphrase from the device and then use it to gain full access with some alternative software.

Remember that obtaining credentials from a device isn’t hard – the credentials  have to be kept in some decrypted format somewhere on disk, so even if they’re hashed/obfuscated in some form, they’ll still have the key that enables them to be exposed somewhere on disk.

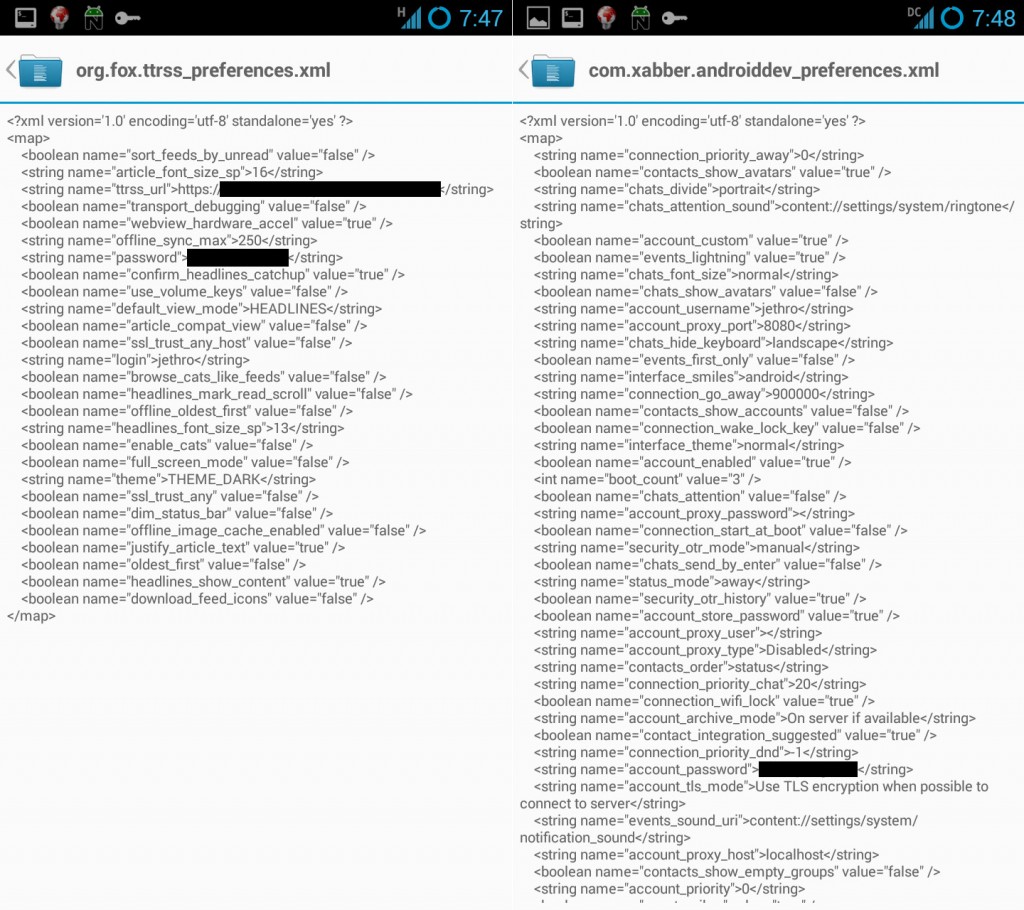
A quick grep through the /data/ volume on my phone revealed numerous applications that had my passphrases in plain text, extremely easy pickings for an attacker.

Mmmm plain text passwords. :-)

Mmmm plain text passwords. :-)

I was getting increasingly concerned with this hole in my security, so recently having replaced my Galaxy Nexus with a Samsung Galaxy Note II, I decided to set it up in a more secure fashion.

Android added disk encryption in Android 3, but it’s suffered two main issues that limits it’s usefulness:

  1. The disk encryption only covers the data volumes (/data, /sdcard) which is good in that it protects the data, but it still leaves the application volumes open to be exploited by anyone wanting to install malware such as key loggers.
  2. Turning on Android disk encryption then forces the user to use either a PIN or a passphrase to unlock their device as swipe or pattern unlock is disabled. For a frequent phone user this is too much of an usability issue, it makes frequent locks/unlocks much more difficult, so users may chose not to use encryption altogether, or choose a very easy/weak passphrase.

The first point I can’t do much about without digging into the low guts of Android, however the second is fixable. My personal acceptable trade-off is a weaker lock screen using a pattern, but being able to have a secure disk encryption passphrase. This ensures that if powered off, an attacker can’t exploit my data and the passphrase is long and secure, but if the phone is running, I take a compromise of security for convenience and ease of use.

There’s still the risk of an attacker installing malware on the non-encrypted OS portion of the mobile device, however if I lose physical access of my phone in an untrusted environment (eg border security confiscation) I can reload the OS from backup.

To setup disk encryption on Android 4 without losing pattern unlock, instead of adjusting via the settings interface, you need to enable it via the shell -easiest way is via the ADB shell in root mode.

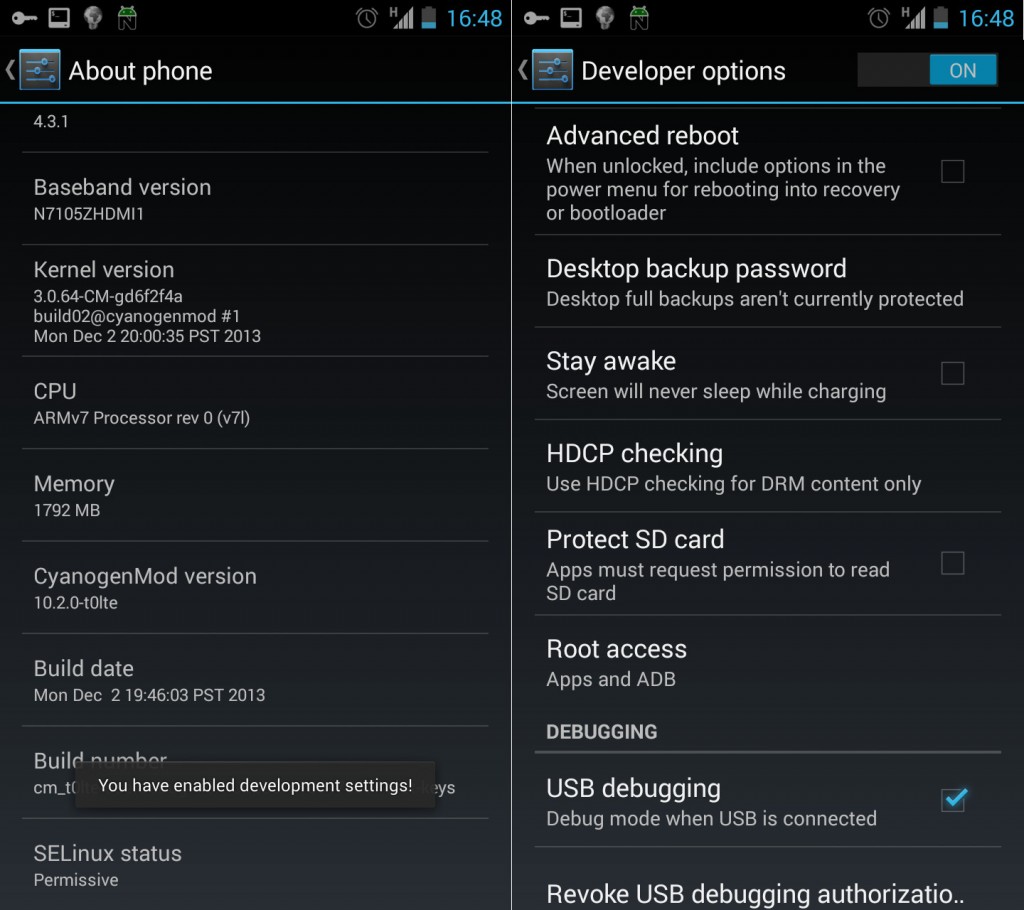
Firstly you need to enable developer mode in Settings -> About Phone by tapping the build number multiple times, until it tells you that the developer mode has been unlocked. Then inside Settings -> Developer options, change the “Root Access” option to “Apps and ADB”.

Enable ADB root for all the fun stuff!

Enable ADB root for all the fun stuff!

Secondly, you need a workstation running the latest version of ADB (ships with the Android ADK under platform-tools) and to connect your phone via USB. Once done, you can enable disk encryption with the following commands (where PASSWORD is the desired encryption passphrase).

user@laptop # adb root
user@laptop # adb shell
root@phone:/ #
root@phone:/ # /system/bin/vdc cryptfs enablecrypto inplace PASSWORD

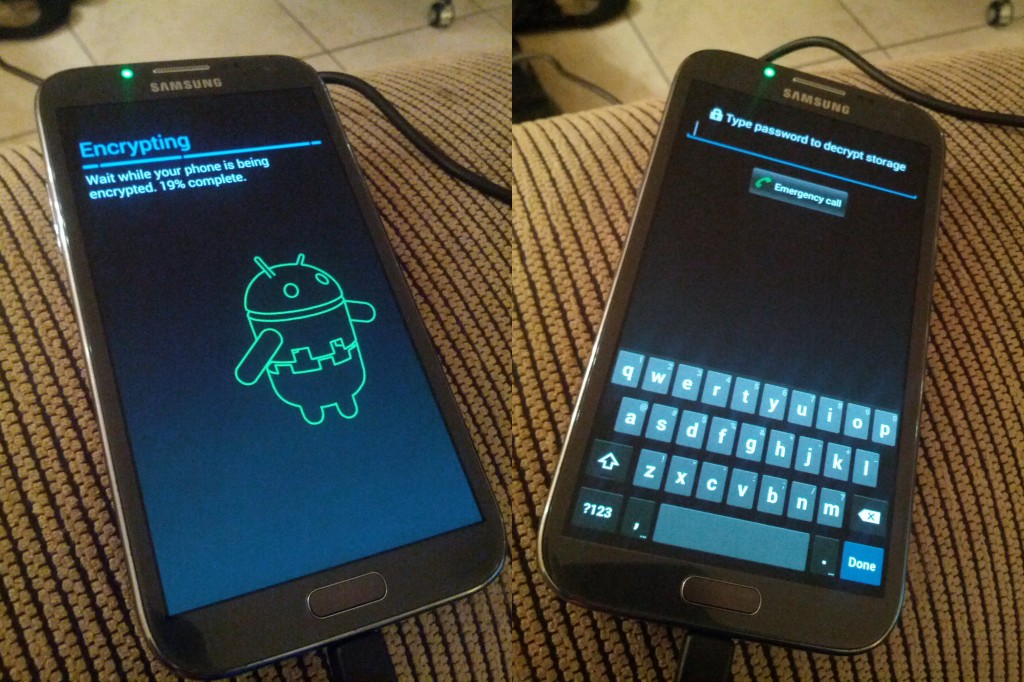
Your Android device will then restart and encrypt itself. This process takes time, factor up to an hour for it to complete it’s work.

Android phone undergoing encryption; and subsequent boot with encryption enabled.

Android phone undergoing encryption; and subsequent boot with encryption enabled.

Once rebooted, your existing pattern based unlock continues to work fine and all your private data and credentials are now secured.

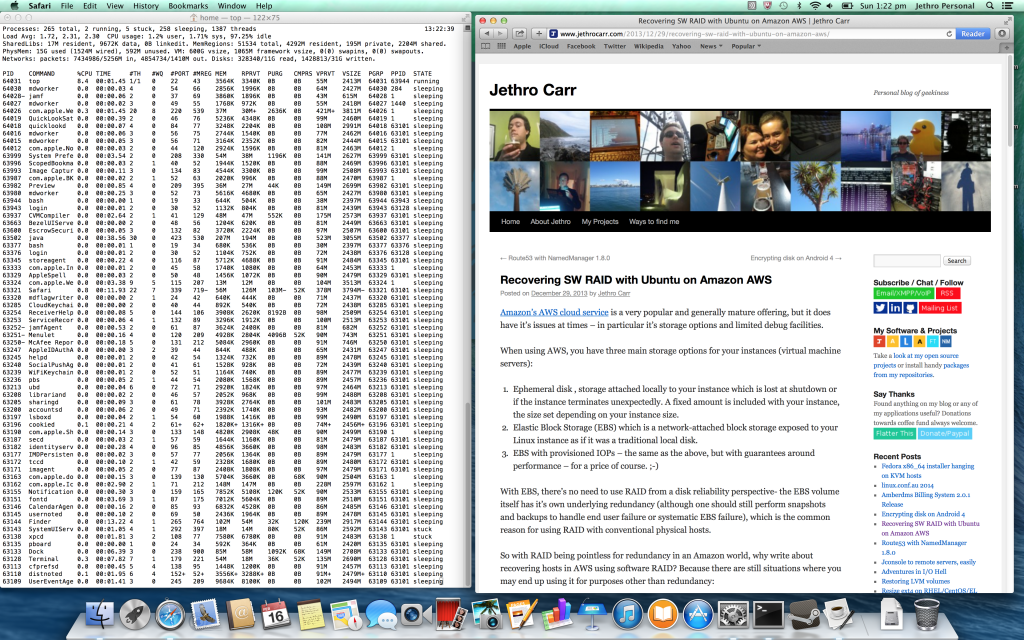
Recovering SW RAID with Ubuntu on Amazon AWS

Amazon’s AWS cloud service is a very popular and generally mature offering, but it does have it’s issues at times – in particular it’s storage options and limited debug facilities.

When using AWS, you have three main storage options for your instances (virtual machine servers):

  1. Ephemeral disk , storage attached locally to your instance which is lost at shutdown or if the instance terminates unexpectedly. A fixed amount is included with your instance, the size set depending on your instance size.
  2. Elastic Block Storage (EBS) which is a network-attached block storage exposed to your Linux instance as if it was a traditional local disk.
  3. EBS with provisioned IOPs – the same as the above, but with guarantees around performance – for a price of course. ;-)

With EBS, there’s no need to use RAID from a disk reliability perspective- the EBS volume itself has it’s own underlying redundancy (although one should still perform snapshots and backups to handle end user failure or systematic EBS failure), which is the common reason for using RAID with conventional physical hosts.

So with RAID being pointless for redundancy in an Amazon world, why write about recovering hosts in AWS using software RAID? Because there are still situations where you may end up using it for purposes other than redundancy:

  1. Poor man’s performance gains – EBS provisioned IOPs are the proper way of getting performance from EBS to meet your particular requirements. But it comes with a cost attached – you pay increasingly more for faster disk, but also need proportionally larger disks minimum sizes to go with the higher speeds (10:1 ratio IOPs:size) which can quickly make a small fast volume prohibitively expensive. A software RAID array can allow you to get more performance by combining numerous small volumes together at low cost.
  2. Merging multiple EBS volumes – EBS volumes have an Amazon-imposed limit of 1TB per volume. If a single filesystem of more than 1TB is required, either LVM or software RAID is needed to merge them.
  3. Merging multiple ephemeral volumes – software RAID can be used to also merge the multiple EBS volumes that Amazon provides on some larger instances. However being ephemeral, if your RAID gets degraded, there’s no need to repair it – just destroy the instance and build a nice new one.

So whilst using software RAID with your AWS Instances can be a legitimate exercise, it can also introduce it’s own share of issues.

Firstly you can no longer use EBS snapshotting to do backups of the EBS volumes, unless you first halt the entire RAID array/freeze the filesystem writes for the duration of all the snapshots to be created – which depending on your application may or may not be feasible.

Secondly you now have the issue of increased complexity of your I/O configuration. If using automation to build your instances, you need to do additional work to handle the setup of the array which is a one-time investment, but the use of RAID also adds complexity to the maintenance (such as resizes) and increases the risk of a fault occurring.

I recently had the excitement/misfortune of such an experience. We had a pair of Ubuntu 12.04 LTS instances using GlusterFS to provide a redundant NFS mount to some of our legacy applications running in AWS (AWS unfortunately lacks a hosted NFS filer service). To provide sufficient speed to an otherwise small volume, RAID 0 had been used with a number of small EBS volumes.

The RAID array was nearly full, so a resize/grow operation was required. This is not an uncommon requirement and just involves adding an EBS volume to the instance, growing the RAID array size and expanding the filesystem on top. Unfortunately something nasty happened between Gluster and the Linux kernel, where the RAID resize operation on one of the two hosts suddenly triggered a kernel panic and failed, killing the host. I wasn’t able to get the logs for it, but at this stage it looks like gluster tried to do some operation right when the resize was active and instead of being blocked, triggered a panic.

Upon a subsequent restart, the host didn’t come back online. Connecting to the AWS Instance’s console output (ec2-get-console-output <instanceid>) showed that the RAID array failure was preventing the instance from booting back up, even through it was an auxiliary mount, not the root filesystem or anything required to boot.

The system may have suffered a hardware fault, such as a disk drive
failure.  The root device may depend on the RAID devices being online. One
or more of the following RAID devices are degraded:
Personalities : [linear] [multipath] [raid0] [raid1] [raid6] [raid5] [raid4] [raid10] 
md0 : inactive xvdn[9](S) xvdm[7](S) xvdj[4](S) xvdi[3](S) xvdf[0](S) xvdh[2](S) xvdk[5](S) xvdl[6](S) xvdg[1](S)
      13630912 blocks super 1.2

unused devices: <none>
Attempting to start the RAID in degraded mode...
mdadm: CREATE user root not found
mdadm: CREATE group disk not found
[31761224.516958] bio: create slab <bio-1> at 1
[31761224.516976] md/raid:md0: not clean -- starting background reconstruction
[31761224.516981] md/raid:md0: reshape will continue
[31761224.516996] md/raid:md0: device xvdm operational as raid disk 7
[31761224.517002] md/raid:md0: device xvdj operational as raid disk 4
[31761224.517007] md/raid:md0: device xvdi operational as raid disk 3
[31761224.517013] md/raid:md0: device xvdf operational as raid disk 0
[31761224.517018] md/raid:md0: device xvdh operational as raid disk 2
[31761224.517023] md/raid:md0: device xvdk operational as raid disk 5
[31761224.517029] md/raid:md0: device xvdl operational as raid disk 6
[31761224.517034] md/raid:md0: device xvdg operational as raid disk 1
[31761224.517683] md/raid:md0: allocated 10592kB
[31761224.517771] md/raid:md0: cannot start dirty degraded array.
[31761224.518405] md/raid:md0: failed to run raid set.
[31761224.518412] md: pers->run() failed ...
mdadm: failed to start array /dev/md0: Input/output error
mdadm: CREATE user root not found
mdadm: CREATE group disk not found
Could not start the RAID in degraded mode.
Dropping to a shell.

BusyBox v1.18.5 (Ubuntu 1:1.18.5-1ubuntu4.1) built-in shell (ash)
Enter 'help' for a list of built-in commands.

Dropping to a shell during bootup problems is an approach that has differing perspectives – personally I want my hosts to boot regardless of how messed up things are so I can get SSH, but others differ and prefer the safety of halting and dropping to a recovery shell for the sysadmin to resolve. Ubuntu is configured to do the latter by default.

But regardless of your views on this subject, dropping to a shell leaves you stuck when running AWS instances, since there is no way to interact with this console – Amazon doesn’t have a proper console for interacting with instances like a traditional VPS provider, you’re limited to only seeing the console log.

Ubuntu’s documentation actually advises that in the event of a failed RAID array, you can still force a boot by setting a kernel option bootdegraded=true. This helps if the array was degraded, but in this case the array had entirely failed, rather than being degraded, and Ubuntu treats that differently.

Thankfully it is possible to recover the failed instance, by attaching it’s volume to another instance, adjusting the initramfs to allow booting even whilst the RAID is failed and then once booted, you can do a repair on the host itself.

To do this repair you require an additional Linux instance to use as a recovery host and the Amazon CLI tools to be installed on your workstation.

# Set some variables with your instance IDs (eg i-abcd3)
export FAILED=setme
export RECOVERY=setme

# Fetch the root filesystem EBS volume ID and set a var with it:
export VOLUME=vol-setme

# Now stop the failed instance, so we can detach it's root volume.
# (Note: wait till status goes from "stopping" to "stopped")
ec2-stop-instances --force $FAILED
ec2-describe-instances $FAILED | grep INSTANCE | awk '{ print $5 }'

# Attach the root volume to the recovery host as /dev/sdo
ec2-detach-volume $VOLUME -i $FAILED
ec2-attach-volume $VOLUME -i $RECOVERY -d /dev/sdo

# Mount the root volume on the recovery host
ssh recoveryhost.example.com
mkdir /mnt/recovery
mount /dev/sdo /mnt/recovery

# Disable raid startup scripts for initramfs/initrd. We need to
# unpack the old file and modify the startup scripts inside it.
cp /mnt/recovery/boot/initrd.img-LATESTHERE-virtual /tmp/initrd-old.img
cd /tmp/
mkdir initrd-test
cd initrd-test
cpio --extract < ../initrd-old.img
vim scripts/local-premount/mdadm
- degraded_arrays || exit 0
- mountroot_fail || panic "Dropping to a shell."
+ #degraded_arrays || exit 0
+ #mountroot_fail || panic "Dropping to a shell."
find . | cpio -o -H newc > ../initrd-new.img
cd ..
gzip initrd-new.img
cp initrd-new.img.gz /mnt/recovery/boot/initrd.img-LATESTHERE-virtual

# Disable mounting of filesystem at boot (otherwise startup process
# will fail despite the array being skipped).
vim /mnt/recovery/etc/fstab
- /dev/md0    /mnt/myraidarray    xfs    defaults    1    2
+ #/dev/md0    /mnt/myraidarray    xfs    defaults    1    2

# Work done, umount volume.
umount /mnt/recovery

# Re-attach the root volume back to the failed instance
ec2-detach-volume $VOLUME -i $RECOVERY
ec2-attach-volume $VOLUME -i $FAILED -d /dev/sda1

# Startup the failed instance.
# (Note: Wait for status to go from pending to running)
ec2-start-instances $FAILED
ec2-describe-instances $FAILED | grep INSTANCE | awk '{ print $5 }'

# Watch the startup console. Note: java.lang.NullPointerException
# means that there is no output from the console yet.
ec2-get-console-output $FAILED

# Host should startup, you can get access via SSH and repair RAID
# array via usual means.

The above is very Ubuntu-specific, but the techniques shown are transferable to other platforms as well – just note that the scripts inside the initramfs/initrd will vary per distribution, it’s one of the components of a GNU/Linux system that is completely specific to the distribution vendor.