Tag Archives: macos

MacOS High Sierra unable to free disk space

I recently ran out of disk space on my iMac. After migrating a considerable amount of undesirable data to either the file server or /dev/null, I found that despite my efforts, the amount of free disk space had not increased.

I was worried it was an issue with the new APFS file system introduced to all SSD-using Macs as of High Sierra, but in this case it turns out the issue is that Time Machine retains local snapshots on disk, in addition to the full backup history that is retained on the network time machine device.

Apple state that they automatically remove local snapshots when disk space is low, but their definition of low is apparently only 5GB of free space remaining – not really much free working space in 2017 when you might want scratch space of 22GB for 1 hour of 4k 30FPS footage.

On older MacOS releases, it was possible to disable the local snapshot feature entirely, this doesn’t seem to be the case with High Sierra – but it does appear to be possible to force an immediate purge of local snapshots with the following command:

sudo tmutil thinLocalSnapshots / 10000000000 4

For example;

Back into the time vortex with you, filthy snapshots!

Note that this snapshot usage is not visible as a distinct item in the Disk Utility or Storage Management application.

In my case, all the snapshots appeared to be within the last 24 hours, so if I hadn’t urgently needed the disk space, I suspect the local snapshots would have flushed themselves after a 24 hour period restoring considerable disk space.

The fact this isn’t an opt-in user-accessible feature is a shame. It adds convenience for a user of not having to get physical access to the backup drive or time capsule-like-thingy in order to restore data, but any users of systems with SSD-only storage are likely to be a bit precious about how every GB is used and there’s almost no transparency about how much space is being consumed. Especially annoying when you urgently need more space and are stuck wondering why nothing is freeing up room…

Macbook Pro 2016

Having recently changed jobs (Fairfax/Stuff -> Sailthru/Carnival), the timing worked out so that I managed to get one of the first new USB-C 2016 Macbook Pros. A few people keep asking me about the dongle situation, so figured I’d just blog about the machine.

Some key things to keep in mind:

  • I don’t need to attach much in the way of USB devices. Essentially I want my screen and input devices when docked at the office, but I have no SD cards and don’t generally swap anything with USB flash drives.
  • My main use case is pushing bits to/from the cloud. Eg web browser, terminals, some IDE usage. Probably the heaviest task I’d throw at it would be running something like IntelliJ or Xcode.
  • I value portability more than performance.
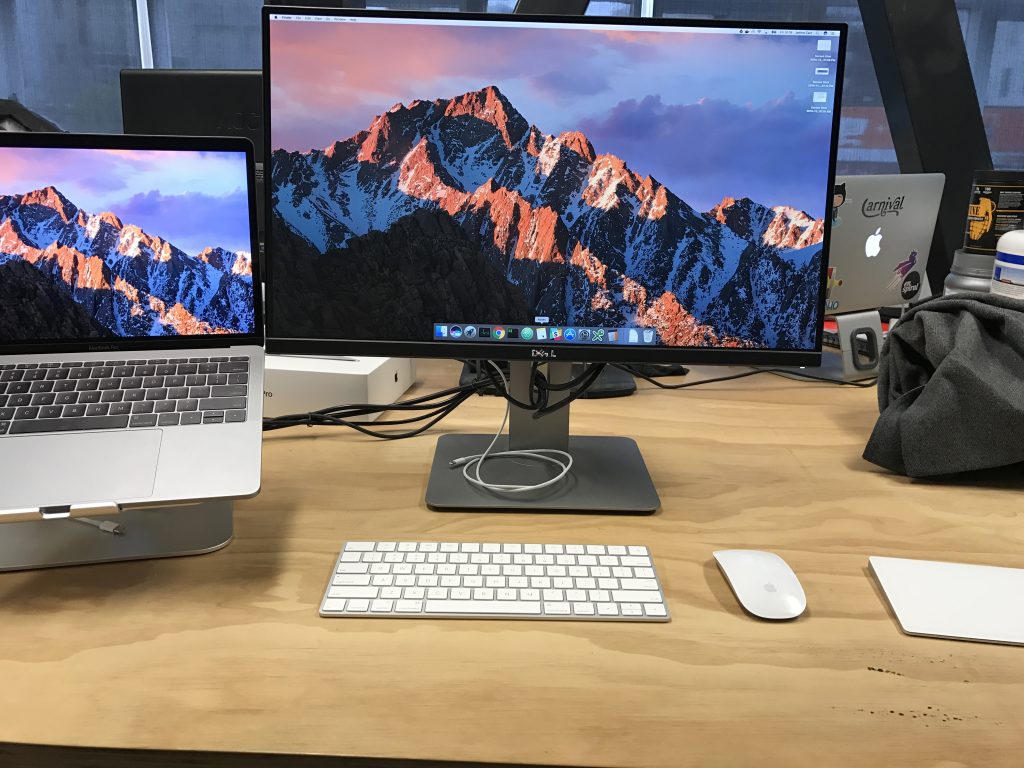
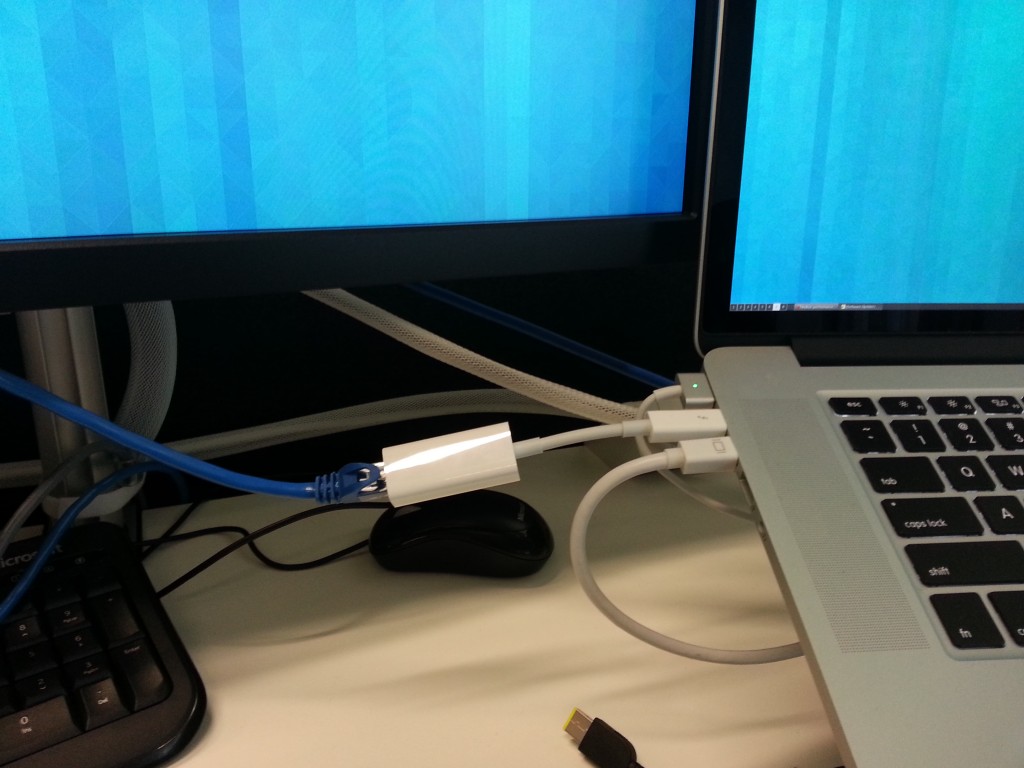
If Apple still made cinema displays, this would be a fully Apple H/W stack


Having used it for about 1 month now, it’s a brilliant unit. Probably the biggest things I love about it are:

  • The weight – at 1.37Kg, it’s essentially the same weight as the 13″ Macbook Air, but packs a lot more grunt. And having come from the 15″ Macbook Pro, it’s a huge size and weight reduction, yet still extremely usable.
  • USB-C. I know some people are going to hate the new connector, but this is the first laptop that literally only requires a single connector to dock – power, video data – one plug.
  • The larger touch pad is a nice addition. And even with my large man hands, I haven’t had any issues when typing, Apple seems to have figured out how to do palm detection properly.
  • It looks and feels amazing, loving the space gray finish. The last generation Macbooks were beautiful machines, but this bumps it up a notch.
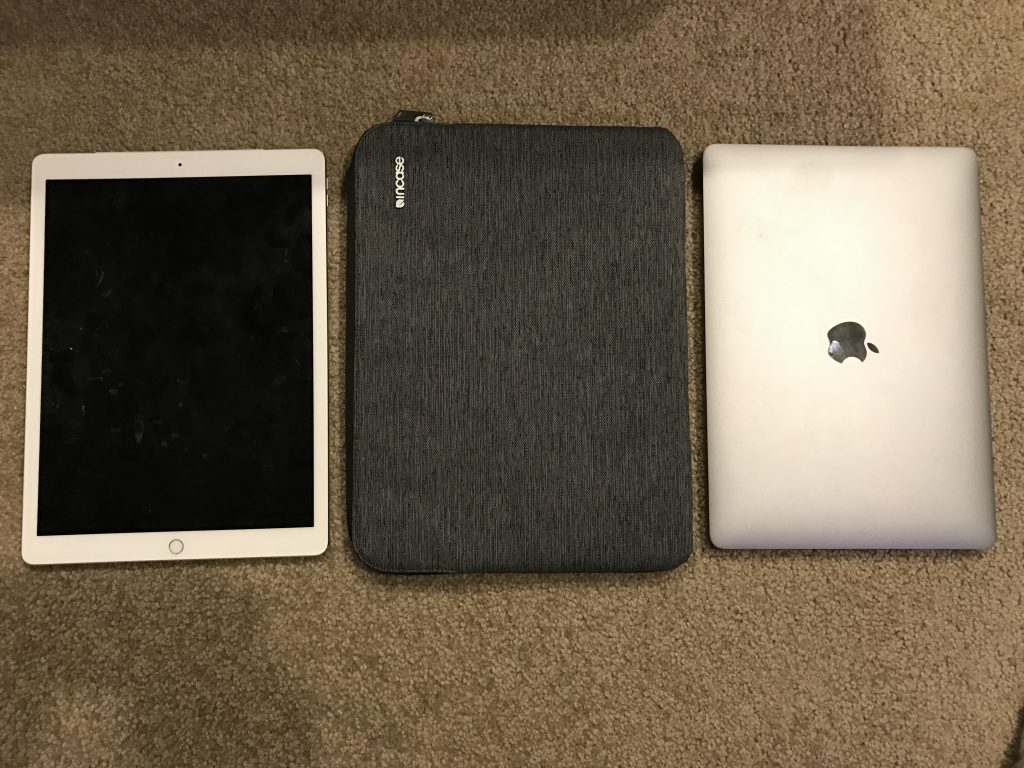
The new 13″ is so slim and light, it fits perfectly into my iPad Pro 12″ sleeve. Don’t bother buying the sleeves intended for the older 13″ models, they’re way too big.

One thing to note is that the one I have is the entry level model. This brings a few differences over the other models:

  • This model is the only one to lack the new Touchbar. In my case, I use the physical ESC key a lot and don’t have a lot of use for the gimmick. I’d have preferred if Apple had made the Touchbar an optional additional for all models so any level machine could opt in/out.
  • As the entry level model, it features only 2x USB-C/Thunderbolt-3 ports. All Touchbar enabled models feature 4x. If you are like me and only want to dock, generally the 2x ports only issue isn’t a biggie since you’ll have one spare port, but it will be an issue if you want to drive multiple displays. If you intend to attach 2+ external displays, I’d recommend getting the model with 4x ports.
  • All the 13″ models feature Intel graphics. The larger 15″ model ships with dual Intel and AMD graphics that swap based on activity and power usage. Now this does mean the 13″ is slower at graphics, but I’m also hearing anecdotally that some users of the 15″ are having graphics stability issues with the new AMD drivers – I’ve had no stability issues of any kind with this new machine.
  • The 2.0Ghz i5 isn’t the fastest CPU. That being said, I only really notice it when doing things like compiles (brew, Xcode, etc) which my 4Ghz i7 at home would crunch through much faster. As compiling things isn’t a common requirement for my work, it’s not an issue for me.

It’s not without it’s problems of course – “donglegate” is an issue, but the extend of the issue depends on your requirements.

On the plus side, the one adaptor you won’t have to buy is headphones – all models still include the 3.5mm headphone jack. One caveat however, they are now purely analogue audio, the built in toslink port has been abandoned.

Whilst there are a huge pile of dongles available, I’d say the essential two dongles you must have are:

  • The USB-C to USB adaptor. If you ever need to connect USB devices when away from desk, you’ll want this one in your bag.
  • The USB-C Digital A/V adaptor. Unless you are getting a native USB-C screen, this is the only official Apple adaptor that supports a digital display. This specific adaptor provides 1x USB2, 1x HDMI and 1x USB-C for charging.

I have some concerns about the digital A/V adaptor. Firstly I’m not sure about is whether it can drive a 4K panel, eg if it’s HDMI 2.0 or not. I’m driving a 25″ Dell U2515H at 2560×1440 at 60Hz happily, but haven’t got anything higher resolution to check with.

It also feels like it’s not going to tolerate a whole lot of flexing and unflexing so I’ll be a bit wary about it’s longevity if travelling with it to connect to things all over the place.
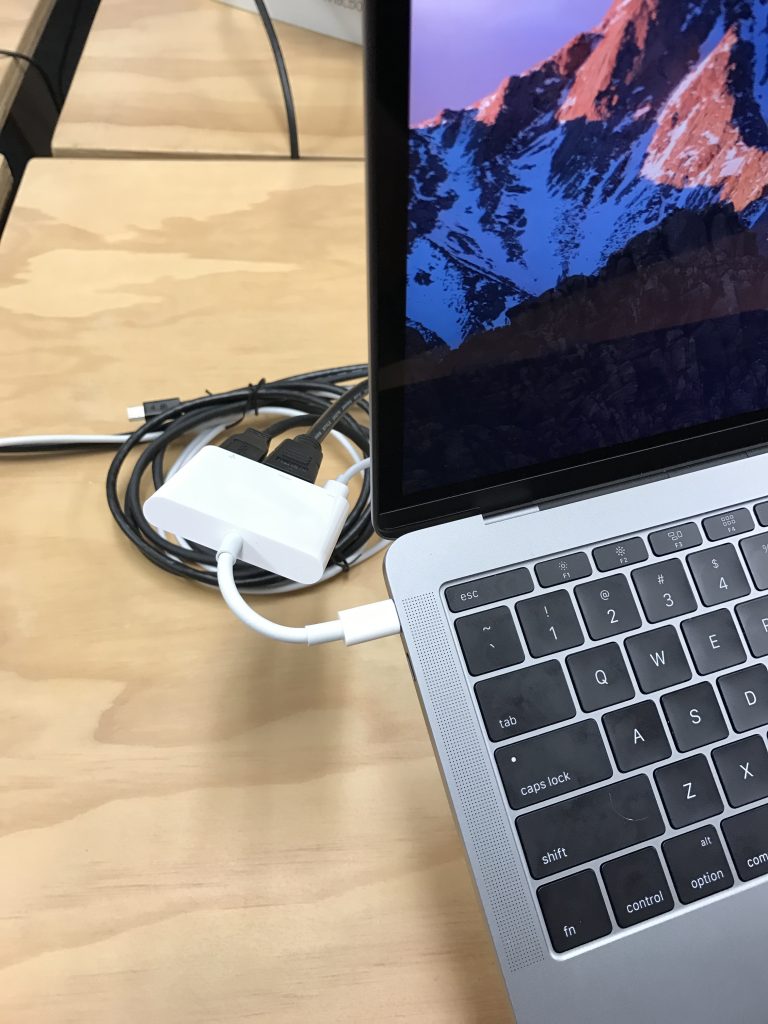
The USB-C Digital AV adaptor. At my desk I have USB and HDMI feeding into the LCD (which has it’s own USB hub) and power coming from the Apple-supplied USB-C charger.
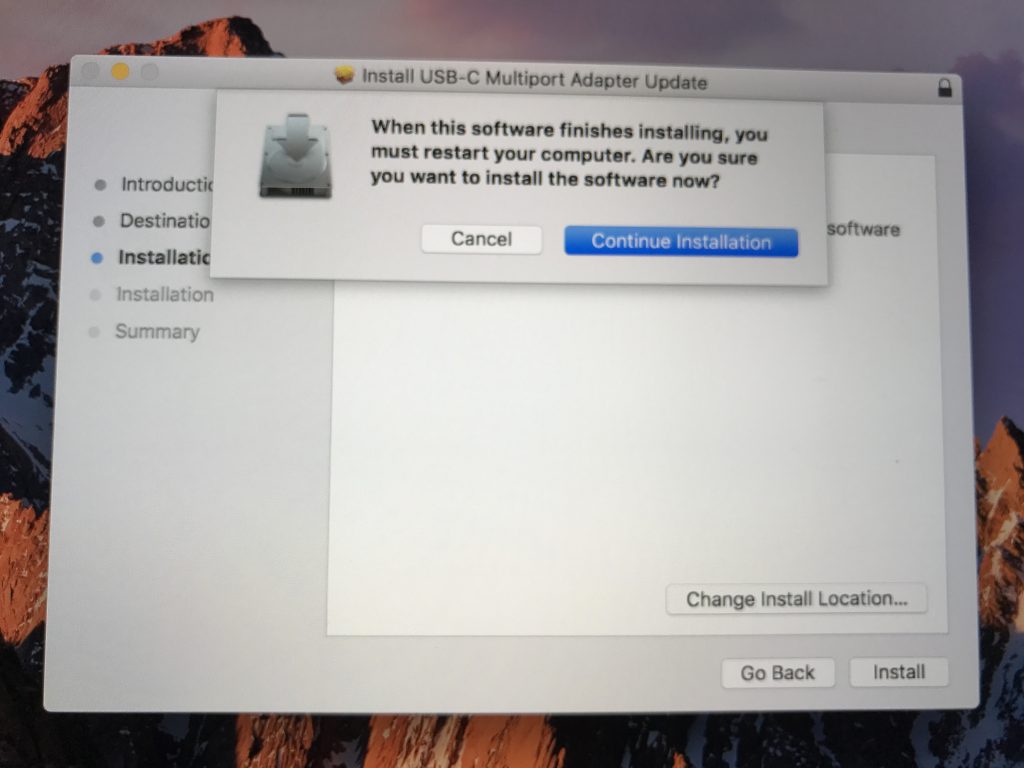
Updating and rebooting for a *dongle update*? The future is bleak.

Oh and if you want a DisplayPort version – there isn’t an official one. And this is where things get a little crazy.

For years all of Apple’s laptops have shipped with combined Thunderbolt 1/2 and Mini-Display ports. These ports take either device, but are technically different protocols that share a single physical socket. The new Macbook Pro doesn’t have any of these sockets. And there’s no USB-C to Mini Display port adaptor sold by Apple.

Apple does sell the “Thunderbolt 3 (USB-C) to Thunderbolt 2 Adaptor” but this is distinctly different to the port on the older laptops, in that it only supports Thunderbolt 2 devices – there is no support for Mini DisplayPort, even though the socket looks the same.

So this adaptor is useless for you, unless you legitimately have Thunderbolt 2 devices you wish to continue using – but these tend to be a minority of the Apple user base whom purchased things like disk arrays or the Apple Cinema Display (which is Thunderbolt, not Mini DisplayPort).

If you want to connect directly to a DisplayPort screen, there are third party cables available which will do so – just remember they will consume a whole USB-C port and not provide data and power. So adding 2x screens using these sorts of adaptors to the entry level Macbook isn’t possible since you’ll have no data ports and no power left! The 4x port machines make it more feasible to attach multiple displays and use the remaining ports for other use cases.

The other option is one of the various third party USB-C/Thunderbolt-3 docks. I’d recommend caution here however, there are a number on the market that doesn’t work properly with MacOS (made for Windows boxes) and a lot of crap “first to market” type offerings that aren’t really any good.


My recommendation is that if you buy one of these machines, you should ideally make the investment in a new native USB-C 4K or 5K panel when you purchase this machine. Apple recommend two different LG models which look pretty good:

There is no such thing as the Apple Cinema Display any more, but these would be their logical equivalent now. These screens connect via USB-C, power your laptop (so no need to spend more on a charger, you can use the one that ships with the laptop as your carry around one) and features a 3x USB-C hub in the back of the screen.

If you’re wanting to do multiple displays, note that there are some limits:

  • 13″ Macbook Pros can drive a single 5K panel or 2x 4K panels.
  • 15″ Macbook Pros can drive two 5K panels or 4x 4K panels.

Plus remember if buying the entry level 13″, having two screens would mean no spare ports at all on the unit – so it would be vital to make sure the screens can power the machine and provide additional ports.

Also be aware that just because the GPU can drive this many panels, doesn’t mean it can drive them particularly well – don’t expect any 4K gaming for example. My high spec iMac 5k struggles at times to drive it’s one panel using an AMD Radeon card, so I’m dubious about the Intel chipset in the new Macbooks being able to drive 2x 4K panels.


So recommendations:

If you need maximum portability, I’d still recommend going for the Macbook 13″ Pro over the Macbook 12″ Retina. It’s slightly heaver (1.37kg vs 0.92kg) and slightly more expensive (NZ $2499 vs $2199), but the performance is far better and the portability is almost the same. The other big plus, is that the USB-C in the Macbook Pro is also a Thunderbolt-3 port, which gives you much better future proofing.

If you need a solid work horse for a DevOps engineer, the base Macbook Pro 13″ model is fine. It’s a good size for carrying around for oncall and 16GB of RAM with a Core i5 2.0Ghz is perfectly adequate for local terminals, IDEs and browsers. Anything needing more grunt can get pushed to the cloud.

No matter what model you buy, bump it to 16GB RAM. 8GB isn’t going to cut it long term and since you can’t expand later, you’ll get better lifespan by going to max RAM now. I’d rate this more worthwhile than buying a better CPU (don’t really need it for most workloads) or more SSD (can never get enough SSD anyway, so just overflow into iCloud).

If you some how can’t live with only 16GB of RAM and need 32GB you’re kind of stuck. But this is a problem across most portable lines from competitors currently, 32GB RAM is too power hungry with the current gen CPUs and memory. If you need that much memory locally you’ll have to look at the iMac 5k (pretty nice) or the Mac Pro series (bit dated/overly expensive) to get it on a Mac.


So is it a good machine? I think so. I feel the main problem is that the machine is ahead of the rest of the market, which means lots of adaptors and pain until things catch up and everything is USB-C. Apple themselves aren’t even ready for this machine, their current flagship iPhone still ships with an older USB 3 connector rather than a USB-C one, which leads to an amusing situation where the current gen iPhone and current gen Macbook Pro can’t be connected without first purchasing a dongle.

Faking a Time Capsule with a GNU/Linux server

Apple MacOS’s Time Machine feature is a great backup solution for general desktop use, but has some annoying limitations such as only working with either locally attached storage devices or with Apple’s Time Capsule devices.

Whilst the Time Capsules aren’t bad devices, they offer a whole bunch of stuff I already have and don’t need – WiFi access point, ethernet router, and network attached storage and they’re not exactly cheap either. They also don’t help anyone wanting to backup to an off-site cloud server/VPS via a VPN.

So instead of a Time Capsule, I’m using a project called netatalk to allow a GNU/Linux server to provide an AFP file share to MacOS which acts as a Time Machine suitable target.

There’s an annoyance with Time Machine where it only officially works with AFP shares specially flagged as “Time Machine” shares. So whilst Apple has embraced SMB2 as the file sharing protocol of future use, you can’t use SMB2 for Time Machine backups (Well technically you can by enabling unsupported volumes in MacOS, but then you lack the ability to restore from backup via the MacOS recovery tools).

To make life easy, I’ve written a Puppet module that install netatalk and configures a Debian GNI/Linux server to act as a Time Capsule for all local users.

After installing the Puppet module (r10k or puppet module tools), you can simply define the directory and how much space to report to each client:

class { 'timemachine':
  location     => '/mnt/backup/timemachine',
  volsizelimit => '1000000', # 1TB per user backing up
}

To setup each MacOS machine, you will need to first connect to the share using Finder. You can do this with Finder -> Go -> Connect to Server and then entering afp://SERVERNAME and authenticating with your PAM credentials for the server.

After connecting, the share should now appear under Time Machine preferences. If you experience any issues connecting, check the /var/log/afpd.log file for debug information on the server – common issues include not having created the directories for the shares or having incorrect permissions on them.

Easy IKEv2 VPN for mobile devices (inc iOS)

I recently obtained an iPhone and needed to connect it to my VPN. However my existing VPN server was an OpenVPN installation which works lovely on traditional desktop operating systems and Android, but the iOS client is a bit more questionable having last been updated in September 2014 (pre iOS 9).

I decided to look into what the “proper” VPN option would be for iOS in order to get something that should be supported by the OS as smoothly as possible. Last time I looked this was full of wonderful horrors like PPTP (not actually encrypted!!) and L2TP/IPSec (configuration hell), so I had always avoided like the plague.

However as of iOS 9+, Apple has implemented support for IKEv2 VPNs which offers an interesting new option. What particularly made this option attractive for me, is that I can support every device I have with the one VPN standard:

  • IKEv2 is built into iOS 9 and MacOS El Capitan.
  • IKEv2 is built into Windows 10.
  • Works on Android with a third party client (hopeful for native integration soonish?).
  • Naturally works on GNU/Linux.

Whilst I love OpenVPN, being able to use the stock OS features instead of a third party client is always nice, particularly on mobile where power management and background tasks behaviour can be interesting.

IKEv2 on mobile also has some other nice features, such as MOBIKE, which makes it very seamless when switching between different networks (like the cellular to WiFi dance we do constantly with phones/tablets). This is something that OpenVPN can’t do – whilst it’s generally fast and reliable at establishing a connection, a change in the network means issuing a reconnect, it doesn’t just move the current connection across.


Given that I run GNU/Linux servers, I went for one of the popular IPSec solutions available on most distributions – StrongSwan.

Unfortunately whilst it’s technical capabilities are excellent, it’s documentation isn’t great. Best way to describe it is that every option is documented, but what options and why you’d want to use them? Not so much. The “left” vs “right” style documentation is also a right pain to work with, it’s not a configuration format that reads nicely and clearly.

Trying to find clear instructions and working examples of configurations for doing IKEv2 with iOS devices was also difficult and there’s some real traps for young players such as generating SHA1 certs instead of SHA2 when using the tools with defaults.

The other fun is that I also wanted my iOS device setup properly to:

  1. Use certificate based authentication, rather than PSK.
  2. Only connect to the VPN when outside of my house.
  3. Remain connected to the VPN even when moving between networks, etc.

I found the best way to make it work, was to use Apple Configurator to generate a .mobileconfig file for my iOS devices that includes all my VPN settings and certificates in an easy-to-import package, but also (critically) allows me to define options that are not selectable to end users, such as on-demand VPN establishment.


After a few nights of messing around and cursing the fact that all the major OS vendors haven’t just implemented OpenVPN, I managed to get a working connection. To avoid others the same pain, I considered writing a guide – but it’s actually a really complex setup, so instead I decided to write a Puppet module (clone from github / or install from puppetforge) which does the following heavy lifting for you:

  • Installs StrongSwan (on a Debian/derived GNU/Linux system).
  • Configures StrongSwan for IKEv2 roadwarrior style VPNs.
  • Generates all the CA, cert and key files for the VPN server.
  • Generates each client’s certs for you.
  • Generates a .mobileconfig file for iOS devices so you can have a single import of all the configuration, certs and ondemand rules and don’t have to have a Mac to use Apple Configurator.

This means you can save yourself all the heavy lifting and setup a VPN with as little as the following Puppet code:

class { 'roadwarrior':
   manage_firewall_v4 => true,
   manage_firewall_v6 => true,
   vpn_name           => 'vpn.example.com',
   vpn_range_v4       => '10.10.10.0/24',
   vpn_route_v4       => '192.168.0.0/16',
 }

roadwarrior::client { 'myiphone':
  ondemand_connect       => true,
  ondemand_ssid_excludes => ['wifihouse'],
}

roadwarrior::client { 'android': }

The above example sets up a routed VPN using 10.10.10.0/24 as the VPN client range and routes the 192.168.0.0/16 network behind the VPN server back through. (Note that I haven’t added masquerading options yet, so your gateway has to know to route the vpn_range back to the VPN server).

It then defines two clients – “myiphone” and “android”. And in the .mobileconfig file generated for the “myiphone” client, it will specifically generate rules that cause the VPN to maintain a constant connection, except when connected to a WiFi network called “wifihouse”.

The certs and .mobileconfig files are helpfully placed in  /etc/ipsec.d/dist/ for your rsync’ing pleasure including a few different formats to help load onto fussy devices.


Hopefully this module is useful to some of you. If you’re new to Puppet but want to take advantage of it, you could always check out my introduction to Puppet with Pupistry guide.

If you’re not sure of my Puppet modules or prefer other config management systems (or *gasp* none at all!) the Puppet module should be fairly readable and easy enough to translate into your own commands to run.

There a few things I still want to do – I haven’t yet done IPv6 configuration (which I’ll fix since I run a dual-stack network everywhere) and I intend to add a masquerade firewall feature for those struggling with routing properly between their VPN and LAN.

I’ve been using this configuration for a few weeks on a couple iOS 9.3.1 devices and it’s been working beautifully, especially with the ondemand configuration which I haven’t been able to do on any other devices (like Android or MacOS) yet unfortunately. The power consumption overhead seems minimal, but of course your mileage may vary.

It would be good to test with Windows 10 and as many other devices as possible. I don’t intend for this module to support non-roadwarrior type configs (eg site-to-site linking) to keep things simple, but happy to merge any PRs that make it easier to connect more mobile devices or branch routers back to a main VPN host. Also happy to merge PRs for more GNU/Linux distribution support- currently only support Debian/Ubuntu, but it shouldn’t be hard to add others.

If you’re on Android, this VPN will work for you, but you may find the OpenVPN client better and more flexible since the Android client doesn’t have the same level of on demand functionality that iOS has built in. You may also find OpenVPN a better option if you’re regularly using restrictive networks that only allow “HTTPS” out, since it can be run on TCP/443, whereas StrongSwan IKEv2 runs on UDP port 500 or 4500.

MacOS won’t build anything? Check xcode license

One of the annoyances of the MacOS platform is that whilst there’s a nice powerful UNIX underneath, there’s a rather dumb layer of top that does silly things like preventing the app store password being saved, or as I found the other day, disabling parts of the build system if the license hasn’t been accepted.

When you first setup MacOS to be useful, you need to install xcode’s build tools and libraries either via the app store, or with:

sudo xcode-select --install

However it seems if xcode gets updated via one of the routine updates, it can require that the license is re-accepted, and until that happens, it disable various builds of the build system.

I found the issue when I suddenly lost the ability to install native ruby gems, eg:

Gem::Installer::ExtensionBuildError: ERROR: Failed to build gem native extension.

 /System/Library/Frameworks/Ruby.framework/Versions/2.0/usr/bin/ruby extconf.rb
checking for BIO_read() in -lcrypto... *** extconf.rb failed ***
Could not create Makefile due to some reason, probably lack of necessary
libraries and/or headers. Check the mkmf.log file for more details. You may
need configuration options.

Provided configuration options:
 --with-opt-dir
 --without-opt-dir
 --with-opt-include
 --without-opt-include=${opt-dir}/include
 --with-opt-lib
 --without-opt-lib=${opt-dir}/lib
 --with-make-prog
 --without-make-prog
 --srcdir=.
 --curdir
 --ruby=/System/Library/Frameworks/Ruby.framework/Versions/2.0/usr/bin/ruby
 --with-puma_http11-dir
 --without-puma_http11-dir
 --with-puma_http11-include
 --without-puma_http11-include=${puma_http11-dir}/include
 --with-puma_http11-lib
 --without-puma_http11-lib=${puma_http11-dir}/
 --with-cryptolib
 --without-cryptolib
/System/Library/Frameworks/Ruby.framework/Versions/2.0/usr/lib/ruby/2.0.0/mkmf.rb:434:in `try_do': The compiler failed to generate an executable file. (RuntimeError)
You have to install development tools first.
 from /System/Library/Frameworks/Ruby.framework/Versions/2.0/usr/lib/ruby/2.0.0/mkmf.rb:513:in `block in try_link0'
 from /System/Library/Frameworks/Ruby.framework/Versions/2.0/usr/lib/ruby/2.0.0/tmpdir.rb:88:in `mktmpdir'
 from /System/Library/Frameworks/Ruby.framework/Versions/2.0/usr/lib/ruby/2.0.0/mkmf.rb:510:in `try_link0'
 from /System/Library/Frameworks/Ruby.framework/Versions/2.0/usr/lib/ruby/2.0.0/mkmf.rb:534:in `try_link'
 from /System/Library/Frameworks/Ruby.framework/Versions/2.0/usr/lib/ruby/2.0.0/mkmf.rb:720:in `try_func'
 from /System/Library/Frameworks/Ruby.framework/Versions/2.0/usr/lib/ruby/2.0.0/mkmf.rb:950:in `block in have_library'
 from /System/Library/Frameworks/Ruby.framework/Versions/2.0/usr/lib/ruby/2.0.0/mkmf.rb:895:in `block in checking_for'
 from /System/Library/Frameworks/Ruby.framework/Versions/2.0/usr/lib/ruby/2.0.0/mkmf.rb:340:in `block (2 levels) in postpone'
 from /System/Library/Frameworks/Ruby.framework/Versions/2.0/usr/lib/ruby/2.0.0/mkmf.rb:310:in `open'
 from /System/Library/Frameworks/Ruby.framework/Versions/2.0/usr/lib/ruby/2.0.0/mkmf.rb:340:in `block in postpone'
 from /System/Library/Frameworks/Ruby.framework/Versions/2.0/usr/lib/ruby/2.0.0/mkmf.rb:310:in `open'
 from /System/Library/Frameworks/Ruby.framework/Versions/2.0/usr/lib/ruby/2.0.0/mkmf.rb:336:in `postpone'
 from /System/Library/Frameworks/Ruby.framework/Versions/2.0/usr/lib/ruby/2.0.0/mkmf.rb:894:in `checking_for'
 from /System/Library/Frameworks/Ruby.framework/Versions/2.0/usr/lib/ruby/2.0.0/mkmf.rb:945:in `have_library'
 from extconf.rb:6:in `block in <main>'
 from extconf.rb:6:in `each'
 from extconf.rb:6:in `find'
 from extconf.rb:6:in `<main>'


Gem files will remain installed in /var/folders/py/r973xbbn2g57sr4l_fmb9gtr0000gn/T/bundler20151009-29854-mszy85puma-2.14.0/gems/puma-2.14.0 for inspection.
Results logged to /var/folders/py/r973xbbn2g57sr4l_fmb9gtr0000gn/T/bundler20151009-29854-mszy85puma-2.14.0/gems/puma-2.14.0/ext/puma_http11/gem_make.out
An error occurred while installing puma (2.14.0), and Bundler cannot continue.
Make sure that `gem install puma -v '2.14.0'` succeeds before bundling.

The solution is quite simple:

sudo xcodebuild -license

Why Apple thinks their build tools are so important that they require their own license to be accepted every so often is beyond me.

Easy Lockscreen MacOS

Whilst MacOS is a pretty polished experience, there’s some really simple things that are stupidly hard sometimes such as getting the keybindings to work right for real keyboards or in this case, getting the screen to be lockable without sleeping the computer.

No matter what configuration I set in power management, the only MacOS keyboard combination that does anything for me (Command + Option + Eject/Power/F12) will not only put up the lock screen, but also immediately sleeps the computer, much to the dismay of any background network connections or audio.

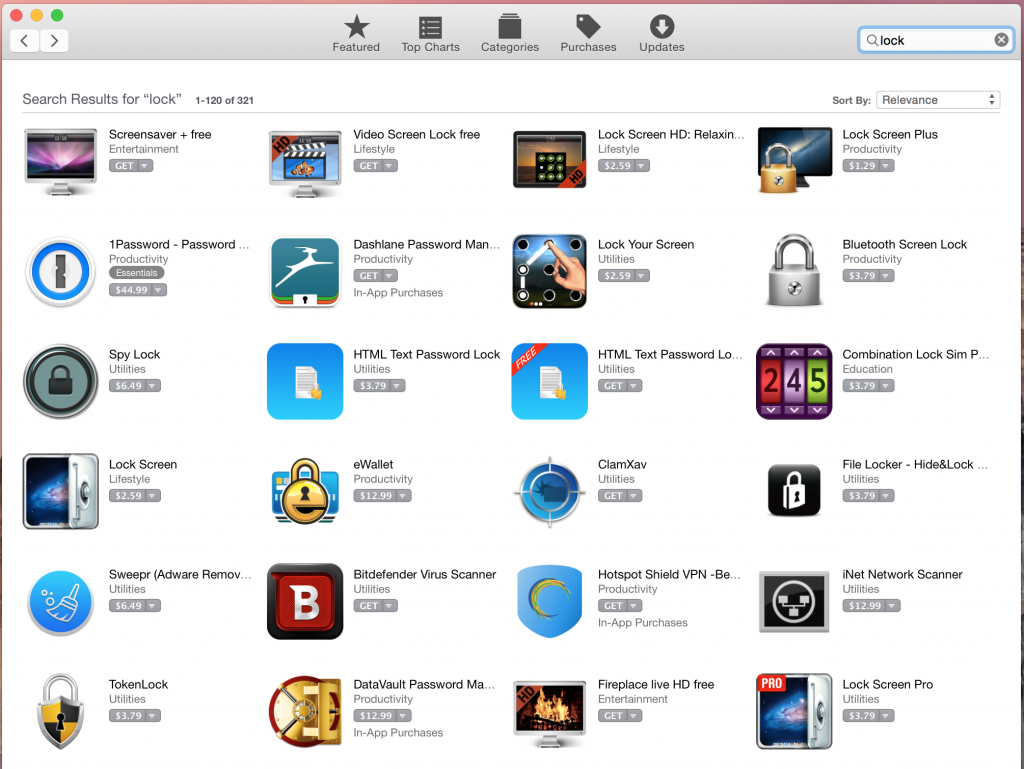
One of the issues with MacOS is that for any issue there are several dubious software vendors offering you an app that “fixes” the issue with quality ranging from some excellent utilities all the way to outright dodgy Android/Windows-style crapware addons.

None of these look particularly good. Who the hell wants Android-style swipe unlock on a Mac??

None of these look particularly good. Who the hell wants Android-style swipe unlock on a Mac??

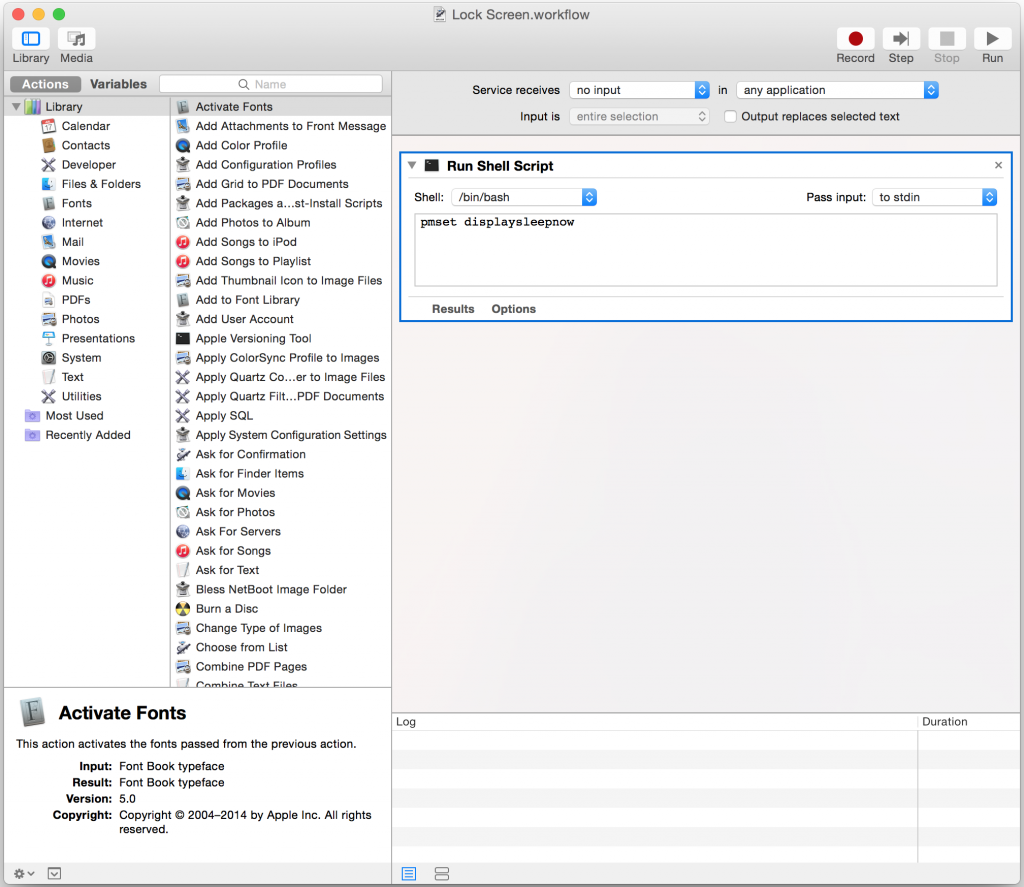
Naturally I’m not keen for some crappy third party app to do something as key as locking my workstation so went looking for the underlying way the screen gets locked. From my trawling I found that the following command executed as a normal user will trigger a sleep of the display, but not the whole machine:

pmset displaysleepnow

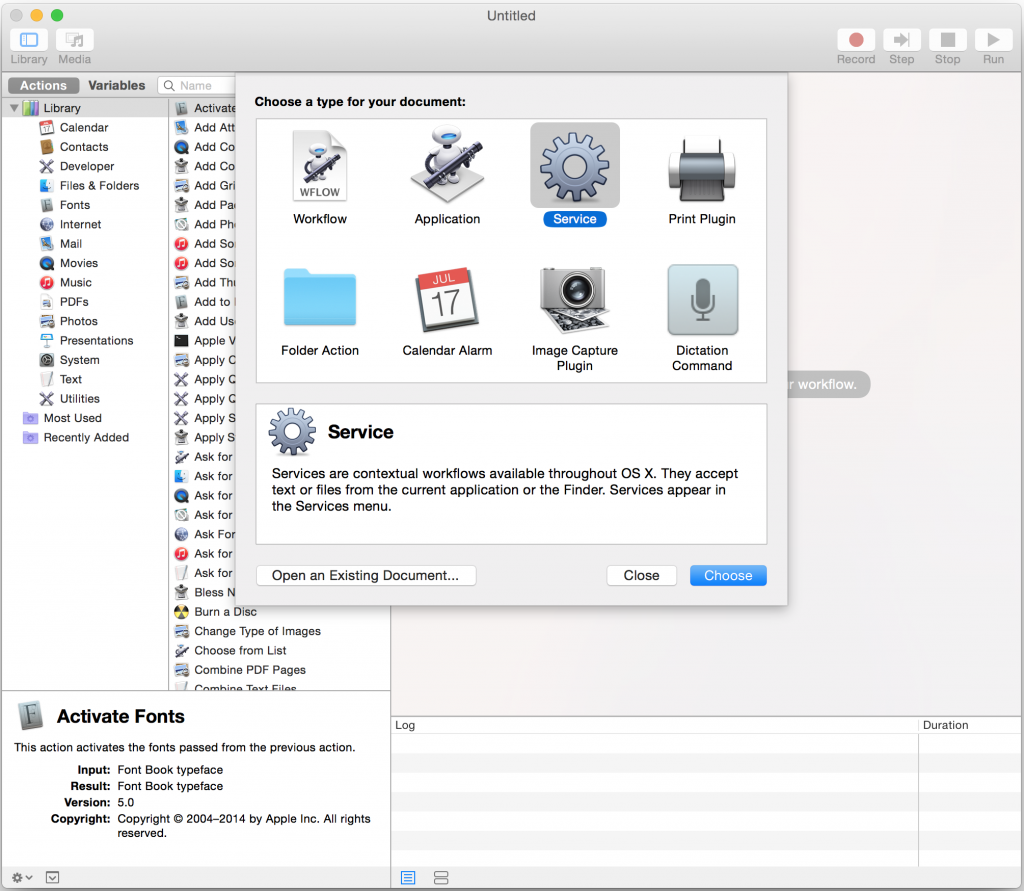
Turns out getting MacOS to execute some line of shell is disturbingly easy by using the Automator tool (Available in Applications -> Utilities) and creating a new Service.

Screen Shot 2015-05-26 at 23.47.59

Then add the Run Shell Script action from the Library of actions like below:

Screen Shot 2015-05-26 at 23.47.00

Save it with a logical name like “Lock Screen”. It gets saved into ~/Library/Services/ so in theory should be possible to easily copy it to other machines.

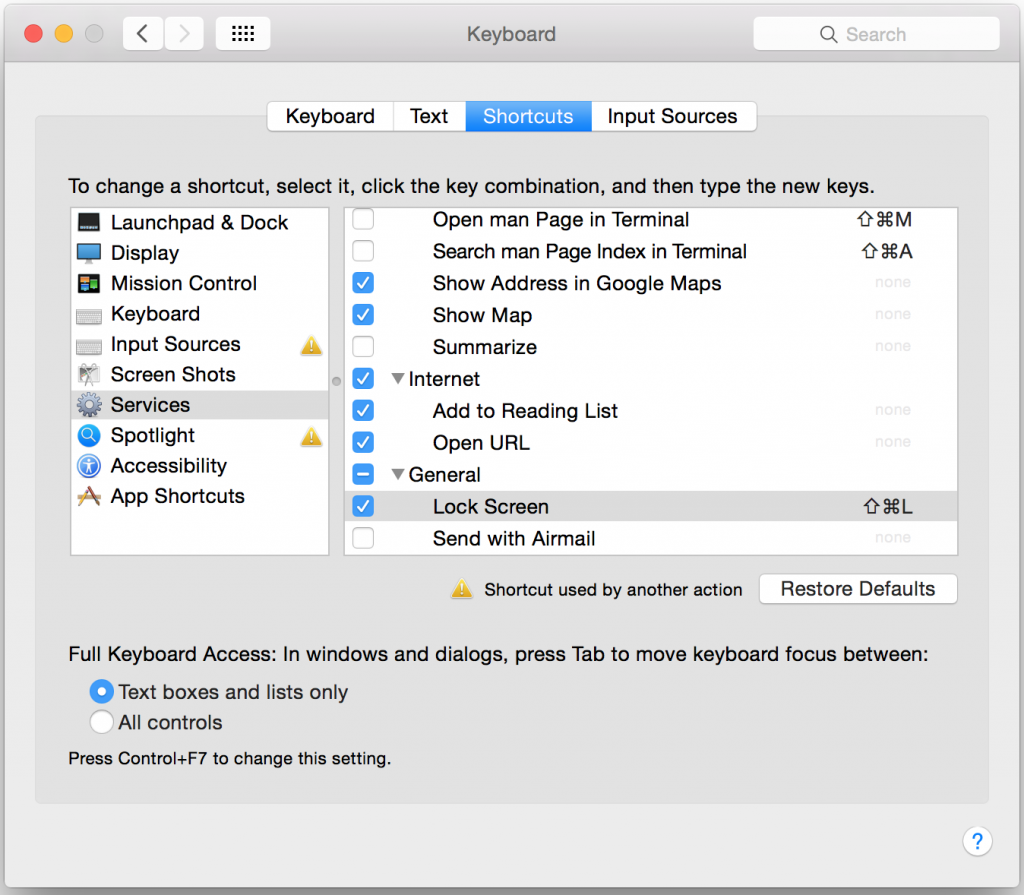
Once saved, your new service will become available to you in System Preferences -> Keyboard -> Shortcuts and will offer you the ability to set a keyboard shortcut.

Screen Shot 2015-05-26 at 23.50.37

And magic, it works. Command + Shift + L is a lot easier in my books than hot corners or clicking stupid menu items. Sadly you don’t have full flexibility of any key, but you should be able to get something that works for you.


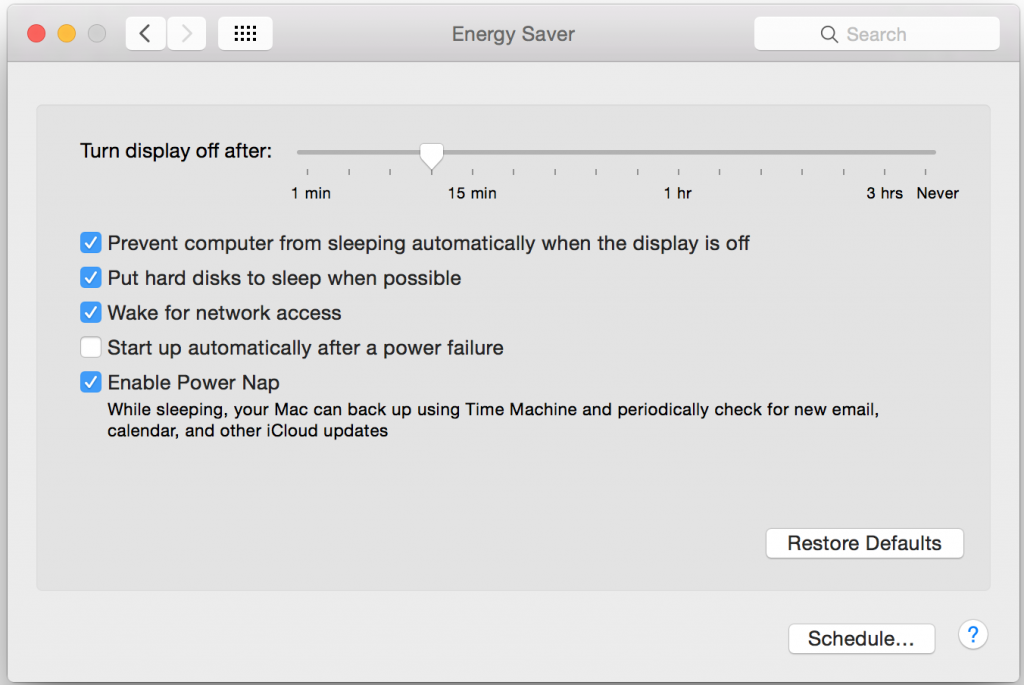
For reference, here are my other settings windows. First the power management (Energy Saver) settings. I select “Prevent computer from sleeping automatically” to avoid any surprises when sleeping.

Screen Shot 2015-05-27 at 00.14.29

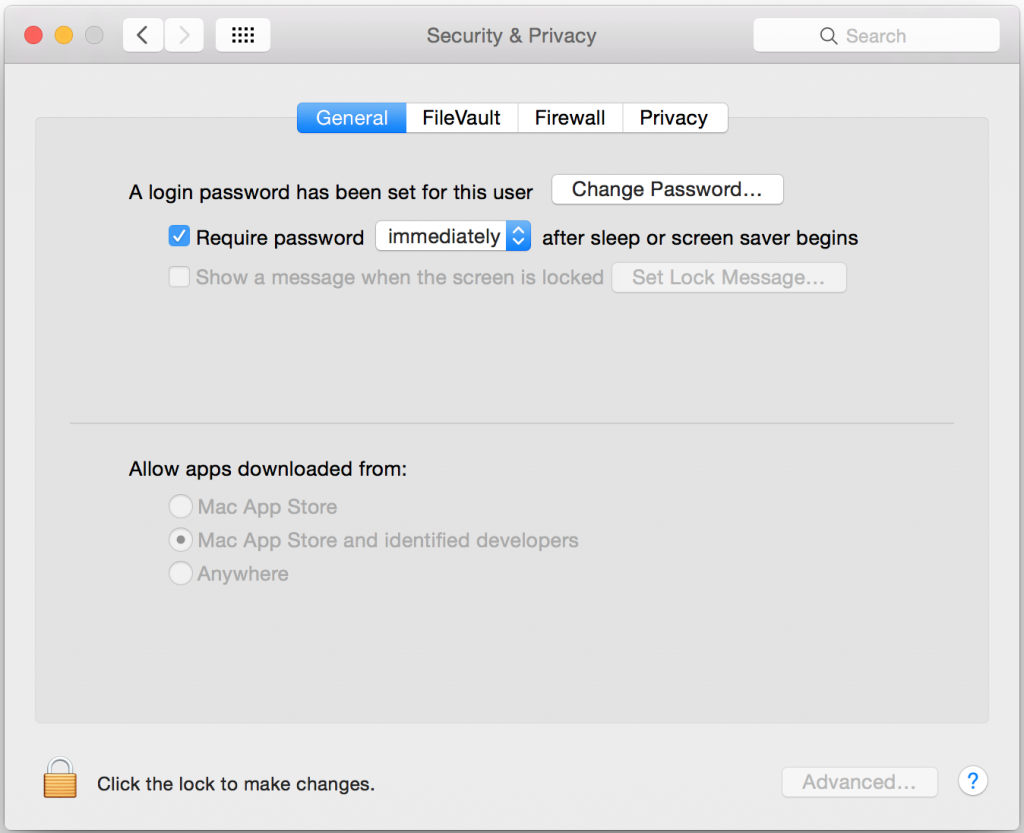
And secondly, your Security & Privacy settings should require a password after sleep/screen saver:

Screen Shot 2015-05-27 at 00.12.07


Tested on MacOS 10.10 Yosemite with pretty much a stock OS installation on an iMac 5k – I wouldn’t expect any variation by hardware, but YMMV (Your Mileage May Vary).

MacOS TTY limit

I’m currently trialling the use of MacOS as a primary workstation on my work laptop, I’m probably bit of a power user and MacOS isn’t all that happy with some of the things I throw at it.

Generally my activities tend to involve vast number of terminals – one day I suddenly started getting the following error when trying to create new sessions inside of iTerm2:

Unable to Fork iTerm cannot launch the program for this session.

Turns out I had managed to exhaust the number of tty sessions configured by default in the Darwin kernel (127 max). Thankfully as per this helpful error report it’s generally pretty easy to resolve:

# Change the current value for the running kernel
sudo sysctl -w kern.tty.ptmx_max=255

# Add the following to /etc/sysctl.conf to make it permanent:
kern.tty.ptmx_max=255

I am liking the fact that although some of what I do is a bit weird for MacOS, at least there is a UNIX underneath it that you can still poke to make things happen :-)

Create MacOS Mavericks Installer

Whilst Apple’s hardware has a clever feature where you can re-install the operating system directly from the internet (essentially netboot install from Apple’s servers), it’s not always suitable if you need to install a machine on an offline connection or via a slow/expensive connection.

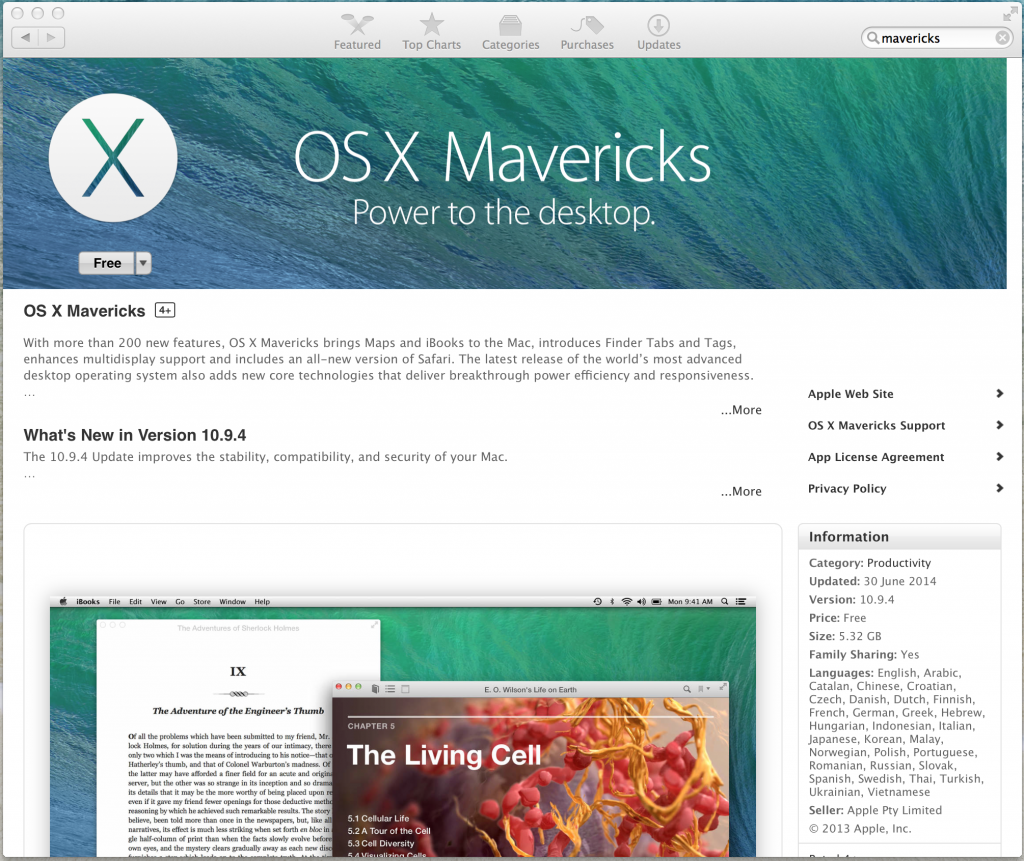
Fortunately Apple provides Mavericks as a .dmg file download which you can get from the app store – whilst that .dmg itself isn’t bootable (sadly) you can use a binary tool Apple provides inside it to generate installer media onto a USB drive.

Firstly download this Mavericks installer from the Apple store:

Properitery Evil. Shiny shiny propietary evil.

Proprietary Evil. Shiny shiny proprietary evil.

Then format a USB drive (at least 8GB) to have a single partition of type “Mac OS Extended (Journaled)”, with a partition name of “InstallMe”.

Now you’ll either have a Mavericks installer inside your applications directory, or on your desktop as a dmg file. If on the desktop, mount the dmg. Once done, in your terminal you can run the installer application to generate an installer:

sudo /Applications/Install\ OS\ X\ Mavericks.app/Contents/Resources/createinstallmedia –volume /Volumes/InstallMe –applicationpath /Applications/Install\ OS\ X\ Mavericks.app –nointeraction

(Replace /Applications with the path to the mounted dmg if installing from inside that).

You’ll see some output as it writes to the USB stick, it can take a while if your USB stick isn’t that fast.

Erasing Disk: 0%... 10%... 20%... 100%...
Copying installer files to disk...
Copy complete.
Making disk bootable...
Copying boot files...
Copy complete.
Done.

Once done, you can reboot and by holding down option you can select the USB stick to install from.

Thanks to this forum post for posting the original answer – there are a lot of long convoluted processes mentioned on the web, this is the easiest one by far out of all the options I found.

Thunderbolt and other Macbook hardware issues with Linux

Having semi-recently switched to a Macbook Pro Retina 15″ at work, I decided to give MacOS a go. It’s been interesting, it’s not too bad an operating system and whilst it is something I could use on an ongoing basis, I quickly longed for the happy embrace of GNU/Linux where I have a bit more power and control over the system.

Generally the Linux kernel supports most of the Macbook hardware out-of-the-box (As of 3.15 anyway), but with a couple exceptions:

  • I believe support for the dual GPU mode switching is now fixed, however the model I’m using now is Intel only, so I can’t test this unfortunately.
  • The Apple Webcam does not yet have a driver. The older iSight driver doesn’t work, since the new gen of hardware is a PCIe connected device, not USB.
  • The WiFi requires a third party driver to be built for your kernel. You’ll want the latest Broadcom 802.11 STA driver in order for it to built with new kernel versions. Ubuntu users, get this version, or more recent.
  • If you’re having weird hangs where the Macbook just halts frequently waiting on on I/O, add “libata.force=noncq” kernel parameter. It seems that there is some bug with this SSD and some kernel versions that leads to weird I/O halts, which is fixed by this option.
  • Thunderbolt support is limited to only working on devices connected at boot up, no hotplug. Additionally, when using Thunderbolt, Suspend/Resume is disabled (although it works otherwise if there’s no Thunderbolt involved).

Of all these issues, the lack of Thunderbolt support was the one that was really frustrating me, since I need to use a Thunderbolt based Ethernet adaptor currently on a daily basis and I always rely on Suspend and Resume heavily.

Thankfully two kernel developers, Andreas Noever and Matthew J Garrett have been working on a series of kernel patches that introduce support for Thunderbolt hotplug and thus allow it to work on suspend and resume.

Sadly whilst this patch is awesome, it doesn't yet do wireless Thunderbolt for when the ethernet cable you want is too bloody short.

You too can now enjoy the shackles of a wired LAN connection like it’s 1990 all over again!

It doesn’t sound like it has been easy based on the posts on MJG’s blog which are well worth a read – essentially the Apple firmware does weird things with the Thunderbolt hardware when the OS doesn’t identify itself as Darwin (MacOS’s kernel) and likes to power stuff down after suspend/resume, so it’s taken some effort to debug and put in hardware-specific workarounds.
It will surely only be a matter of time before these awesome patches are merged, but if you need them right now and are happy to run rather beta kernel patches (who isn’t??) then the easiest way is to checkout their Git repo of 3.15 with all the patches applied. This repository should build cleanly via the usual means, and provide you with a new kernel module called “thunderbolt”.I’ve been testing it for a few days and it looks really good. I’ve had no kernel panics, freezes, devices failing to work or any issues with suspend/resume with these patches – the features that they claim to work, just work.  The only catches are:

  • If you boot the Macbook with the Thunderbolt device attached, it will be treated like a PCIe hotplug device… except that when you remove it, that Thunderbolt port won’t work again until the next restart. I recommend booting the Macbook with no devices attached, then hotplug once started to avoid this issue. I always remove before suspend and re-connect after resume as well (mostly because it’s a laptop and it’s easy to do so and avoid any issues).
  • The developers advise that Thunderbolt Displays don’t work at this time (however Mini DisplayPort connected screens work fine, even though they share the same socket).
  • The developers advise that chaining Thunderbolt devices is not yet supported. So stick to one device per port for now.

If you’re using Linux on a Macbook, I recommend grabbing the patched source and doing a build. Hopefully all these patches make their way into 3.16 or 3.17 and make this post irrelevant soon.

If you’re extra lazy and trust a random blogger’s binary packages, I’ve built deb packages for Ubuntu 13.10 (and should work just fine on 14.04 as well) for both the Thunderbolt enabled kernel as well as the Broadcom WiFi. You can download these packages here.

Jethro does Mac: Terminals

With a change in job, I recently shifted from my primary work computer being a Lenovo X1 Carbon running GNU/Linux to using an Apple Macbook Pro Retina 15″ running MacOS.

It’s not the first time that I’ve used MacOS as my primary workstation, but I’ve spent the vast majority of my IT life working in a purely GNU/Linux environment so it was interesting having to try and setup my usual working habits and flow with this new platform.

I’m going to do a few blog posts addressing my thoughts and issues with this platform and how I’ve found it compared to my GNU/Linux laptops. I’m going to look at both hardware and software and note down a few fixes and tricks that I’ve learnt along the way.


Part 4: Terminals and adventures with keybindings

I’ve already written about the physical issues with the Macbook keyboard, but there’s another issue with this input device – keybindings.

As mentioned previously, the Macbook lacks various useful keys, such as home and end, instead, you need to use a key combination such as Apple + Left/Right to achieve the same result. However for some inexplicable reason, Apple decided that the Terminal should have it’s own special behaviour, so it does not obey the same keybindings. In any other MacOS program, using these key combinations will achieve the desired results. But with Terminal, it results in random junk appearing in the terminal – or nothing at all.

For an engineer like myself this is the single most frustrating issue I’ve had with MacOS to date – having the Terminal essentially broken out of the box on their own hardware is quite frankly unacceptable and I suspect a reflection on how Apple cares far more about consumer users than power users.

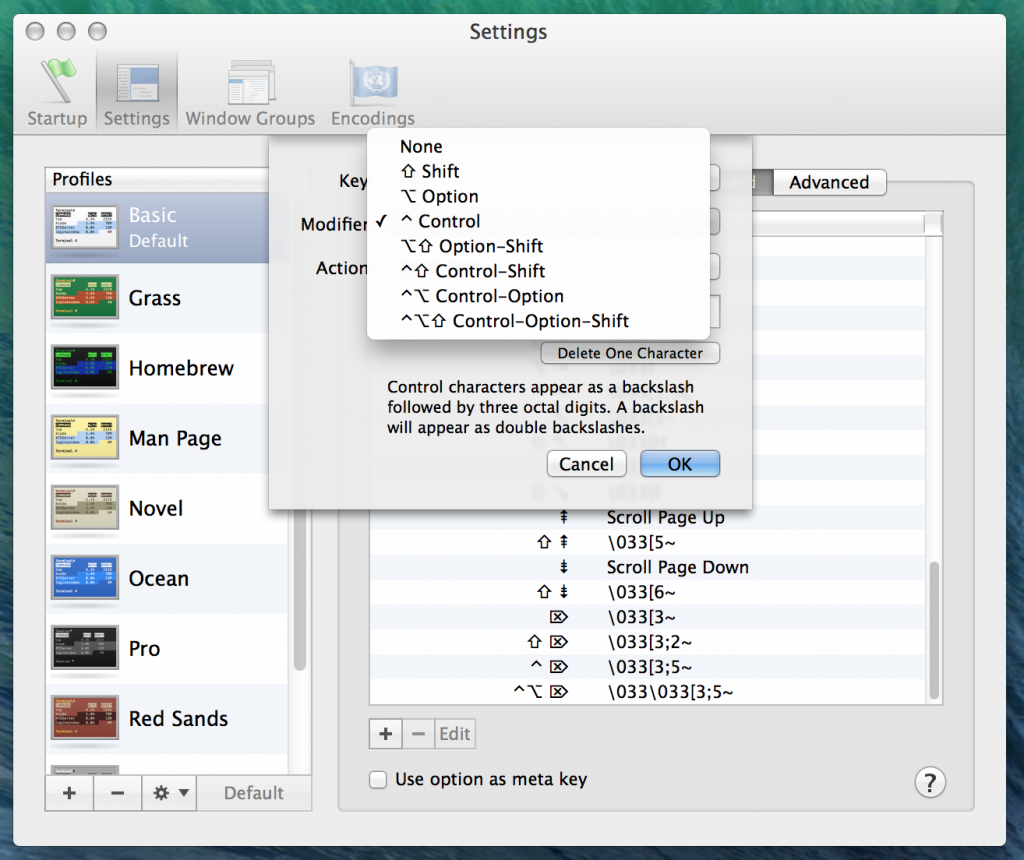
Whilst Apple’s Terminal offers the ability to configure keybindings, it has two major problems that make it unusable:

  1. Whilst there is an entry for keys called “Home” and “End”, these entries seem to map to actual physical Home/End keys, but not the key combinations of Apple + Home/End, which appear as-is to the OS. So any configuration done for the Home/End won’t help.
  2. Instead we need to configure a key combination with a modifier of Apple key. But MacOS Terminal doesn’t allow the Apple key to be used as a modifier.
MacOS stock terminal keybinding configuration.

MacOS stock terminal keybinding configuration – no Apple key option here!

The result is, there’s no way to properly fix the MacOS Terminal and in my view, it’s essentially useless. Whilst if I was using an external keyboard with a physical home/end key it wouldn’t be too much of a problem since I can set a keybinding, there are times I do actually want to be able to use the laptop keyboard effectively!

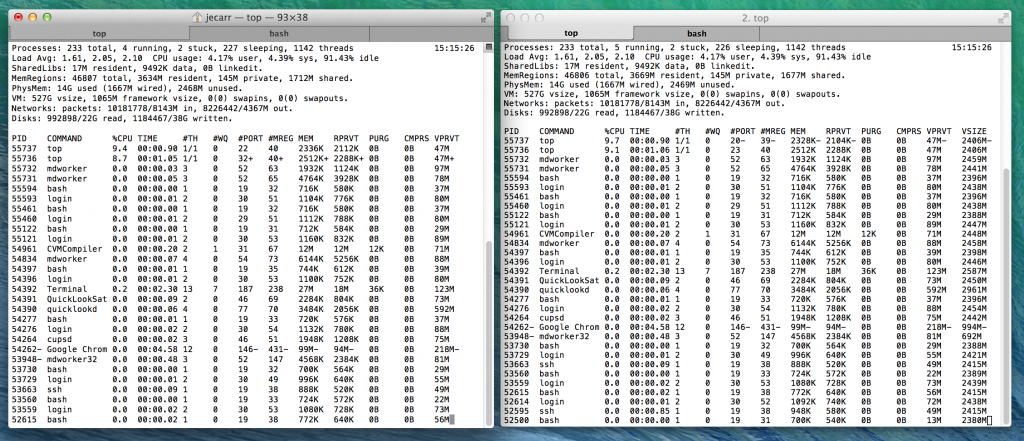
I ended up fixing it by installing the popular iTerm2 third party terminal application- in many ways it’s similar to the stock terminal, but it offers various additional configuration options.

iTerm2 and MacOS Terminal alongside each other.

iTerm2 and MacOS Terminal alongside each other, configured to use same colour scheme and fonts.

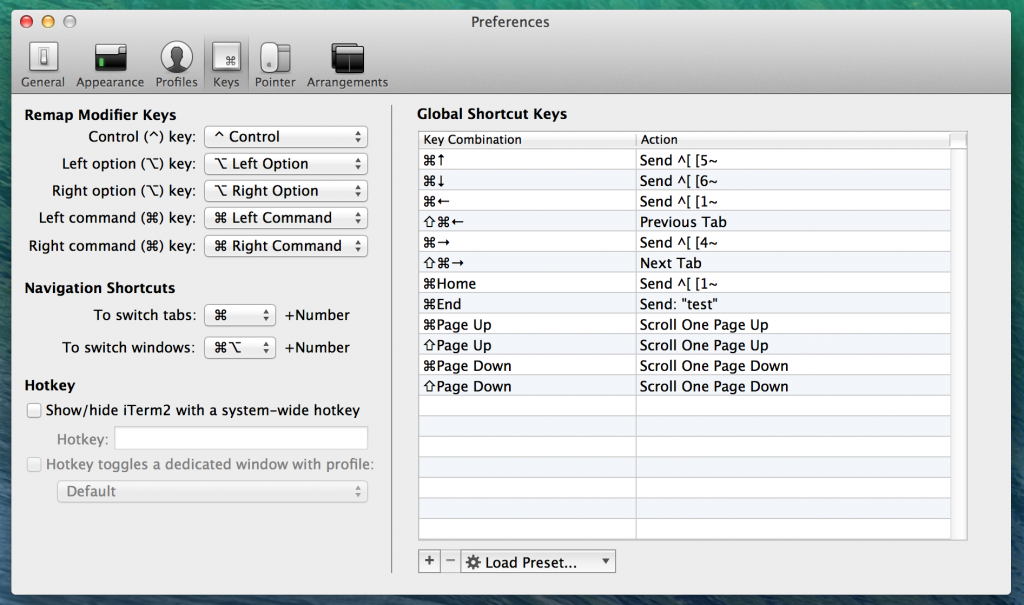
For me the only thing that I really care about is the fact that it adds the ability to setup keybindings with the Apple + Home/End key options.

iTerm2

The killer feature – the ability to set key combinations with the Apple key!

Setting the above and then creating an ~/.input.rc file (as per these instructions) resolved the keybinding issues for me, and made iTerm2 consistent with all the MacOS applications.

"\e[1~": beginning-of-line
"\e[4~": end-of-line
"\e[5~": history-search-backward
"\e[6~": history-search-forward
"\e[3~": delete-char
"\e[2~": quoted-insert
"\e[5C": forward-word
"\e[5D": backward-word
"\e\e[C": forward-word
"\e\e[D": backward-word
set completion-ignore-case On

The key combinations work correct in the local shell, Vim and also via SSH connections to other systems. Perfect! I just wish I didn’t have to do this in the first place…


See other posts in this series via the jethro does mac tag as I explore using MacOS after years of GNU/Linux only.