Tag Archives: security

Puppet Autosigning & Cloud Recommendations

I was over in Sydney this week attending linux.conf.au 2018 and made a short presentation at the Sysadmin miniconf regarding deploying Puppet in cloud environments.

The majority of this talk covers the Puppet autosigning process which is a big potential security headache if misconfigured. If you’re deploying Puppet (or even some other config management system) into the cloud, I recommend checking this one out (~15mins) and making sure your own setup doesn’t have any issues.


Firebase FCM upstream with Swift on iOS

I’ve been learning a bit of Swift lately in order to write an iOS app for my alarm system. I’m not very good at it yet, but figured I’d write some notes to help anyone else playing with the murky world of Firebase Cloud Messaging/FCM and iOS.

One of the key parts of the design is that I wanted the alarm app and the alarm server to communicate directly with each other without needing public facing endpoints, rather than the conventional design when the app interacts via an HTTP API.

The intention of this design is that it means I can dump all the alarm software onto a small embedded computer and as long as that computer has outbound internet access, it just works™️. No headaches about discovering the endpoint of the service and much more simplified security as there’s no public-facing web server.

Given I need to deliver push notifications to the app, I implemented Google Firebase Cloud Messaging (FCM) – formerly GCM – for push delivery to both iOS and Android apps.

Whilst FCM is commonly used for pushing to devices, it also supports pushing messages back upstream to the server from the device. In order to do this, the server must be implemented as an XMPP server and the FCM SDK be embedded into the app.

The server was reasonably straight forwards, I’ve written a small Java daemon that uses a reference XMPP client implementation and wraps some additional logic to work with HowAlarming.

The client side was a bit more tricky. Google has some docs covering how to implement upstream messaging in the iOS app, but I had a few issues to solve that weren’t clearly detailed there.


Handling failure of FCM upstream message delivery

Firstly, it’s important to have some logic in place to handle/report back if a message can not be sent upstream – otherwise you have no way to tell if it’s worked. To do this in swift, I added a notification observer for .MessagingSendError which is thrown by the FCM SDK if it’s unable to send upstream.

class AppDelegate: UIResponder, UIApplicationDelegate, MessagingDelegate {

 func application(_ application: UIApplication, didFinishLaunchingWithOptions launchOptions: [UIApplicationLaunchOptionsKey: Any]?) -> Bool {
   ...
   // Trigger if we fail to send a message upstream for any reason.
   NotificationCenter.default.addObserver(self, selector: #selector(onMessagingUpstreamFailure(_:)), name: .MessagingSendError, object: nil)
   ...
 }

 @objc
 func onMessagingUpstreamFailure(_ notification: Notification) {
   // FCM tends not to give us any kind of useful message here, but
   // at least we now know it failed for when we start debugging it.
   print("A failure occurred when attempting to send a message upstream via FCM")
 }
}

Unfortunately I’m yet to see a useful error code back from FCM in response to any failures to send message upstream – seem to just get back a 501 error to anything that has gone wrong which isn’t overly helpful… especially since in web programming land, any 5xx series error implies it’s the remote server’s fault rather than the client’s.


Getting the GCM Sender ID

In order to send messages upstream, you need the GCM Sender ID. This is available in the GoogleService-Info.plist file that is included in the app build, but I couldn’t figure out a way to extract this easily from the FCM SDK. There probably is a better/nice way of doing this, but the following hack works:

// Here we are extracting out the GCM SENDER ID from the Google
// plist file. There used to be an easy way to get this with GCM, but
// it's non-obvious with FCM so here's a hacky approach instead.
if let path = Bundle.main.path(forResource: "GoogleService-Info", ofType: "plist") {
  let dictRoot = NSDictionary(contentsOfFile: path)
  if let dict = dictRoot {
    if let gcmSenderId = dict["GCM_SENDER_ID"] as? String {
       self.gcmSenderId = gcmSenderId // make available on AppDelegate to whole app
    }
  }
}

And yes, although we’re all about FCM now, this part hasn’t been rebranded from the old GCM product, so enjoy having yet another acronym in your app.


Ensuring the FCM direct channel is established

Finally the biggest cause I had for upstream message delivery failing, is that I was often trying to send an upstream message before FCM had finished establishing the direct channel.

This happens for you automatically by the SDK whenever the app is loaded into foreground, provided that you have shouldEstablishDirectChannel set to true. This can take up to several seconds after application launch for it to actually complete – which means if you try to send upstream too early, the connection isn’t ready, and your send fails with an obscure 501 error.

The best solution I found was to use an observer to listen to .MessagingConnectionStateChanged which is triggered whenever the FCM direct channel connects or disconnects. By listening to this notification, you know when FCM is ready and capable of delivering upstream messages.

An additional bonus of this observer, is that when it indicates the FCM direct channel is established, by that time the FCM token for the device is available to your app to use if needed.

So my approach is to:

  1. Setup FCM with shouldEstablishDirectChannel set to true (otherwise you won’t be going upstream at all!).
  2. Setup an observer on .MessagingConnectionStateChanged
  3. When triggered, use Messaging.messaging().isDirectChannelEstablished to see if we have a connection ready for us to use.
  4. If so, pull the FCM token (device token) and the GCM Sender ID and retain in AppDelegate for other parts of the app to use at any point.
  5. Dispatch the message to upstream with whatever you want in messageData.

My implementation looks a bit like this:

class AppDelegate: UIResponder, UIApplicationDelegate, MessagingDelegate {

 func application(_ application: UIApplication, didFinishLaunchingWithOptions launchOptions: [UIApplicationLaunchOptionsKey: Any]?) -> Bool {
  ...
  // Configure FCM and other Firebase APIs with a single call.
  FirebaseApp.configure()

  // Setup FCM messaging
  Messaging.messaging().delegate = self
  Messaging.messaging().shouldEstablishDirectChannel = true

  // Trigger when FCM establishes it's direct connection. We want to know this to avoid race conditions where we
  // try to post upstream messages before the direct connection is ready... which kind of sucks.
  NotificationCenter.default.addObserver(self, selector: #selector(onMessagingDirectChannelStateChanged(_:)), name: .MessagingConnectionStateChanged, object: nil)
  ...
 }

 @objc
 func onMessagingDirectChannelStateChanged(_ notification: Notification) {
  // This is our own function listen for the direct connection to be established.
  print("Is FCM Direct Channel Established: \(Messaging.messaging().isDirectChannelEstablished)")

  if (Messaging.messaging().isDirectChannelEstablished) {
   // Set the FCM token. Given that a direct channel has been established, it kind of implies that this
   // must be available to us..
   if self.registrationToken == nil {
    if let fcmToken = Messaging.messaging().fcmToken {
     self.registrationToken = fcmToken
     print("Firebase registration token: \(fcmToken)")
    }
   }

   // Here we are extracting out the GCM SENDER ID from the Google PList file. There used to be an easy way
   // to get this with GCM, but it's non-obvious with FCM so we're just going to read the plist file.
   if let path = Bundle.main.path(forResource: "GoogleService-Info", ofType: "plist") {
    let dictRoot = NSDictionary(contentsOfFile: path)
     if let dict = dictRoot {
      if let gcmSenderId = dict["GCM_SENDER_ID"] as? String {
       self.gcmSenderID = gcmSenderId
     }
    }
   }

  // Send an upstream message
  let messageId = ProcessInfo().globallyUniqueString
  let messageData: [String: String] = [
   "registration_token": self.registrationToken!, // In my use case, I want to know which device sent us the message
   "marco": "polo"
  ]
  let messageTo: String = self.gcmSenderID! + "@gcm.googleapis.com"
  let ttl: Int64 = 0 // Seconds. 0 means "do immediately or throw away"

  print("Sending message to FCM server: \(messageTo)")

  Messaging.messaging().sendMessage(messageData, to: messageTo, withMessageID: messageId, timeToLive: ttl)
  }
 }

 ...
}

For a full FCM downstream and upstream implementation example, you can take a look at the HowAlarming iOS app source code on Github and if you need a server reference, take a look at the HowAlarming GCM server in Java.


Learnings

It’s been an interesting exercise – I wouldn’t particularly recommend this architecture for anyone building real world apps, the main headaches I ran into were:

  1. FCM SDK just seems a bit buggy. I had a lot of trouble with the GCM SDK and the move to FCM did improve stuff a bit, but there’s still a number of issues that occur from time to time. For example: occasionally a FCM Direct Channel isn’t established for no clear reason until the app is terminated and restarted.
  2. Needing to do things like making sure FCM Direct Channel is ready before sending upstream messages should probably be handled transparently by the SDK rather than by the app developer.
  3. I have still yet to get background code execution on notifications working properly. I get the push notification without a problem, but seem to be unable to trigger my app to execute code even with content-available == 1 . Maybe a bug in my code, or FCM might be complicating the mix in some way, vs using pure APNS. Probably my code.
  4. It’s tricky using FCM messages alone to populate the app data, occasionally have issues such as messages arriving out of order, not arriving at all, or occasionally ending up with duplicates. This requires the app code to process, sort and re-populate the table view controller which isn’t a lot of fun. I suspect it would be a lot easier to simply re-populate the view controller on load from an HTTP endpoint and simply use FCM messages to trigger refreshes of the data if the user taps on a notification.

So my view for other projects in future would be to use FCM purely for server->app message delivery (ie: “tell the user there’s a reason to open the app”) and then rely entirely on a classic app client and HTTP API model for all further interactions back to the server.

Detectatron

I recently installed security cameras around my house which are doing an awesome job of recording all the events that take place around my house and grounds (generally of the feline variety).

Unfortunately the motion capture tends to be overly trigger happy and I end up with heaps of recordings of trees waving, clouds moving or insects flying past. It’s not a problem from a security perspective as I’m not missing any events, but it makes it harder to check the feed for noteworthy events during the day.

I decided I’d like to write some logic for processing the videos being generated and decided to write a proof of concept that sucks video out of the Ubiquiti Unifi Video server and then analyses it with Amazon Web Services new AI product “Rekognition” to identify interesting videos worthy of note.

What this means, is that I can now filter out all the noise from my motion recordings by doing image recognition and flagging the specific videos that feature events I consider interesting, such as footage featuring people or cats doing crazy things.

I’ve got a 20 minute talk about this system which you can watch below, introducing it’s capabilities and how I’m using the AWS Rekognition service to solve this problem. The talk was for the Wellington AWS Users Group, so it focuses a bit more on the AWS aspects of Rekognition and AWS architecture rather than the Unifi video integration side of things.

The software I wrote has two parts – “Detectatron” which is the backend Java service for processing each video and storing it in S3 after processing and the connector I wrote for integration with the Unifi Video service. These can be found at:

https://github.com/jethrocarr/detectatron
https://github.com/jethrocarr/detectatron-connector-unifi

The code quality is rather poor right now – insufficient unit tests, bad structure and in need of a good refactor, but I wanted to get it up sooner rather than later… since perfection is always the enemy of just shipping something.

Note that whilst I’ve only added support for the product I use (Ubiquiti’s Unifi Video), I’ve designed it so that it’s pretty trivial to build other connectors for other platforms. I’d love to see contributions like connectors for Zone Minder and other popular open source or commercial platforms.

If you’re using Unifi Video, my connector will automatically mark any videos it deems as interesting as locked videos, for easy filtering using the native Unifi Video apps and web interface.

It also includes an S3 upload feature – given that I integrated with the Unifi Video software, it was a trivial step to extend it to also upload every video the system records into S3 within a few seconds for off-site retention. This performs really well, my on-prem NVR really struggled to keep up with uploads when using inotify + awscli to upload footage, but using my connector and Detectatron it has no issues keeping up with even high video rates.

Surveillance State “at home” Edition

A number of months ago I purchased a series of Ubiquiti UniFi video surveillance cameras. These are standard IP ethernet cameras and uses a free (as-in-beer) server agent that runs happily on GNU/Linux to manage the recording and motion detection, which makes them a much more attractive offering than other proprietary systems that use their own specific NVRs.

Once I first got them I hooked them up in the house to test with the intention of installing properly on the outside of the house. This plan got delayed somewhat when we adopted two lovely kittens which immediately removed any incentive I had to actually install them properly since it was just too much fun watching the cats rather than keeping an eye out for axe murderers roaming the property.

I had originally ordered the 720p model, but during this time of kitten watching, Ubiquiti brought out a new 1080p “g3” model which provides better resolution as well as also offering a much nicer looking and easier to install form factor – so I now have a mix of both generations.

The following video shows some footage taken from the older 720p model:

During this test phase we also captured the November 2016 Wellington earthquake on the cameras using a mix of both generation of camera:

Finally with the New Year break, I got the time and motivation to get back up into the attic and install the cameras properly. This wasn’t a technically challenging task – mostly just a case of running cabling, but it’s a right PITA due to the difficulty of moving around in my attic thanks to heaps of water pipes, electrical wires, data wires and joists all hidden under a good foot or two of insulation.


On the plus side, the technical requirements for the cameras are pretty simple. Each camera is a Power-over-Ethernet (PoE) device, which means it gets both data and power via a single cable, which makes installation simple – no mains electrical wiring, just need to get a single cat6 cable to wherever you want the camera to sit. The camera then connects to the switch and of course the server running the included software.

I am aware of some vendors selling wireless cameras that use WiFi with a battery that needs to be recharged every so often. I can see the use and appeal for renters, but as a home owner, a hard wired system is going to be much easier and more reliable in the long term.

Ubiquiti sell the camera either with or without a PoE adaptor. Using the included PoE adaptor means you can connect them to essentially any existing switch, but if installing a number of cameras this can create a cable management nightmare. I’d strongly recommend a PoE switch if installing more than 5 cameras, even taking into account their higher cost.

A PoE switch suddenly didn’t seem like such an expensive investment…

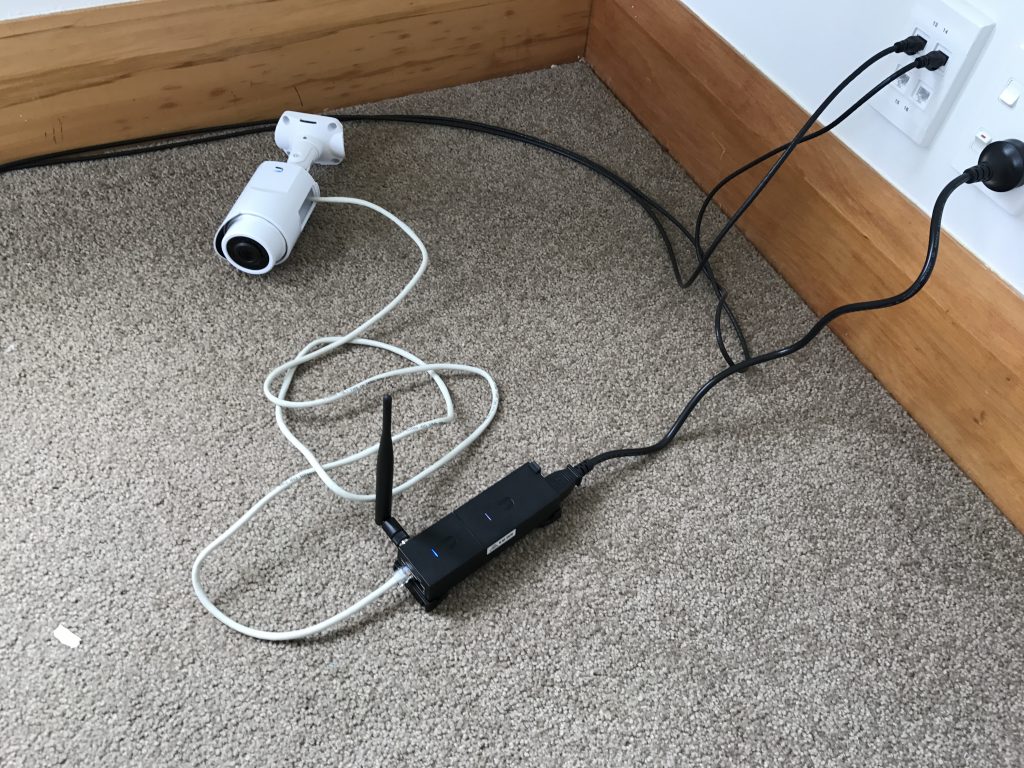
The easiest installation was the remote shed camera. Conveniently the shed has mains electrical wiring, but I needed to install a wireless AP to connect back to the house as running ethernet out there is just a bit too difficult.

I used Ubiquiti’s airGW-LR product which is a low cost access point that is designed to clip to their standard PoE supply. End result is a really tidy setup with a single power supply for both devices and with both devices mounted on a robust bracket for easy installation.

720p camera + airGW + PoE supply

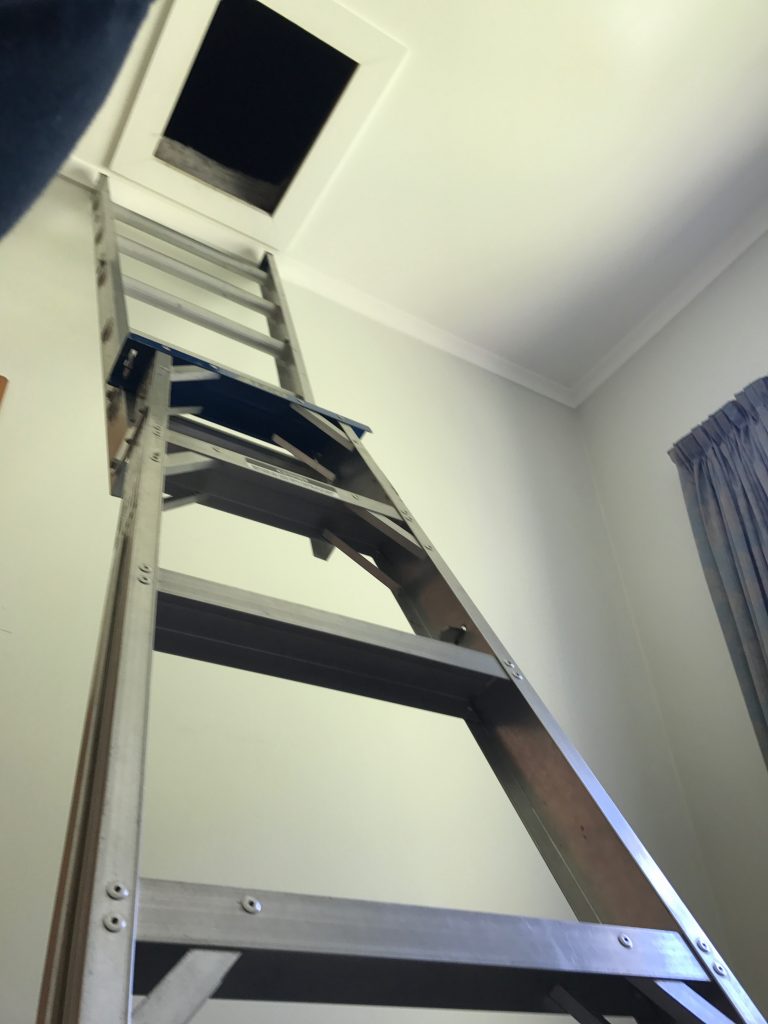
The house cameras were a bit more work. It took me roughly a day to run cabling through the attic – my house isn’t easy to move in the roof or floor space so it takes longer than some others. Also tip – it’s much easier running cabling *before* the insulation is installed, so if you’re thinking of doing both, install the ethernet in advance.

High ceilings and a small attic entrance is just the start of the hassles of running cabling.

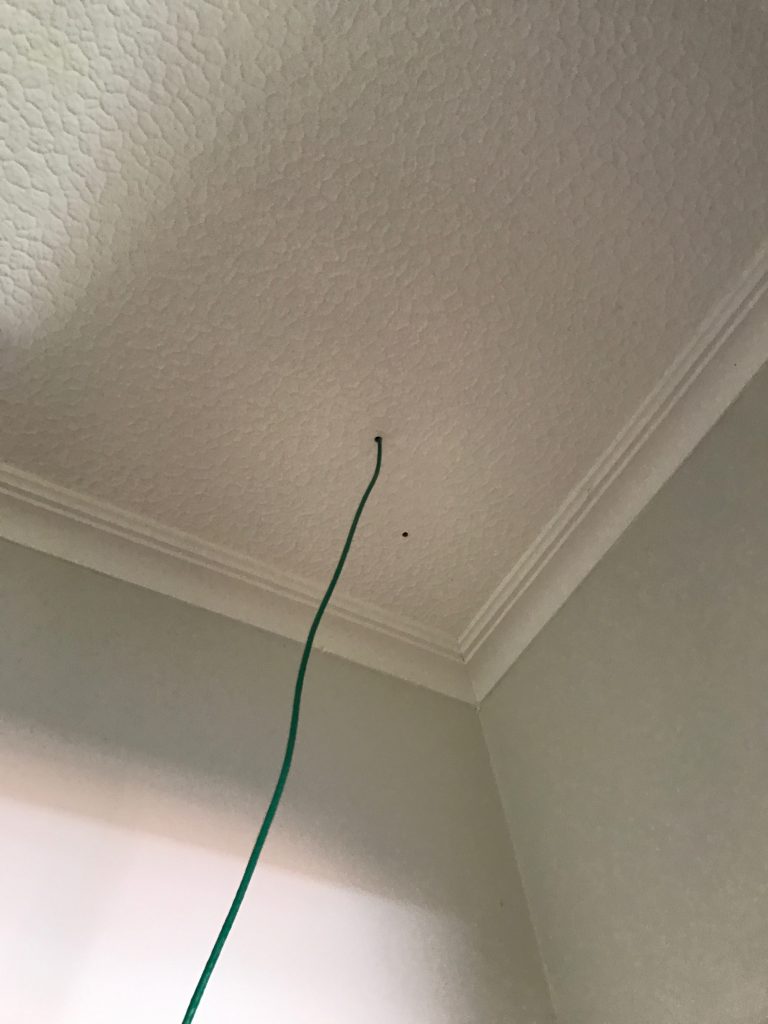
The annoying moment when you drill into a stud and end up with a hole that needs filling again. (with solid hardwood walls and ceilings, stud finders don’t work well at my place)

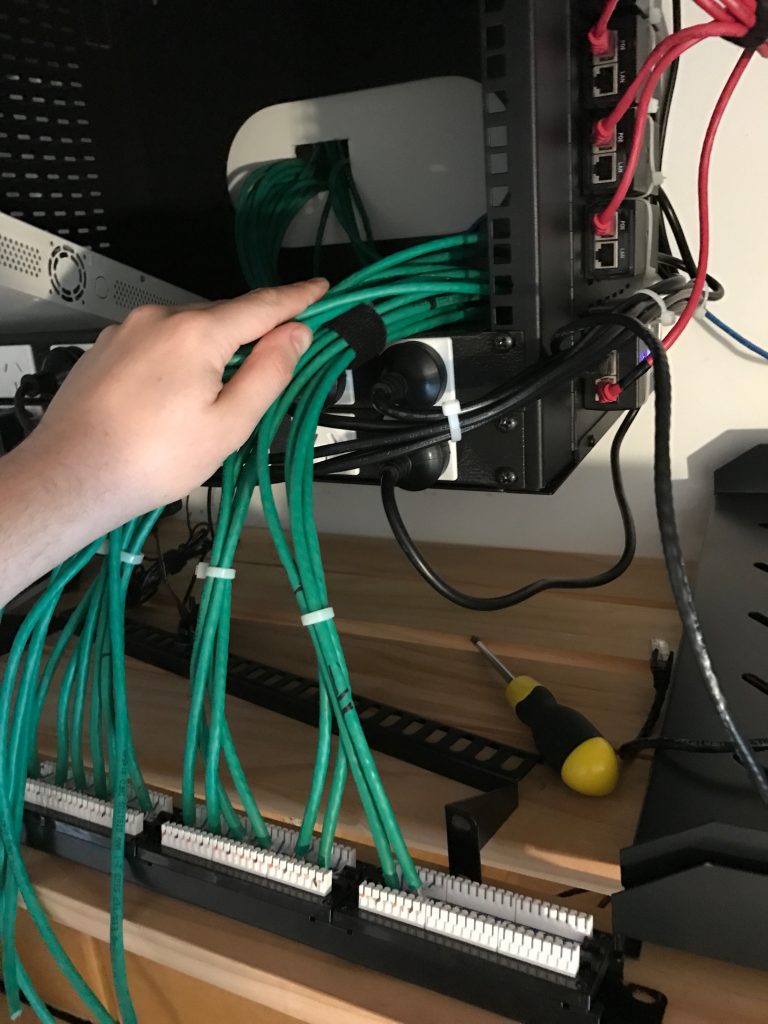
Once the cable run had been completed, I crimped the outside ends with RJ45 connectors for the cameras and then proceeded to take apart the existing patch panel, which also required removing most of the gear in the comms cabinet to free up room to work.

Couple tips for anyone else doing this:

  • I left plenty of excess cable on my ethernet runs. This allowed me to crimp the camera end whilst standing comfortably on the ground, then when I installed the camera I just pushed up all the excess into attic. Ethernet cable is cheap compared to one’s time messing around up at the tops of ladders.
  • The same applies at the patch panel – make sure to leave enough slack to allow you to easily take the patch panel off and work on it in the future – you can see from the picture below I have a good length spare that comes out of the wall.
  • Remember to wire the RJ45 connectors and the patch panel to the same standard – I managed to do T568B at the camera end and T568A at the patch panel on my first attempt.
  • Test each cable as you complete the wiring. Because of this I caught the above issue on the first camera and it saved me a lot of pain in future. A cheap ethernet tester can be found online for ~$10 and is worth having in your tool kit.

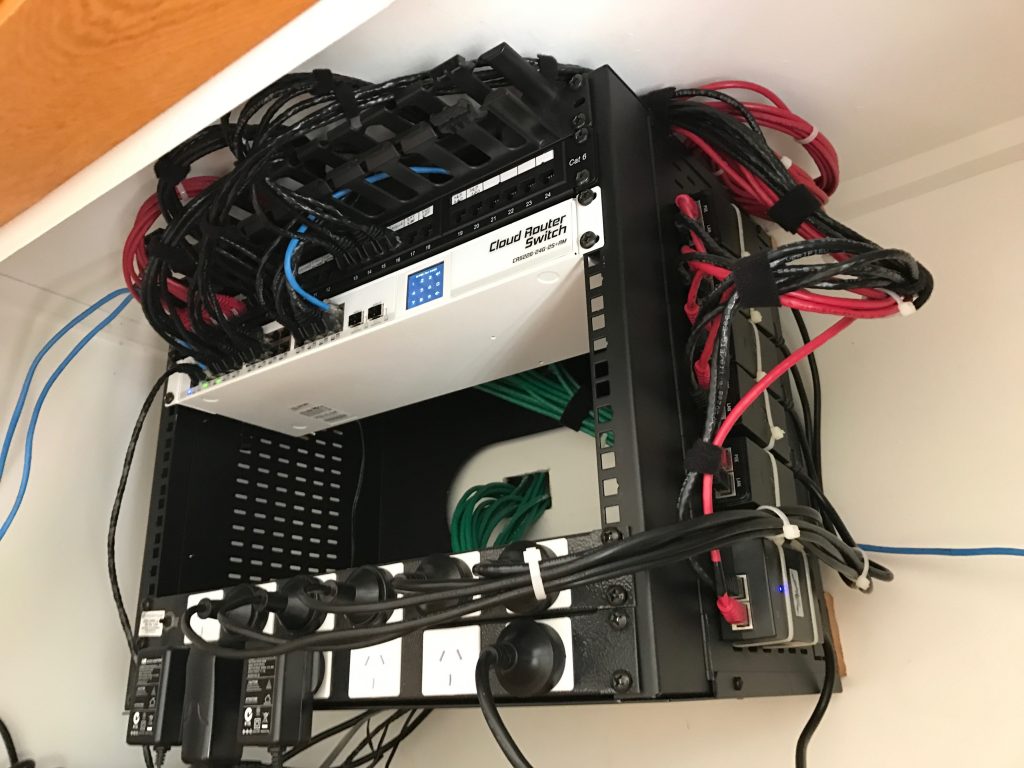
Down to only 4/24 ports free on the patch panel! I expect the last 4 will be consumed by WiGig/802.11ad in future, since it will require an AP per-room in order to get high performance, I might even need a second patch panel in future… good thing I brought the large wall mounted cabinet.


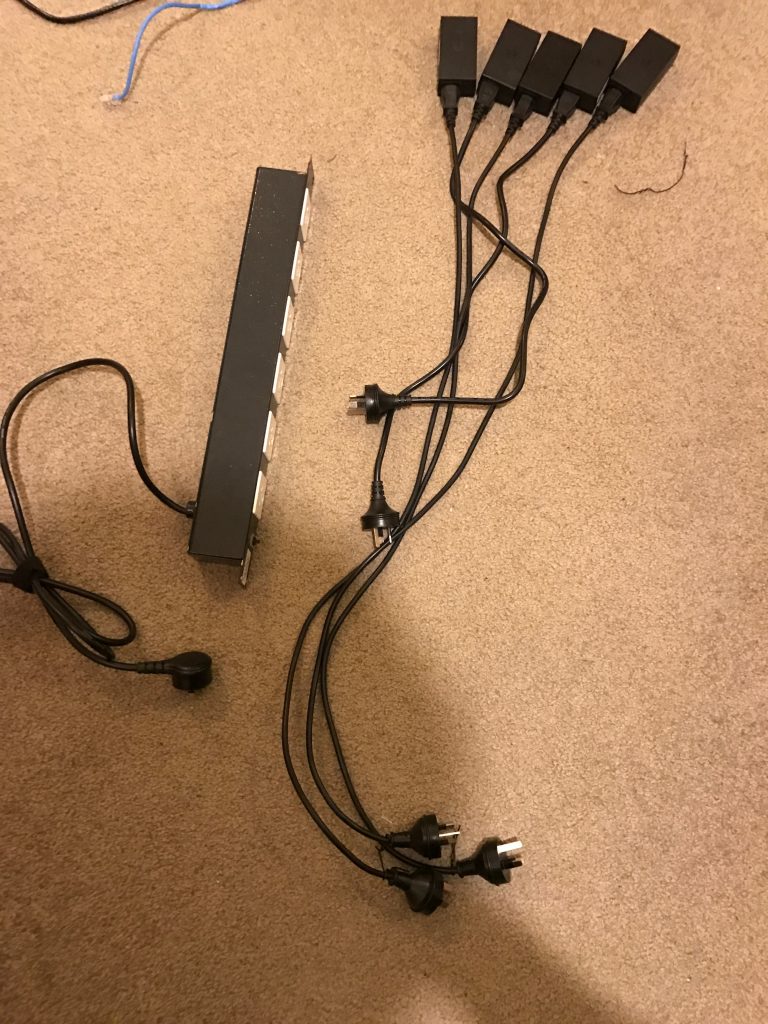
With the cabling done, I connected all the PoE adaptors. These are a bit of a PITA if you’re using a rack – you could get a small rackmount shelf with holes and cable tie down, but I went for cable tying them to the outside of the cabinet.

I also colour coded the output from the PoE adaptors. You need to be careful with passive PoE adaptors, you can potentially damage computers and network equipment if you connect them to the adaptor by mistake so I used the colour coding to make it very clear what cables are what.

Finished cabling installation. About as tidy as I can get it in here without moving to using custom length patch cables…. but crimping 30+ patch cables by hand isn’t my idea of a good time.


Having completed the cabling and putting together the networking gear and PoE adaptors, I could finally install the cameras themselves. This isn’t particularly hard, basically just need to be able to screw something to the side of the house and then aim the camera in the right position.

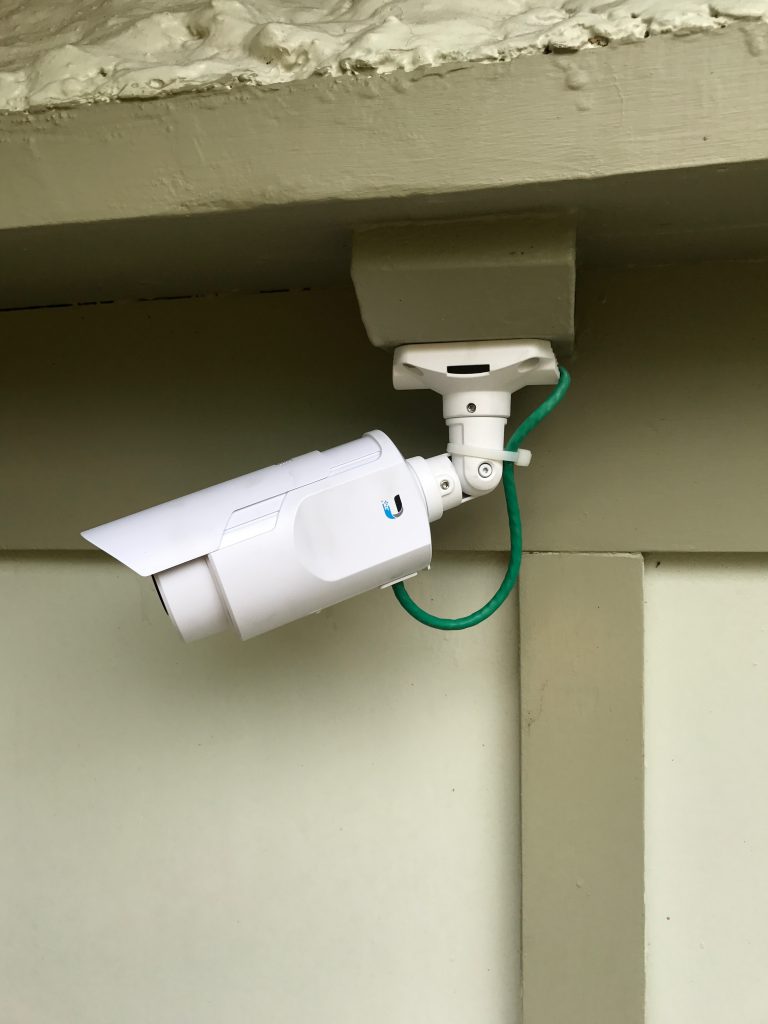
The older 720p model is the most annoying to install as it requires adjusting everything using an allen key, plus the cable must be exposed with a drip loop. It’s also more of an eyesore which is a mixed bag – you get better deterrence aspect, but it can look a bit ugly on the house.

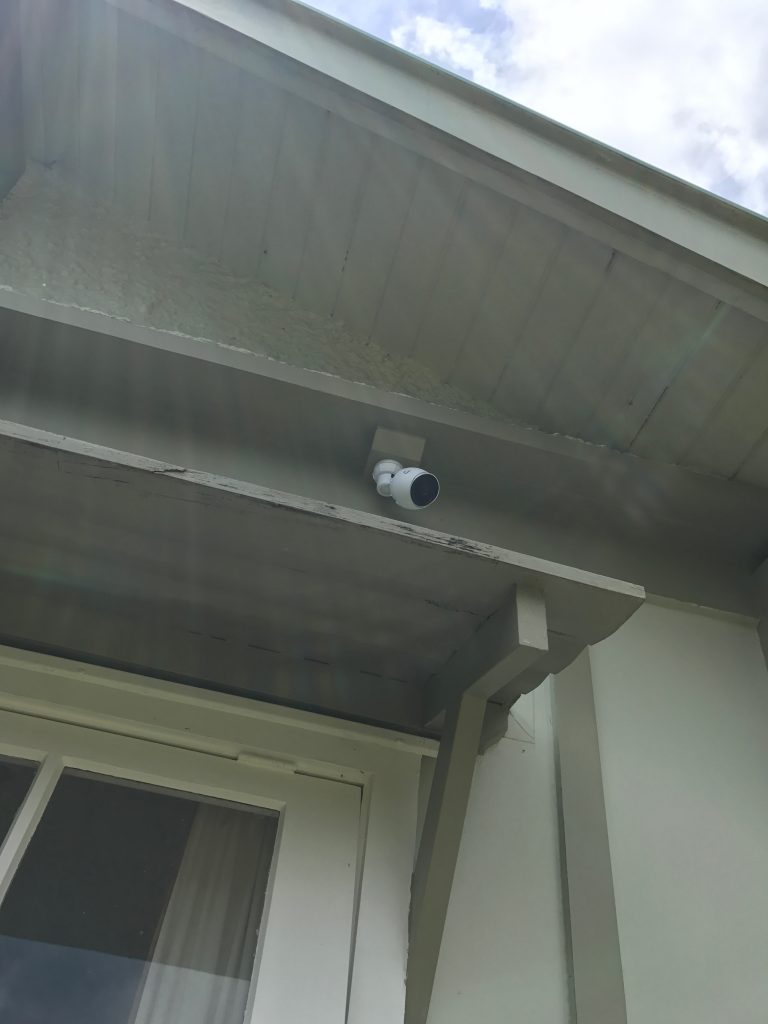
The newer model is more aesthetically pleasing, but it’s possible some people might not realise it’s a camera which could be a downside for deterrence.

That being said, they look OK when installed on the house – certainly no worse than the ugly alarm and sensor lights you get on many houses. I even ended up putting one inside to give me complete visibility of the hallway linking every room in the house and it’s not much more visible than a large alarm PIR sensor.

Some additional features worth noting:

  • All the cameras have built in IR, which means they provide decent footage, even at night time. The cameras switch an IR filter on/off automatically as required.
  • All the cameras have built in microphones. Whilst they capture a lot of background wind noise, they’re also quite good at picking up conversations even when outside – it’s a handy tool for gathering intel on any unwanted guests.


With all the hardware completed, onto the software. Ubiquiti supply their server software free-of-charge. It’s easy enough to download and install, but if you have Puppetised your home server (of course you have right?) I have a Puppet module here for you.


Generally I’ve found the software solution (including the iOS mobile app) to be pretty good, but there are two main issues to be aware of with it:

  1. First is that the motion detection is pretty dumb and works on percentage of image changed. This means windy areas with lots of greenery get lots of unwanted recordings made. It doesn’t causing technical issues, but it does make for a noisy set of recordings – don’t expect it to *only* record events of note, you’ll get all the burglars and axe murderers, but also every neighbourhood cat and the nearby trees on windy days. Oh and night time you get lots of footage of moths when they fly close to the camera with the IR night vision on.

  2. Second is that I found a software bug in the mobile apps where they did not validate SSL certs properly and got a very poor response from Ubiquiti. That being said one of their reps recently claimed they’ve hired more security staff to deal with their poor responsiveness, so let’s see what happens on this front.


One feature which is strangely absent, is the lack of support for automatically uploading recordings to a cloud storage service. It’s not possible for everyone, but if on a fast connection (eg VDSL, UFB) it’s worth uploading all recordings to something like Amazon S3 so that an attacker can’t subsequently break in and remove the recording hardware.

My approach was setting up lsyncd to listen to inotify events from Linux every time a video file is written to disk and then quickly copy that file up into Amazon S3 where it remains for a prolonged period.

If you can’t achieve this due to poor internet performance, your best bet is to put the video recording server in a difficult to find and/or access location, sufficient to prevent the casual intruder from finding it. If you have a proper monitored alarm system they shouldn’t be lingering long enough to find it.


Stability seems good. I’ve been running these cameras since April and have never had the server agent or the cameras crash or fail to record. I’m using a Mac Mini for the camera server but you can always buy an embedded black-box NVR solution from Ubiquiti themselves. If you’re on a budget, a second hand Mac Mini or Intel NUC might be better value for money – just make sure it’s 64bit, not an older gen 32bit device.


DNC NZ submission

The DNC has proposed a new policy for .nz WHOIS data which unfortunately does not in my view address the current issues with lack of privacy of the .nz namespace. The following is my submission on the matter.

Dear DNC,

I have strong concerns with the proposed policy changes to .nz WHOIS information and am writing to request you reconsider your stance on publication of WHOIS information.

#1: Refuting requirement of public information for IT and business related contact

My background is working in IT and I manage around 600 domains for a large NZ organisation. This would imply that WHOIS data would be useful, as per your public good statement, however I don’t find this to be correct.

My use cases tend to be one of the following:

1. A requirement to get a malicious (phishing, malware, etc) site taken down.

2. Contacting a domain owner to request a purchase of their domain.

3. A legal issue (eg copyright infringement, trademarks, defamation).

4. Determining if my employer actually owns the domain marketing is trying to use today. :-)

Of the above:

1. In this case, I would generally contact the service provider of the hosting anyway since the owners of such domains tend to be unreliable or unsure how to even fix the issue. Service providers tend to have a higher level of maturity of pulling such content quickly. The service provider details can be determined via IP-address lookup and finding the hosting provider from there, rather than relying on the technical contact information which often is just the same as the registrant and doesn’t reflect the actual company hosting the site. All the registrant information is not required to complete this requirement, although email is always good for a courtesy heads up.

2. Email is satisfactory for this. Address & phone is not required.

3. Given any legal issue is handled by a solicitor, a legal request could be filed with DNC to release the private ownership information in the event that the email address of the domain owner was non responsive.

4. Accurate owner name is more than enough.

#2: Internet Abuse

I publish a non-interesting and non-controversial personal blog. I don’t belong to any minorities ethnic groups. I’m born in NZ. I’m well off. I’m male. The point being that I don’t generally attract any kind of abuse or harassment that is sadly delivered to some members of the online community.

However even I end up receiving abuse relating to my online presence on occasion in the form of anonymous abusive emails. This doesn’t phase me personally, but if I was in one of the many online minorities that can (and still do) suffer real-word physical abuses, I might not be so blasé knowing that it doesn’t take much to suddenly turn up at my home and throw abuse in person.

It’s also extremely easy for an online debate to result in a real world incident. It isn’t hard to trace a person’s social media comments to their blog/website and from there, their real world address. Nobody likes angry morons abusing them at 2am outside their house with a tire iron about their Twitter post.

#3. Cold-blooded targeting

I’ve discussed my needs as an IT professional for WHOIS data, the issue of internet abuse. Finally I wish to point out the issue of exposing one’s address publicly when we consider what a smart, malicious player can do with the information.

* With a target’s date of birth (thanks Facebook!) and their address (thanks DNC policy!) you’re in the position to fake someone’s identity for a number of NZ organisations including insurance and medical whom use these two (weak) forms of validation.

* Tweet a picture of your coffee at Mojo this morning? Excellent, your house is probably unoccupied for 8 hours, I need a new TV.

* Posting blogs about your amazing international trip? Should be a couple good weeks to take advantage of this – need a couch to go with that TV.

* Mentioned you have a young daughter? Time to wait for them at your address after school events and intercept there. Its not hard to be “Uncle Bob from the UK to take you for candy” when you have address, names, habits thanks to the combined forces of real world location and social media disclosure.

Not exposing information that doesn’t need to be public is a text-book infosec best practise to prevent social engineering type attacks. We (try to be) cautious around what we tell outsiders because lots of small bits of information becomes very powerful very quickly. Yet we’re happy for people to slap their real world home address on the internet for anyone to take advantage of because no harm could come of this?

To sum up, I request the DNC please reconsider this proposed policy and:

1. Restrict the publication of physical address and phone numbers for all private nz domains. This information has little real use and offer avenues for very disturbing and intrusive abuse and targeting. At least email abuse can be deleted from the comfort of your couch.

2. Retain the requirement for a name and contact email address to be public.However permit the publicly displayed named to be a pseudonym to preserve privacy for users whom consider themselves at risk, with the owner’s real/legal name to be held by DNC for legal contact situations.

I have no concerns if DNC was to keep business-owned domain information public. Ltd companies director contact details are already publicly available via the companies registry, and most business-owned domains simply list their place of business and their reception phone number which doesn’t expose any particular person. My concern is the lack of privacy for New Zealanders rather than businesses.

Thank you for reading. I am happy for this submission to be public.

regards.

Jethro

Ubiquiti UniFi video lack of SSL/TLS validation

Posting this here since I’ve filed a disclosure with Ubiquiti on Feb 28th 2016 and had no acknowledgment other than to be patient. But two months of not even looking at what is quite a serious issue isn’t acceptable to me.

I do really like the Unifi Video product (hardware + software) so it’s a shame it’s let down by poor transport security and slow addressing of security issues by the vendor. I intend to write up a proper review soon, but it was more important to get this report out first.

My mitigation recommendation is that you only communicate with your Unifi Video systems via secure encrypted VPN, eg IKEv2 or OpenVPN until such time that Ubiquiti takes this seriously and patch their shit.


28th Feb 2016 – Disclosure of issue via HackerOne (#119121).

There is a SSL/TLS certificate validation flaw on the Unifi Video application for Android and iOS where it accepts any self-signed certificate served by the Unifi Video server silently allowing a malicious third party to intercept data.

Versions of software used;

  • Unifi Video 3.1.2 (server)
  • Android app 1.1.3 (Build 153)
  • iOS app 1.1.7 (Build 1.1.48)

Impact
Any man-in-the-middle attacker could intercept customers using Unifi Video from mobile devices by replacing the secure connection with their own self-signed certificate, capturing login password, all video content and being able to use this in future to view any cameras at their leisure.

Steps to reproduce:

  1. Perform clean installation of Unifi Video server.
  2. Connect to the web interface via browser. Self-signed cert, so have to accept cert.
  3. Connect to NVR via the Android app. No cert acceptance needed.
  4. Connect to NVR via the iOS app. No cert acceptance needed.
  5. Erase the previously generated keystore on server with: echo -n “” > /usr/lib/unifi-video/data/keystore
  6. Restart server with: /etc/init.d/unifi-video restart
  7. We now have the server running with a new cert. You can validate that, by refreshing the browser session and it will require re-acceptance of the new self-signed certificate and can see new generation time & fingerprint of new cert.
  8. Launch the Android app. Reconnect to the previously connected NVR. No warning/validation/acceptance of the new self-signed cert is requested.
  9. Launch the Android app. Reconnect to the previously connected NVR. No warning/validation/acceptance of the new self-signed cert is requested.
  10. Go get some gin and cry :-(

Comments
Whilst I can understand an engineer may have decided to develop the mobile apps to always accept a cert the first time it sees it to simplify setup for customers whom will predominately have a self-signed cert on Unifi Video server, it must not accept subsequent certificate changes without warning to the user. Failing to do so, allows a MITM attack on any insecure networks.

I’d recommend a revised workflow such as:

  1. User connects to a new NVR for the first time. Certificate is accepted silently (or better, shows the fingerprint, aka SSH style).
  2. Mobile app stores the cert fingerprint against the NVR it connected to.
  3. Cert gets changed – whether intentionally by user, or unintentionally by attacker.
  4. Mobile apps warn that the NVR’s cert fingerprint has changed and that this could be dangerous/malicious. User has option of selecting whether they trust this new certificate or whether they do not wish to connect. This is the approach that web browsers take with changed self-signed certificates.

This would prevent silent MITM attacks, whilst will allowing a cert to be updated/changed intentionally.


Communication with Ubiquiti:

12th March 2016 Jethro Carr

hi Ubiquiti,

Can I please get an update – do you confirm there is an issue and have a timeframe for resolution?

regards,
Jethro

15th March 2016 Ubiquiti Response

Thank you for submitting this issue to us, and we apologize for the delay. Since launching with HackerOne we have seen many issues submitted, and we are currently working on reducing our backlog. We appreciate your patience and we’ll be sure to update you as soon as we have more information.

Thanks and good luck in your future bug hunting.

24th April 2016 Jethro Carr

hi Ubiquiti,

I’ll be disclosing publicly on 29th of April due to no action on this report after two months.

regards,
Jethro

26th April 2016 Ubiquiti Response

Thank you for submitting this issue to us, and we apologize for the delay.

We’re still reviewing this issue and we appreciate your patience. We’ll be sure to update you as soon as we have more information.

Thanks and good luck in your future bug hunting.


Secure Hiera data with Masterless Puppet

One of the biggest limitations with masterless Puppet is keeping Hiera data secure. Hiera is a great way for separating site-specific information (like credentials) from your Puppet modules without making a huge mess of your sites.pp. On a traditional Puppet master environment, this works well since the Puppet master controls access to the Hiera data and ensures that client servers only have access to credentials that apply to them.

With masterless puppet this becomes difficult since all clients have access to the full set of Hiera data, which means your webserver might have the ability to query the database server’s admin password – certainly not ideal.

Some solutions like Hiera-eyaml can still be used, but they require setting up different keys for each server (or group of servers) which is a pain with masterless, especially when you have one value you wish to encrypted for several different servers.

To solve this limitation for Pupistry users, I’ve added a feature “HieraCrypt” in Pupistry version 1.3.0 that allows the hieradata directory to be encrypted and filtered to specific hosts.

HieraCrypt works, by generating a cert on each node (server) you use with the pupistry hieracrypt --generate parameter and saving the output into your puppetcode repository at hieracrypt/nodes/HOSTNAME. This output includes a x509 cert made against the host’s SSH RSA host key and a JSON array of all the facter facts on that host that correlate to values inside the hiera.yaml file.

When you run Pupistry on your build workstation, it parses the hiera.yaml file for each environment and generates a match of files per-node. It then encrypts these files and creates an encrypted package for each node that only they can decrypt.

For example, if your hiera.yaml file looks like:

:hierarchy:
  - "environments/%{::environment}"
  - "nodes/%{::hostname}"
  - common

And your hieradata directory looks like:

hieradata/
hieradata/common.yaml
hieradata/environments
hieradata/nodes
hieradata/nodes/testhost.yaml
hieradata/nodes/foobox.yaml

When Pupistry builds the artifact, it will include the common.yaml file for all nodes, however the testhost.yaml file will only be included for node “testhost” and of course foobox.yaml will only be available on node “foobox”.

The selection of matching files is then encrypted against each host’s certificate and bundled into the artifact. The end result is that whilst all nodes have access to the same artifact, nodes can only decrypt the Hiera files relating to them. Provided you setup your Hiera structure properly, you can make sure your webserver can’t access your database server credentials and vice-versa.


HowAlarming

The previous owners of our house had left us with a reasonably comprehensive alarm system wired throughout the house, however like many alarm systems currently in homes, it required an analogue phone line to be able to call back to any kind of monitoring service.

To upgrade the alarm to an IP module via the monitoring company would be at least $500 in parts and seemed to consist of hooking the phone line to essentially a VoIP ATA adaptor which can phone home to their service.

As a home owner I want it internet connected so I can do self-monitoring, give me the ability to control remotely and to integrate it with IP-based camera systems. Most of the conventional alarm companies seem to offer none of things, or only very expensive sub-standard solutions.

To make things worse, their monitoring services are also pretty poor. Most of the companies I spoke to would receive an alarm, then call me to tell me about it/check with me and only then send someone out to investigate. The existing alarm company the previous owner was using didn’t even offer a callout security service!

Spark (NZ incumbent telco) recently brought out a consumer product called Morepork (as seen on stuff!) which looks attractive for your average non-techie consumer, but I’m not particularly keen to tie myself to Spark’s platform and it is very expensive, especially when considering I have to discard an existing functional system and start from scratch. There’s also some design weaknesses like the cameras being mains dependent, which I don’t consider acceptable given how easy it is to cut power to a house.

So I decided that I’d like to get my existing alarm IP connected, but importantly, I wanted to retain complete control over the process of generating an alert and delivering it to my phone so that it’s as fast as possible and also, as reliable as possible.

Not only did I want to avoid the human factor, but I’m also wary of the proprietary technologies used by most of the alarm companies off-the-shelf solutions. I have some strong doubts about the security of a number of offers, not to mention life span (oh sorry that alarm is EOL, no new mobile app for you) and the level of customisation/integration offered (oh you want to link your alarm with your camera motion detection? Sorry, we don’t support that).


I did some research on my alarm system and found it’s one of the DSC PowerSeries range which is a large Canadian company operating globally. The good thing about them being a large global player is that there’s a heap of reference material about their products online.

With a quick search I was able to find user guides, installer guides, programming guides and more. They also include a full wiring diagram inside the alarm control centre which is exceptionally useful, since it essentially explains how you can connect any kind of sensors yourself which can save a whole heap of money compared to paying for an alarm company to do the installation.
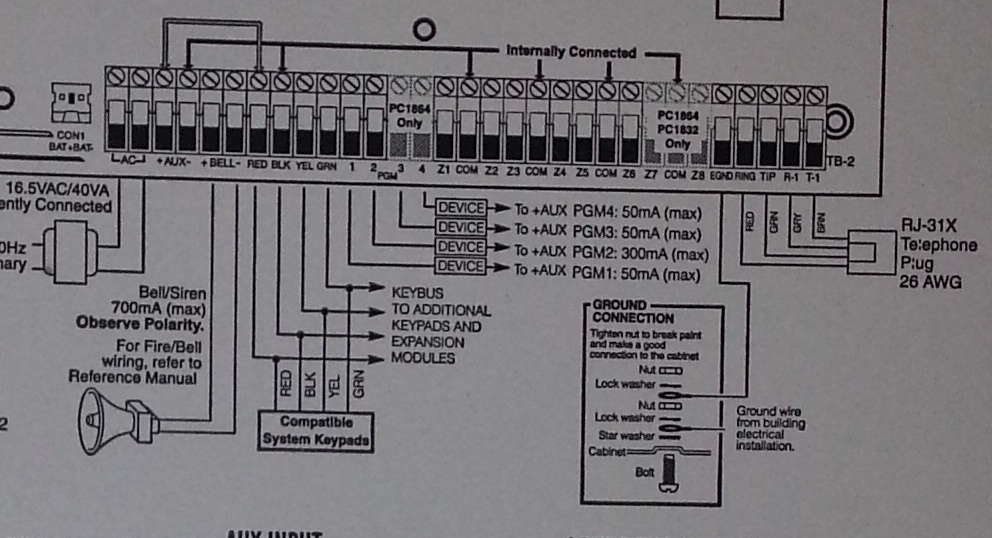
Spagettie

I wish all my electronic devices came with documentation this detailed.

The other great thing about this alarm is that since DSC is so massive, there’s an ecosystem of third party vendors offering components for it. Searching for third party IP modules, I ran into this article where the author purchased an IP module from a company known as Envisalink and used it’s third party API to write custom code to get alarm events and issue commands.

A third party API sounded perfect, so I purchased the EnvisaLink EVL-4 for $239 NZD delivered and did the installation myself. In theory the installation is easy, just a case of powering down the alarm (not touching any 240V hard wired mains in the process) and connecting it via the 4 wire keypad bus.

In my case it ended up being a bit more complex since the previous owner had helpfully never given me any of the master/installer alarm codes, so I ended up doing a factory reset of the unit and re-programming it from scratch (which means all the sensors, etc) which takes about a day to figure out and do the first time. The plus side is that this gave me complete control over the unit and I was able to do things like deprogram the old alarm company’s phone number to stop repeat failed callout attempts.

Once connected, the EnvisaLink unit was remarkably hassle free to setup – it grabbed a DHCP lease, connected to the internet and phoned home to the vendor’s free monitoring service.
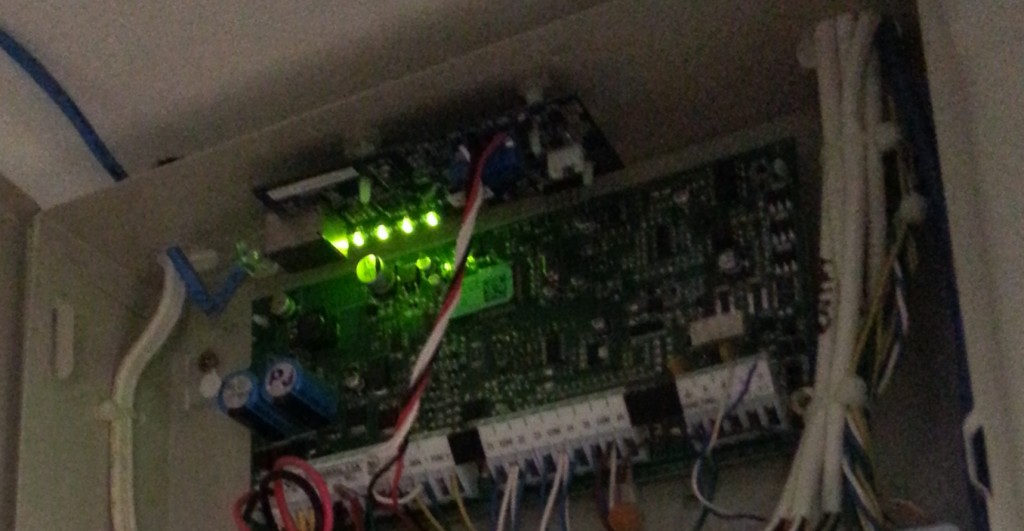
Installed with pretty LEDs!

EnvisaLink unit installed at the top above the alarm control circuit. A++ for LED ricing guys!


The EnvisaLink hardware is a great little unit and the third party programmer’s interface is reasonably well documented and works without too much grief. Unfortunately the rest of the experience of the company selling it isn’t particularly good. Specifically:

  • Their website places the order by emailing their accounts mailbox. How do I know? Because they printed the email including my credit card number in full and sent it as the packing slip on it’s journey across the world. Great PCI compliance guys!
  • They show the product as working with Android, iPhone and Blackberry. They carefully avoid saying it has native apps, they actually mean it has a “smart phone” optimized version, which is as terrible as it sounds.
  • I can’t enable alerts on their service since their signup process keeps sending my email a blank validation code. So I had an alarm that couldn’t alarm me via their service.
  • No 2FA on logging into the alarm website, so you could brute force login and then disable the alarm remotely… or set it off if you just want to annoy the occupants.

I haven’t dug into the communications between the unit and it’s vendor, I sure hope it’s SSL/TLS secured and doesn’t have the ability to remotely exploit it and upgrade it, but I’m not going to chance it. Even if they’ve properly encrypted and secured comms between the unit and their servers, the security is limited to the best practices of the company and software which already look disturbingly weak.

Thankfully my requirements for the module is purely it’s third party API so I can integrate with my own systems, so I can ignore all these issues and put it on it’s own little isolated VLAN where it can’t cause any trouble and talk to anything but my server.


So having sorted out the hardware and gotten the alarm onto the network, I now needed some software that would at least meet the basic alerting requirements I have.

There’s an existing comprehensive Java/Android-based product (plainly labeled as “DSC Security Server”) which looks very configurable, but I specifically wanted something open source to make sure the alarm integration remained maintainable long term and to use Google Push Notifications  for instant alerting on both Android (which supports long running background processes) and iOS (which does not – hence you must use push notifications via APNS).

I ended up taking advantage of some existing public code for handling the various commands and error responses from the Envisalink/DSC alarm combination but reworked it a bit so I now have a module system that consists of “alarm integrators” exchanging information/events with the alarm system and “alarm consumers” which decide what to do with the events generated. These all communicate via a simple beanstalk queue.

This design gives ultimate simplicity – each program is not much more than a small script and there’s a standard documented format for anyone whom wants to add support for other alarm integrators or alarm consumers in future. I wanted it kept simple, making it the sort of thing you could dump onto a Raspberry Pi and have anyone with basic scripting skills be able to debug and adjust it.

I’ve assembled these programs into an open source package I’m calling “HowAlarming”“, hopefully it might be useful for anyone in future with the same alarm system or wanting a foundation for building their own software for other alarms (or even their own alarms).


The simplest solution to get alerts from the system would be by sending SMS using one of the many different web-based SMS services, but I wanted something I can extend to support receiving images from the surveillance system in future and maybe also sending commands back.

Hence I’ve written a companion Android app which receives messages from HowAlarming via push notifications and maintains an event log and the current state of the alarm.
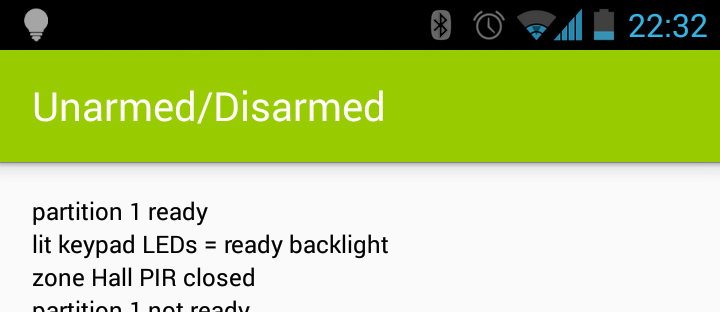
UX doens't get much better than this.

UX doens’t get much better than this.

It’s pretty basic, but it offers the MVP that I require. Took about a day to hack together not having done any Android or Java before, thankfully Android Studio makes the process pretty easy with lots of hand holding and easy integration with the simulators and native devices.

TBD if I can hack something together in a day not having done any native app development before that’s better than many of the offerings from the alarm companies currently around, they need to be asking themselves some hard questions. At the very least, they should get someone to write some apps that can pull their customer’s alarm state from their current phone-home infrastructure – there’s probably good money to be made giving existing customers on non-IP era alarms upgrades given the number of installations out there.


So far my solution is working well for me. It’s not without it’s potential problems, for example alarm communications are now at the mercy of a power/internet outage whereas previously as long as the phone line was intact, it could call out. However this is easily fixed with my UPS and 3G failover modem – the 3G actually makes it better than previously.


The other potential issue is that I don’t know what insurance would classify this nature of self-monitoring as. I have mine declared as “un-monitored” to avoid any complications, but if your insurance conditions require monitoring I’m unsure if a home-grown solution would meet those requirements (even if it is better than 90% of the alarm companies). So do your research and check your contracts & terms.
Easy Lockscreen MacOS

Whilst MacOS is a pretty polished experience, there’s some really simple things that are stupidly hard sometimes such as getting the keybindings to work right for real keyboards or in this case, getting the screen to be lockable without sleeping the computer.

No matter what configuration I set in power management, the only MacOS keyboard combination that does anything for me (Command + Option + Eject/Power/F12) will not only put up the lock screen, but also immediately sleeps the computer, much to the dismay of any background network connections or audio.

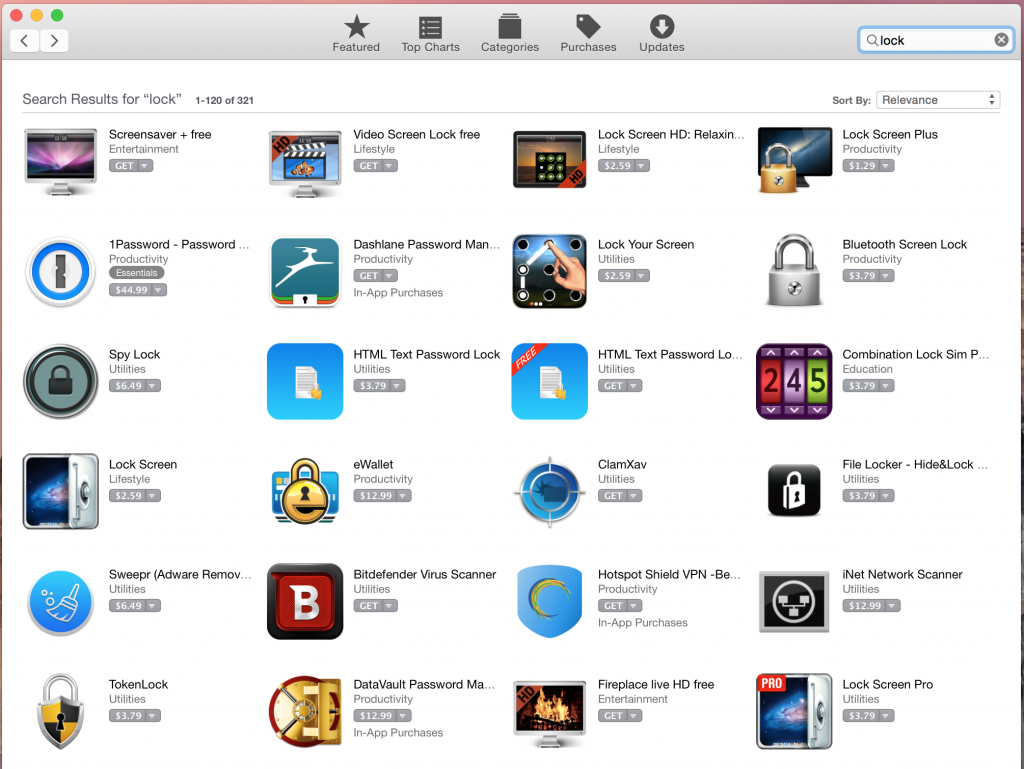
One of the issues with MacOS is that for any issue there are several dubious software vendors offering you an app that “fixes” the issue with quality ranging from some excellent utilities all the way to outright dodgy Android/Windows-style crapware addons.

None of these look particularly good. Who the hell wants Android-style swipe unlock on a Mac??

None of these look particularly good. Who the hell wants Android-style swipe unlock on a Mac??

Naturally I’m not keen for some crappy third party app to do something as key as locking my workstation so went looking for the underlying way the screen gets locked. From my trawling I found that the following command executed as a normal user will trigger a sleep of the display, but not the whole machine:

pmset displaysleepnow

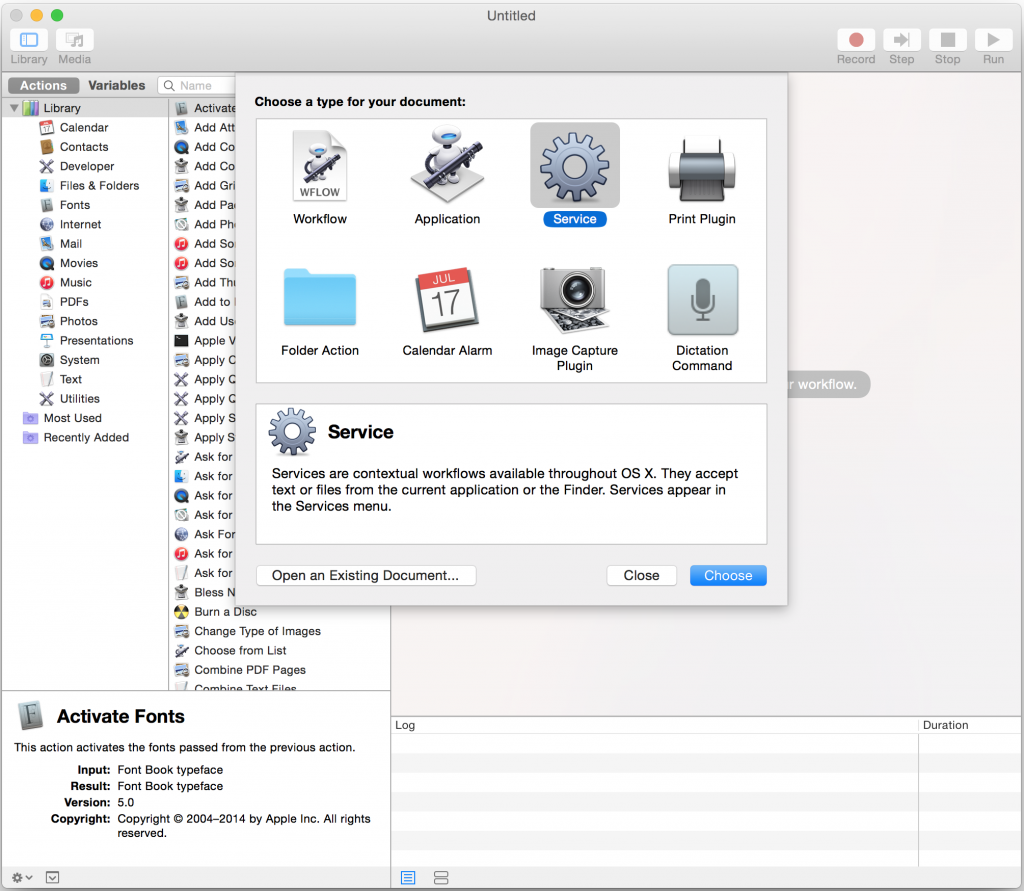
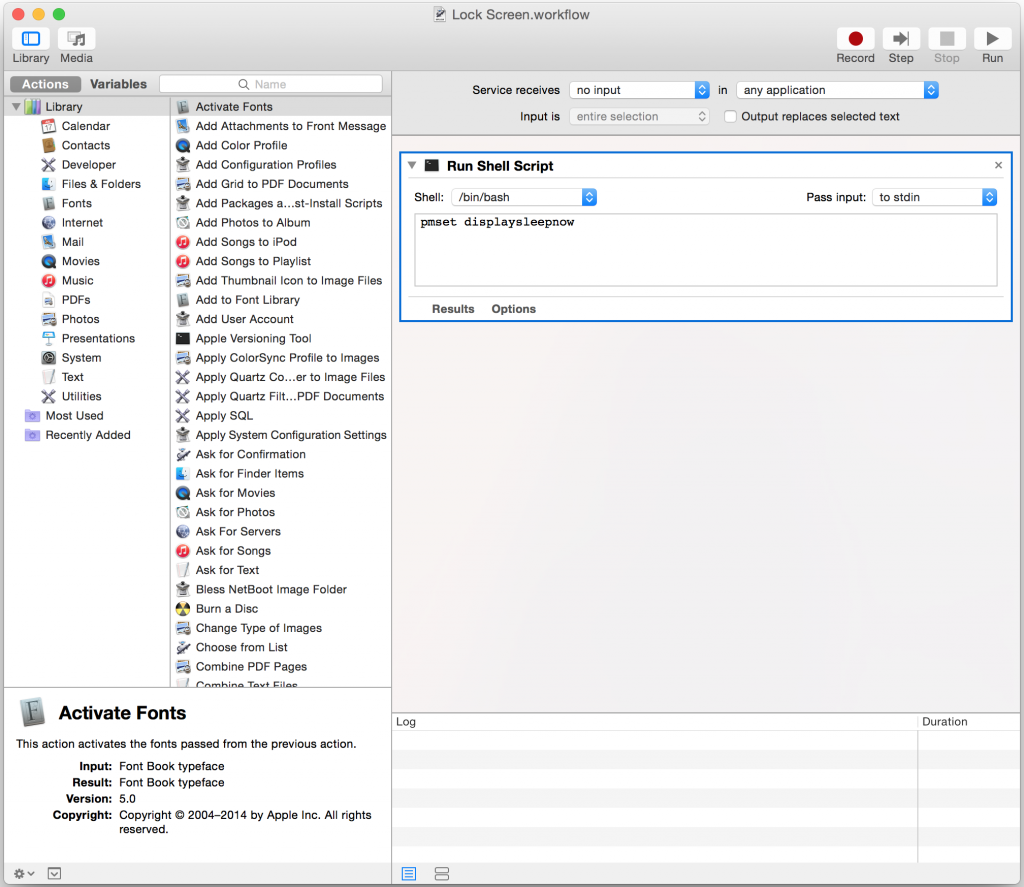
Turns out getting MacOS to execute some line of shell is disturbingly easy by using the Automator tool (Available in Applications -> Utilities) and creating a new Service.

Screen Shot 2015-05-26 at 23.47.59

Then add the Run Shell Script action from the Library of actions like below:

Screen Shot 2015-05-26 at 23.47.00

Save it with a logical name like “Lock Screen”. It gets saved into ~/Library/Services/ so in theory should be possible to easily copy it to other machines.

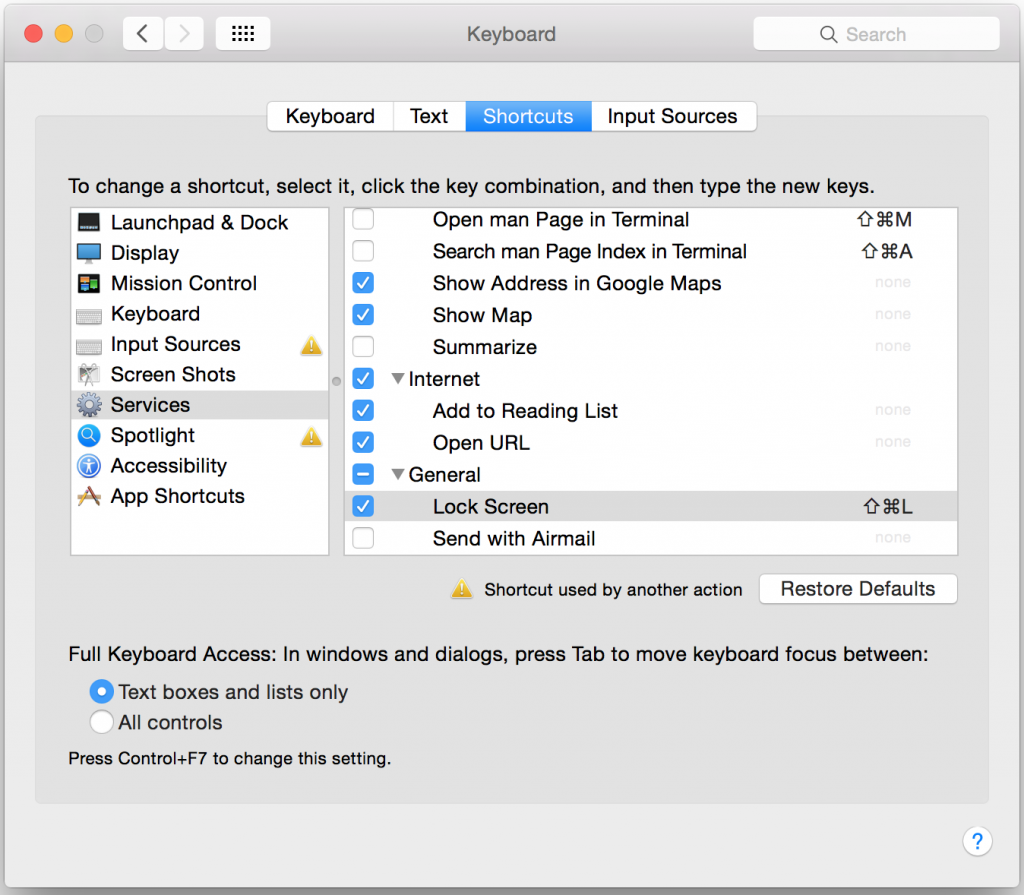
Once saved, your new service will become available to you in System Preferences -> Keyboard -> Shortcuts and will offer you the ability to set a keyboard shortcut.

Screen Shot 2015-05-26 at 23.50.37

And magic, it works. Command + Shift + L is a lot easier in my books than hot corners or clicking stupid menu items. Sadly you don’t have full flexibility of any key, but you should be able to get something that works for you.


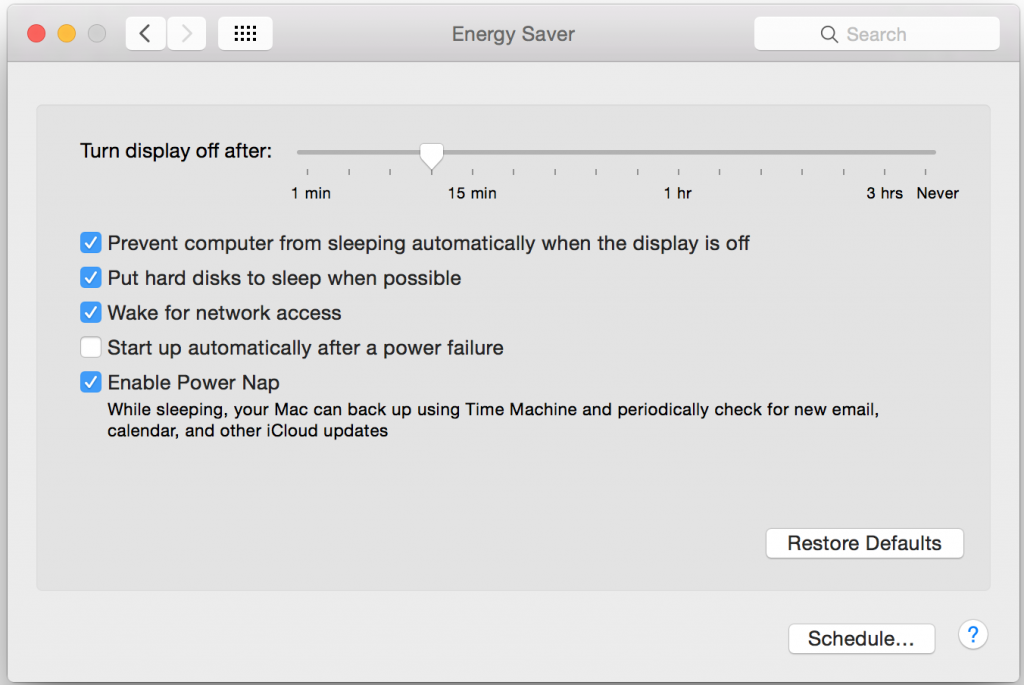
For reference, here are my other settings windows. First the power management (Energy Saver) settings. I select “Prevent computer from sleeping automatically” to avoid any surprises when sleeping.

Screen Shot 2015-05-27 at 00.14.29

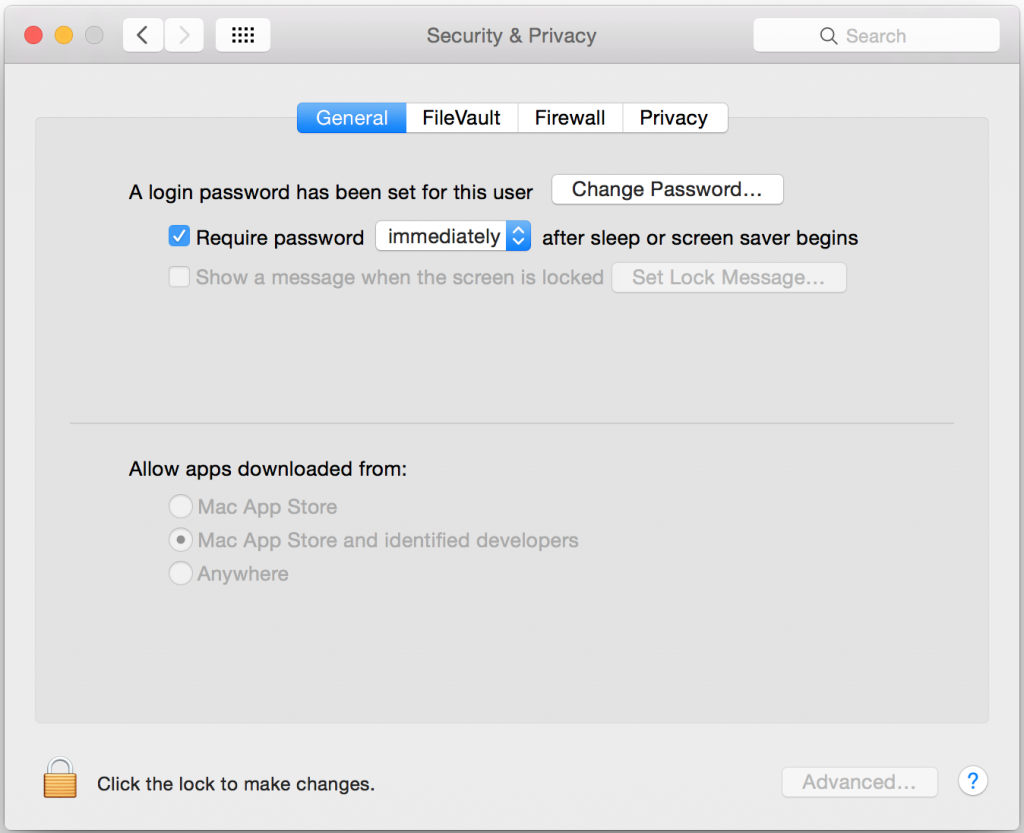
And secondly, your Security & Privacy settings should require a password after sleep/screen saver:

Screen Shot 2015-05-27 at 00.12.07


Tested on MacOS 10.10 Yosemite with pretty much a stock OS installation on an iMac 5k – I wouldn’t expect any variation by hardware, but YMMV (Your Mileage May Vary).

Encrypting disk on Android 4

Traditional computer operating systems have been around for a while, long enough that concerns around physical security have been well addressed. We understand the value and power that the information on our computers can provide to an attacker, so we have locked them down with features such as disk encryption, passphrase protected lock screens and techniques to prevent unwanted DMA attacks via high speed buses.

Yet despite the massive development of mobile devices technology in the past several years, a number of these features didn’t manage to make their way into the mobile operating systems as defaults. Whilst we take the time to setup disk encryption on our laptops and maybe desktops, we tend not to bother securing our mobile devices, possibly due to the perception of them being less risky to have exposed, or that they are less attractive targets.

Even a relatively paranoid IT geek like myself with an encrypted laptop, secure passphrases, and VPNs, still had a mobile phone that was protected with nothing more than it’s physical proximity to myself. Anyone gaining physical access to my phone could unlock it, whether it be by guessing a trivial unlock pattern, or by attaching it to another computer and reading the unencrypted filesystem.

And as these mobile devices have increased in functionality, so has the risk of an attacker getting hold of the device. When a mobile phone did nothing but phone calls and txts, having someone gain access would be more of a annoyance when they rack up a bill or prank call your contacts, than a serious risk.

But rather than leave it there, we started adding other productivity features – email, so we could keep in touch on the go. Instant messaging. Fully featured web browers that sync account details, bookmarks and history with your desktop. Banking applications. Access to shared storage solutions like Dropbox. Suddenly a mobile device is a much more attractive target.

And even if we decide that the mobile apps are too limited in scope, there’s  the risk of an attacker using the information such as credentials stored on the device to gain full access to the desktop version of these services. Having an email application that limits the phone to the inbox can reduce risk by protecting your archives, but not if the attacker can obtain your full username/passphrase from the device and then use it to gain full access with some alternative software.

Remember that obtaining credentials from a device isn’t hard – the credentials  have to be kept in some decrypted format somewhere on disk, so even if they’re hashed/obfuscated in some form, they’ll still have the key that enables them to be exposed somewhere on disk.

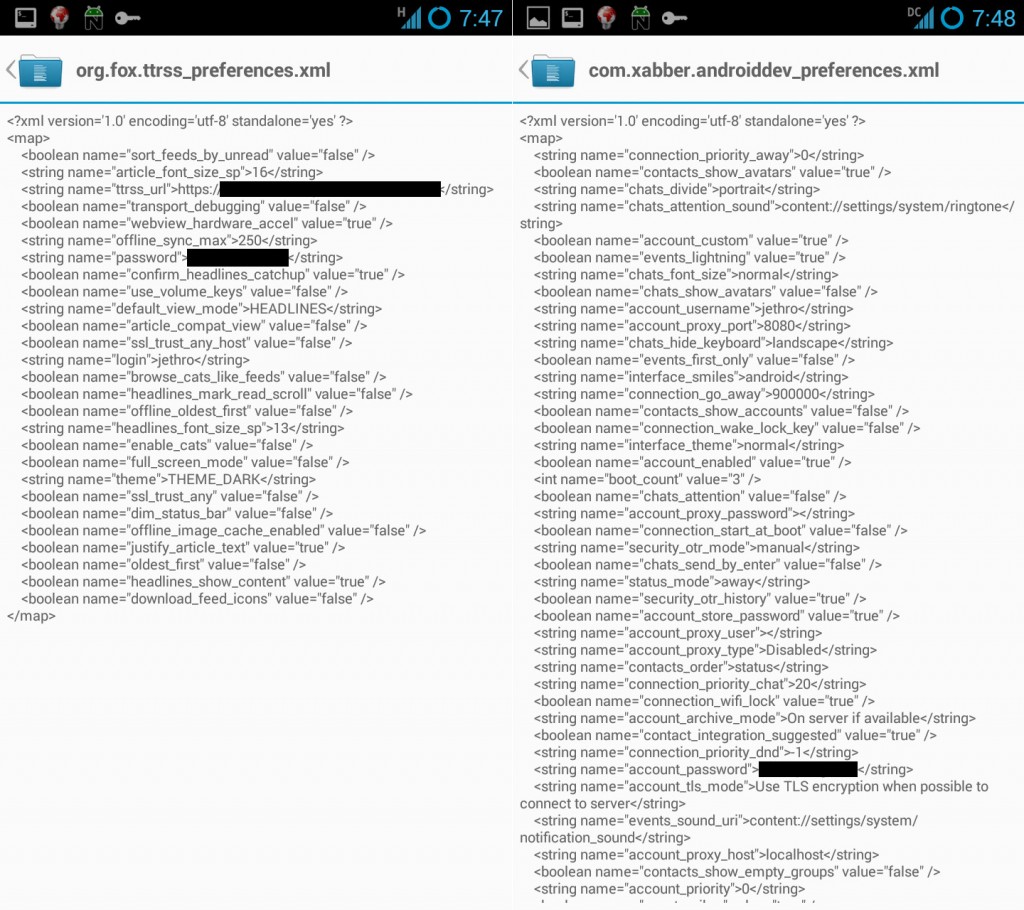
A quick grep through the /data/ volume on my phone revealed numerous applications that had my passphrases in plain text, extremely easy pickings for an attacker.

Mmmm plain text passwords. :-)

Mmmm plain text passwords. :-)

I was getting increasingly concerned with this hole in my security, so recently having replaced my Galaxy Nexus with a Samsung Galaxy Note II, I decided to set it up in a more secure fashion.

Android added disk encryption in Android 3, but it’s suffered two main issues that limits it’s usefulness:

  1. The disk encryption only covers the data volumes (/data, /sdcard) which is good in that it protects the data, but it still leaves the application volumes open to be exploited by anyone wanting to install malware such as key loggers.
  2. Turning on Android disk encryption then forces the user to use either a PIN or a passphrase to unlock their device as swipe or pattern unlock is disabled. For a frequent phone user this is too much of an usability issue, it makes frequent locks/unlocks much more difficult, so users may chose not to use encryption altogether, or choose a very easy/weak passphrase.

The first point I can’t do much about without digging into the low guts of Android, however the second is fixable. My personal acceptable trade-off is a weaker lock screen using a pattern, but being able to have a secure disk encryption passphrase. This ensures that if powered off, an attacker can’t exploit my data and the passphrase is long and secure, but if the phone is running, I take a compromise of security for convenience and ease of use.

There’s still the risk of an attacker installing malware on the non-encrypted OS portion of the mobile device, however if I lose physical access of my phone in an untrusted environment (eg border security confiscation) I can reload the OS from backup.

To setup disk encryption on Android 4 without losing pattern unlock, instead of adjusting via the settings interface, you need to enable it via the shell -easiest way is via the ADB shell in root mode.

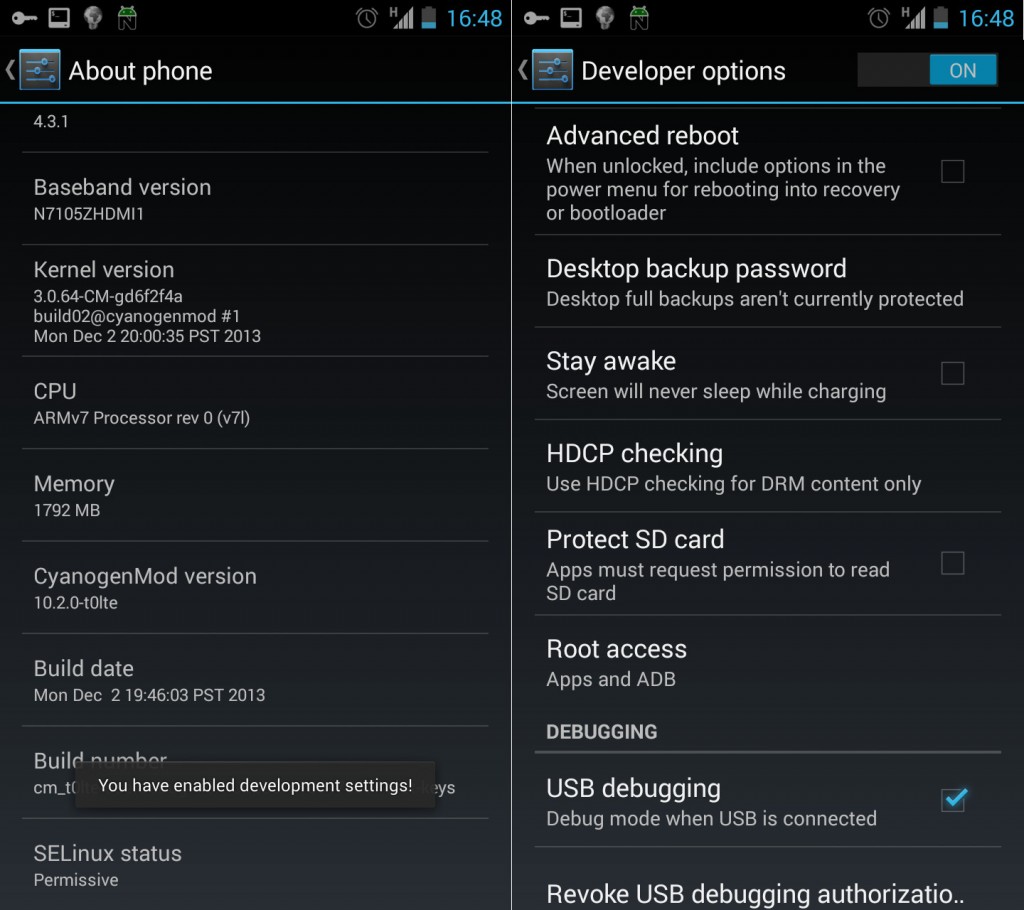
Firstly you need to enable developer mode in Settings -> About Phone by tapping the build number multiple times, until it tells you that the developer mode has been unlocked. Then inside Settings -> Developer options, change the “Root Access” option to “Apps and ADB”.

Enable ADB root for all the fun stuff!

Enable ADB root for all the fun stuff!

Secondly, you need a workstation running the latest version of ADB (ships with the Android ADK under platform-tools) and to connect your phone via USB. Once done, you can enable disk encryption with the following commands (where PASSWORD is the desired encryption passphrase).

user@laptop # adb root
user@laptop # adb shell
root@phone:/ #
root@phone:/ # /system/bin/vdc cryptfs enablecrypto inplace PASSWORD

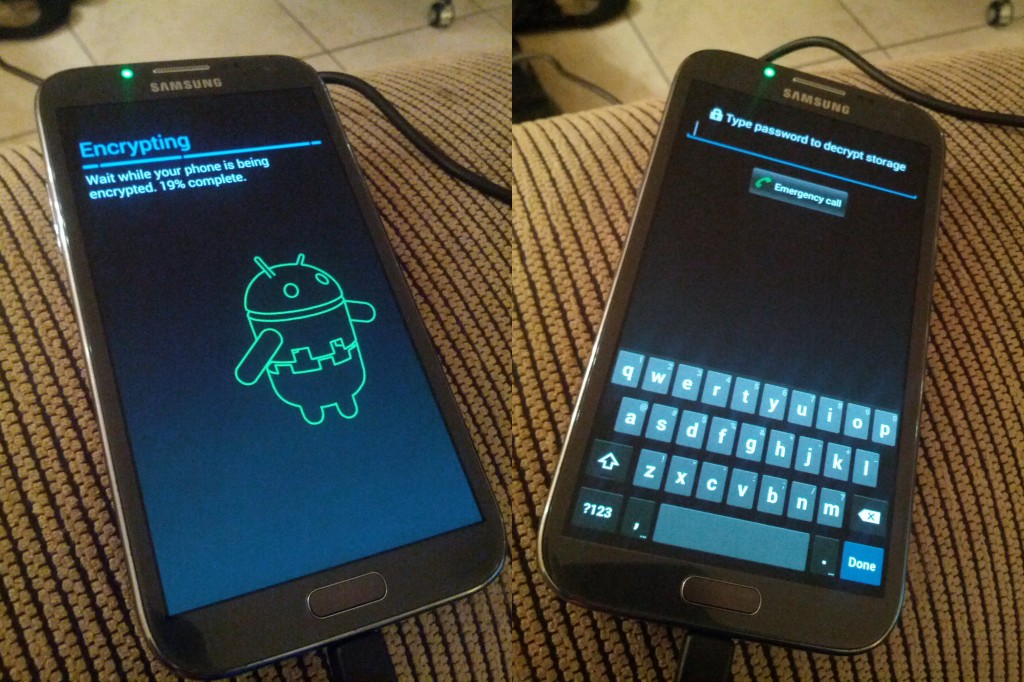
Your Android device will then restart and encrypt itself. This process takes time, factor up to an hour for it to complete it’s work.

Android phone undergoing encryption; and subsequent boot with encryption enabled.

Android phone undergoing encryption; and subsequent boot with encryption enabled.

Once rebooted, your existing pattern based unlock continues to work fine and all your private data and credentials are now secured.